Let’s Refab the Steamer Trunk!
This post may contain Amazon affiliate links
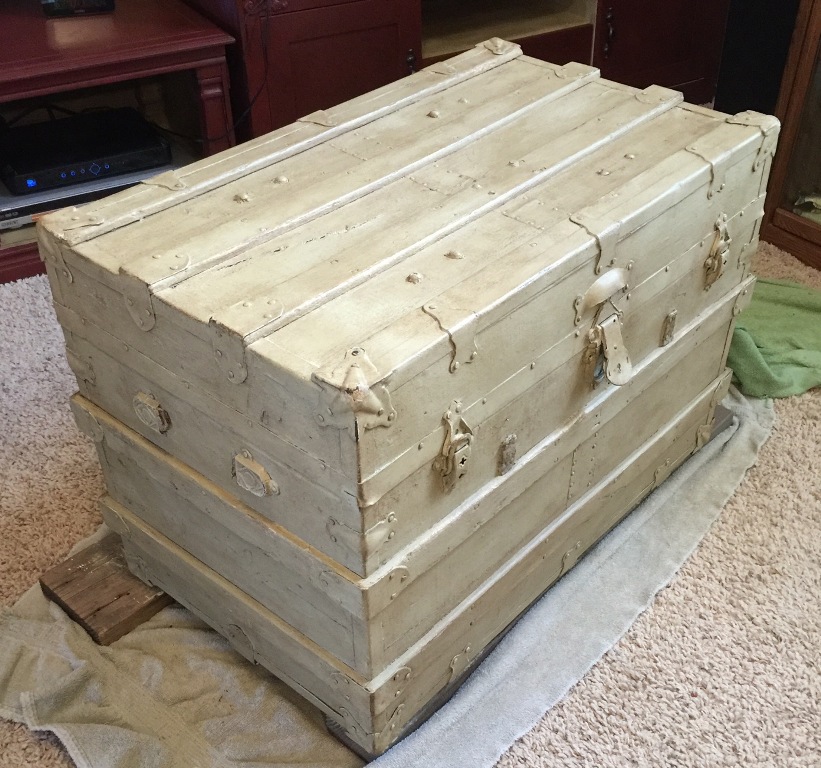
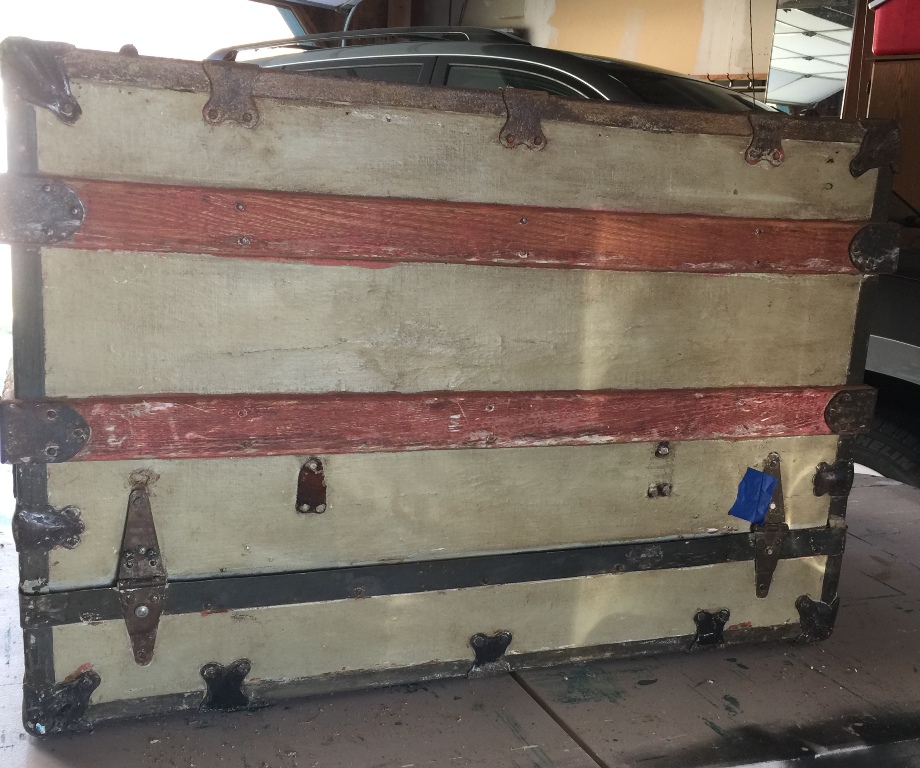
I have always loved steamer trunks and have owned a few over the years. Several years ago, we found one at a garage sale for $20! We have been using it as a coffee table since it’s just the right height and size. To create a flat surface, I bought a sheet of 1/4″ tempered glass to use on the top of the wood slats. When I bought the trunk, it had been painted white and had a distressed look. I liked that look and it went well with my décor. That was, until I updated the look of the living room. I decided to change the paint color of the two wall units and bench from white to a deep burgundy color & accent them with a light olive green. I used Anne Sloan’s chalk paint in Emperors Silk & Versailles and then used her dark wax to antique them. Well, now the trunk didn’t match so I decided to paint it also using the Versailles. You can see the transformation of the wall units here.

While I loved the Versailles on the wall units, I didn’t so much love it on the trunk. It was ok, just not fabulous. A few months ago, I decided I was ready to change it.
After thinking about what I could do to updte the trunk short of repainting it again, I thought it would be cool to just strip the paint from the wood slats and the metal. That would be fast & easy** and give it a whole new look! **My initial thought when it comes to starting a new project**
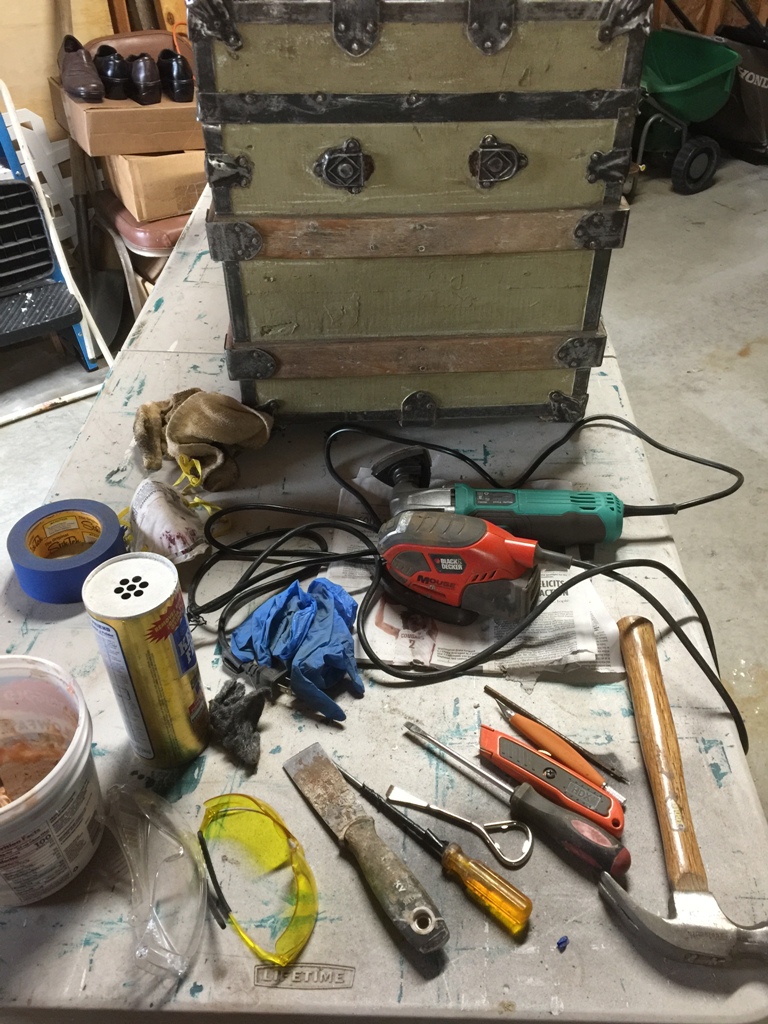
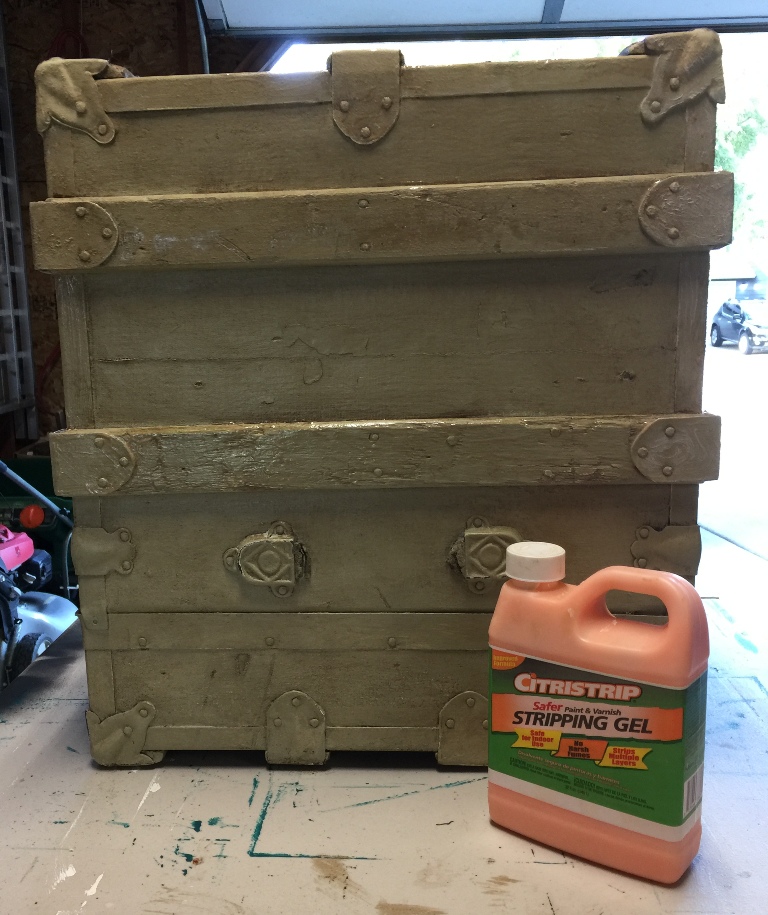
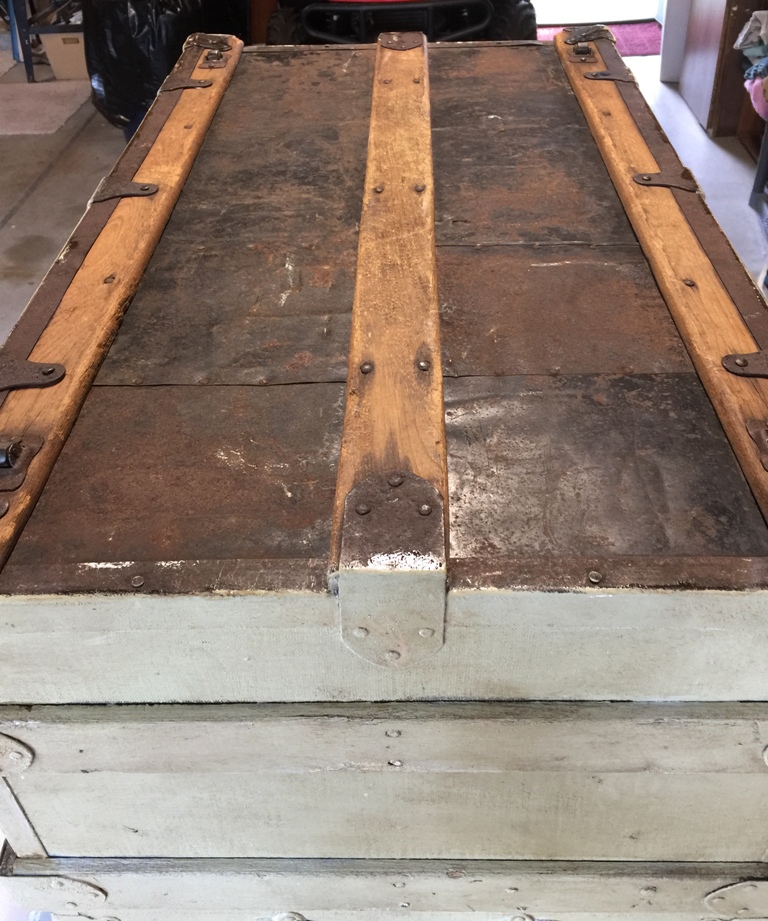
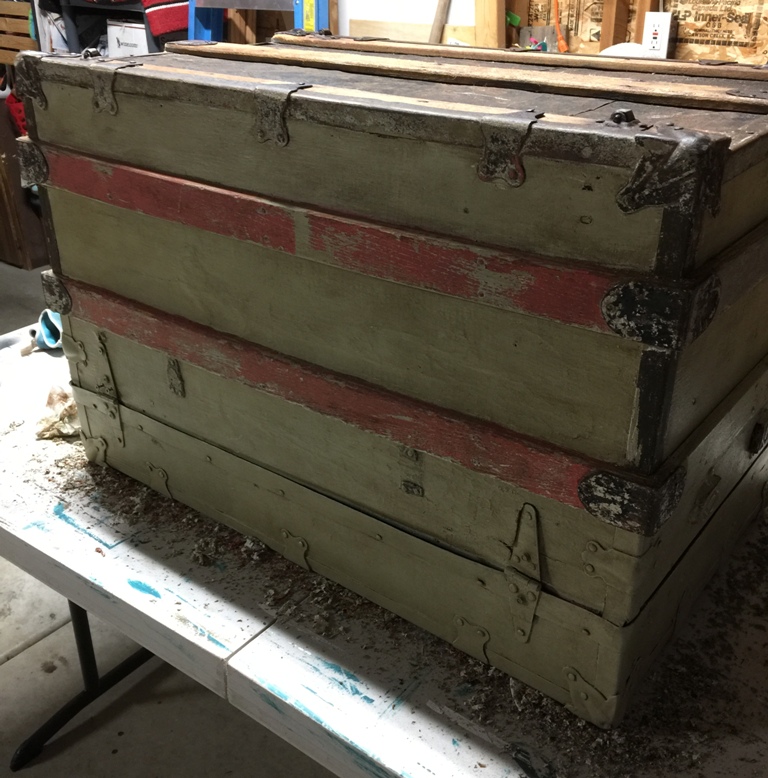
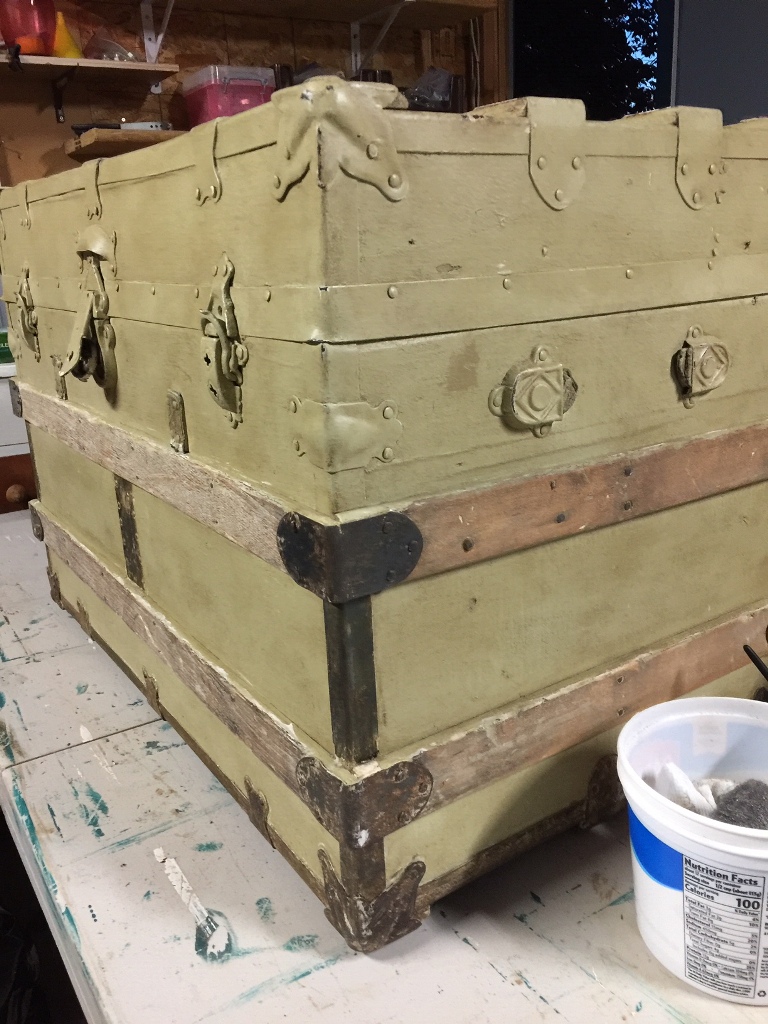
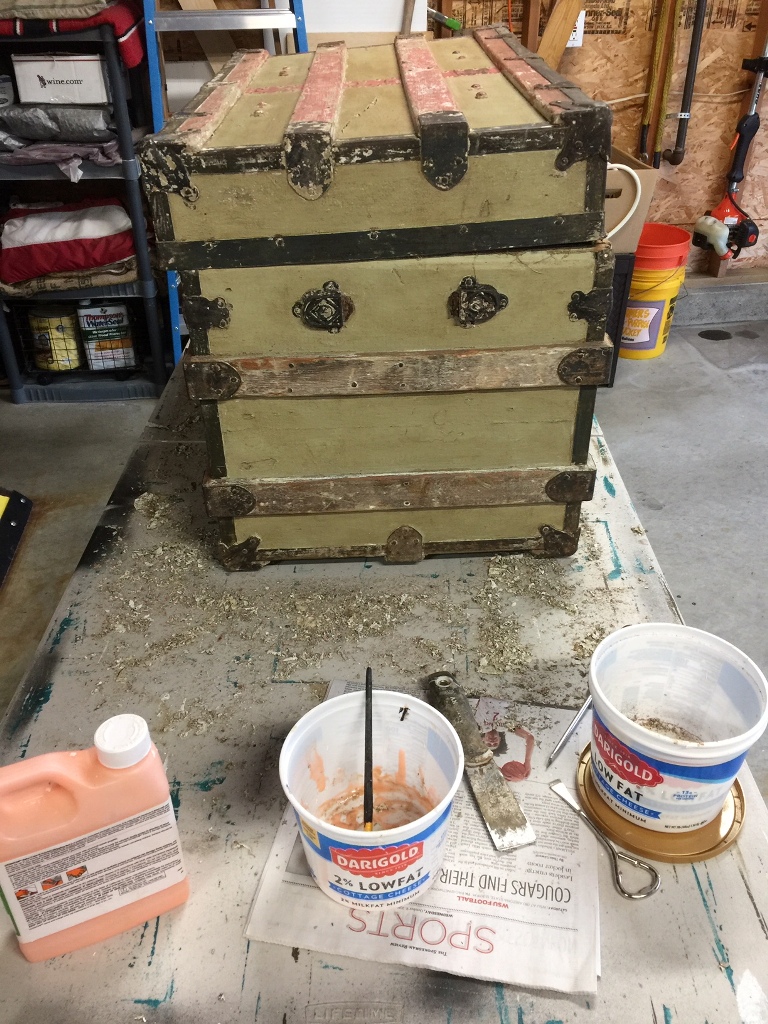
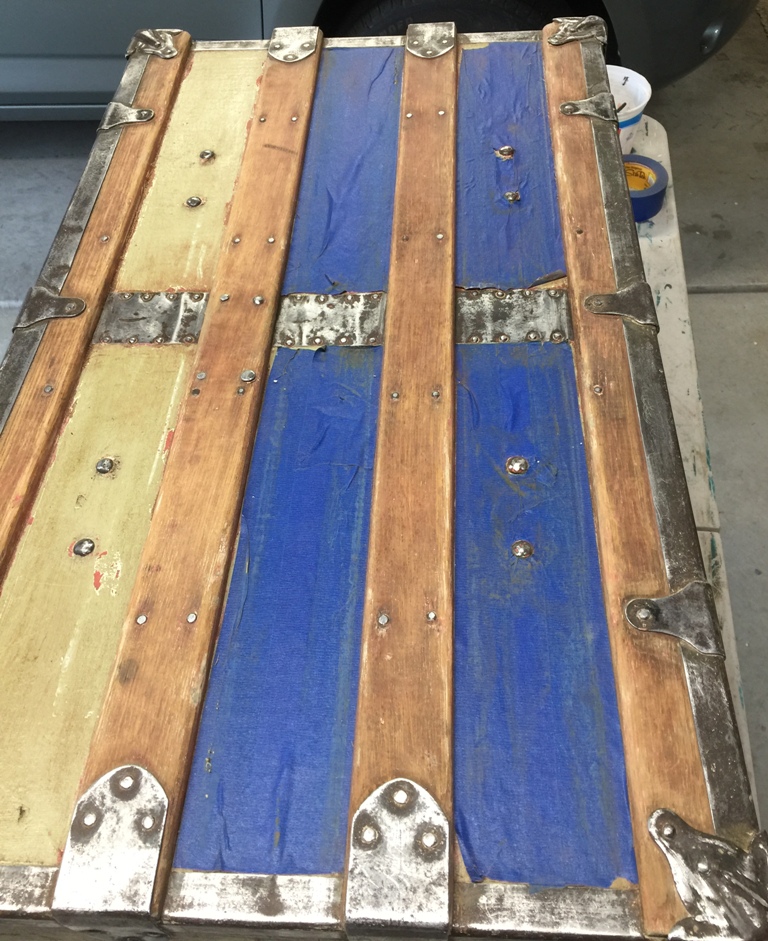
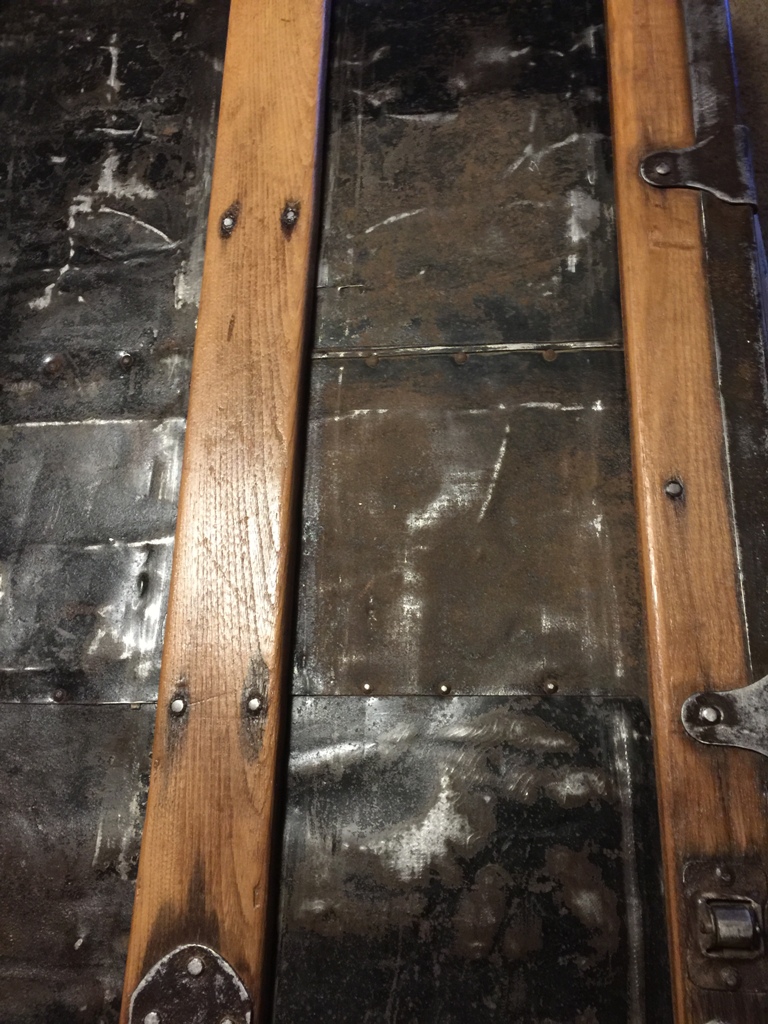
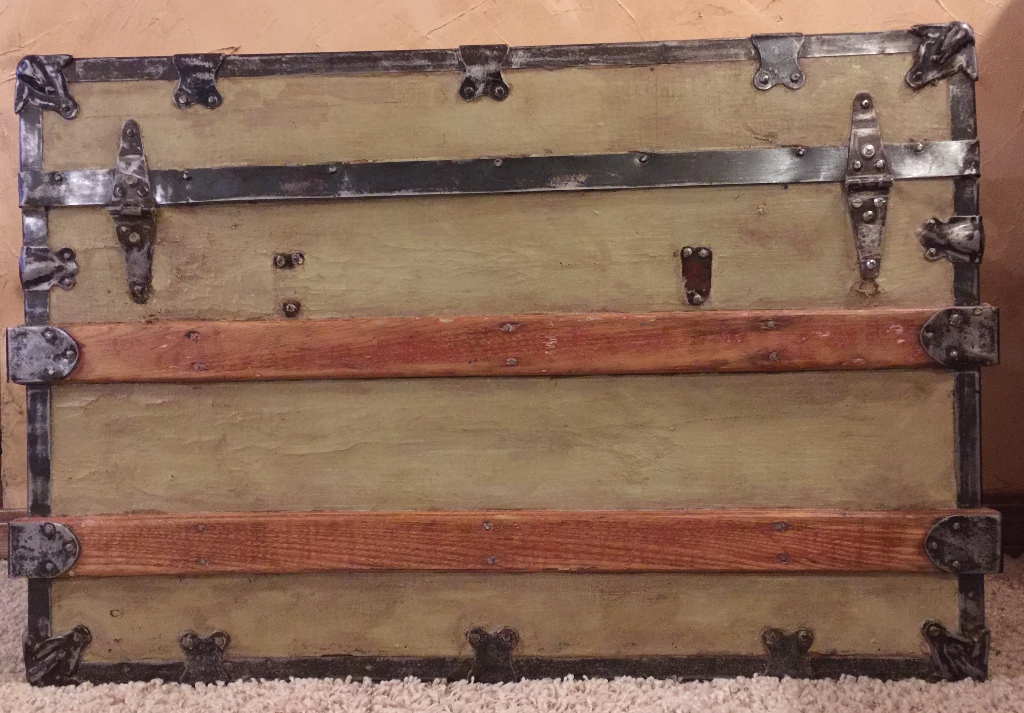
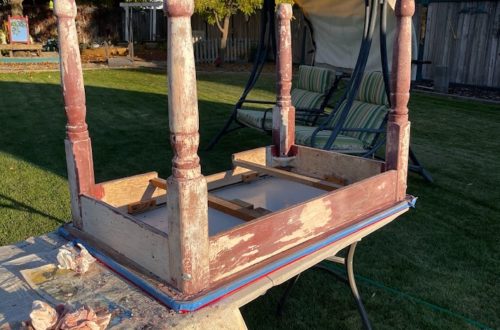
Since I was going to be using stripper, I moved the trunk to the garage and set it upside down on a table. When I turned it over, I was surprised to see metal on the bottom of the trunk. Then it dawned on me that I hadn’t seen the bottom of the trunk before. It was nice to see that the wood was a warm oak color and I got excited to see how the trunk was going to look when all the wood and metal was stripped. I pulled out my stripper (I’ve been using Citristrip for my last few projects), poured some in an old cottage cheese container and applied it to a couple of strips of the wood & surrounding metal with a small artist brush. I didn’t plan to strip off any of the paint on the main part of the trunk so I was careful to apply the stripper only to the wood and metal. This process ended up taking much more time than if I had just stripped the entire trunk. Since the main part of the trunk is canvas, though, I thought it would probably ruin the canvas by applying stripper to it.
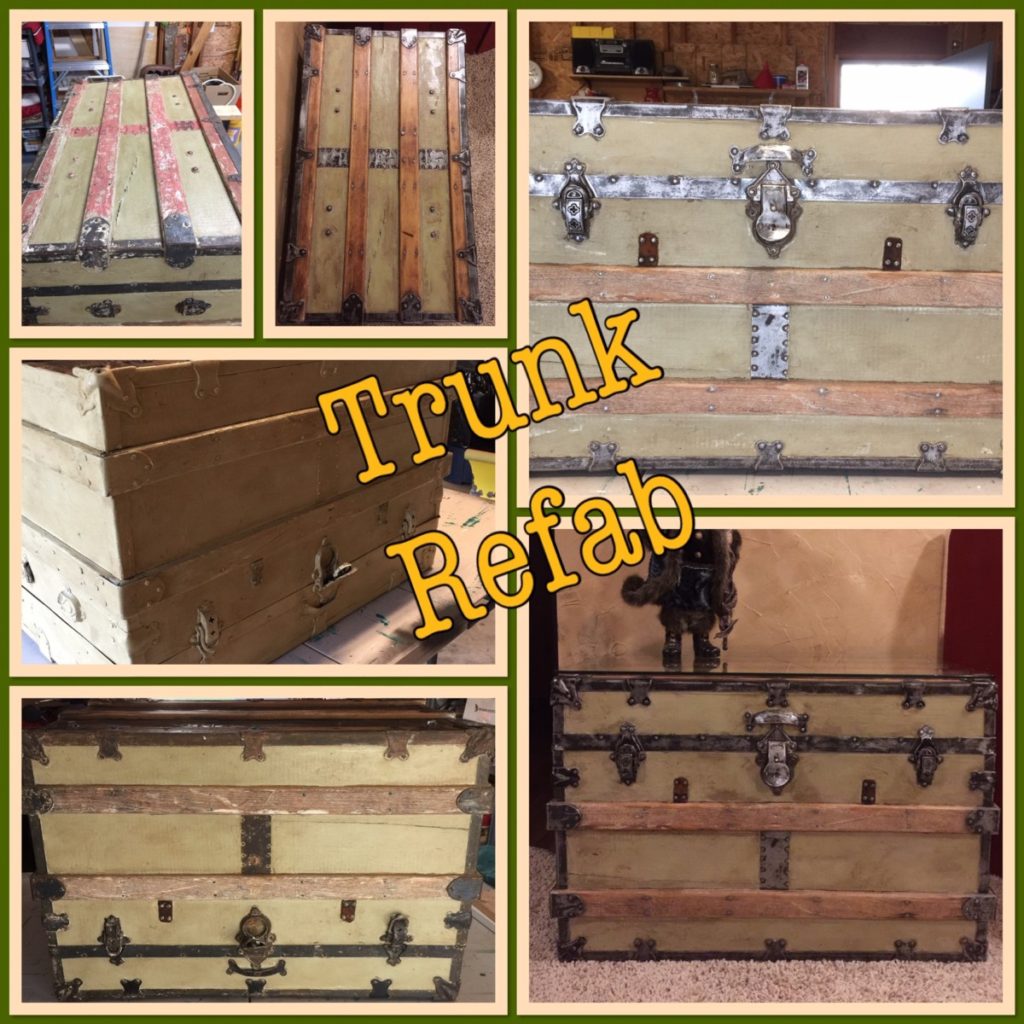
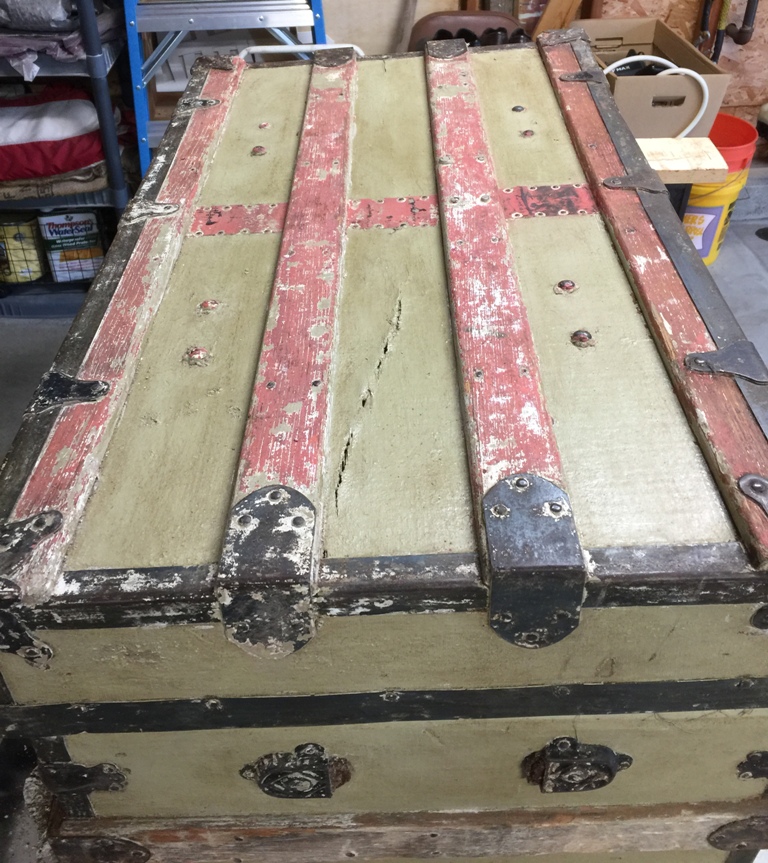
As I mentioned, I have used Citristrip on several projects and it works really well. For some reason, though, it hardly budged the paint on this project. After waiting about an hour & using a metal putty knife, I was struggling to get any of the paint off either the wood or the metal. I worked at it for awhile then decided to leave the stripper to work for a longer period of time. I ended up waiting over night and was pleased to find that the next day, it was much easier to remove the paint. What I didn’t know was that there was a third layer of paint, a salmon color, on the top and back of the trunk. I don’t know why the rest of the trunk wasn’t also painted that color, maybe the owner at the time changed their mind after seeing what it looked like on the top and back. Regardless, now I had even more stripping to do.
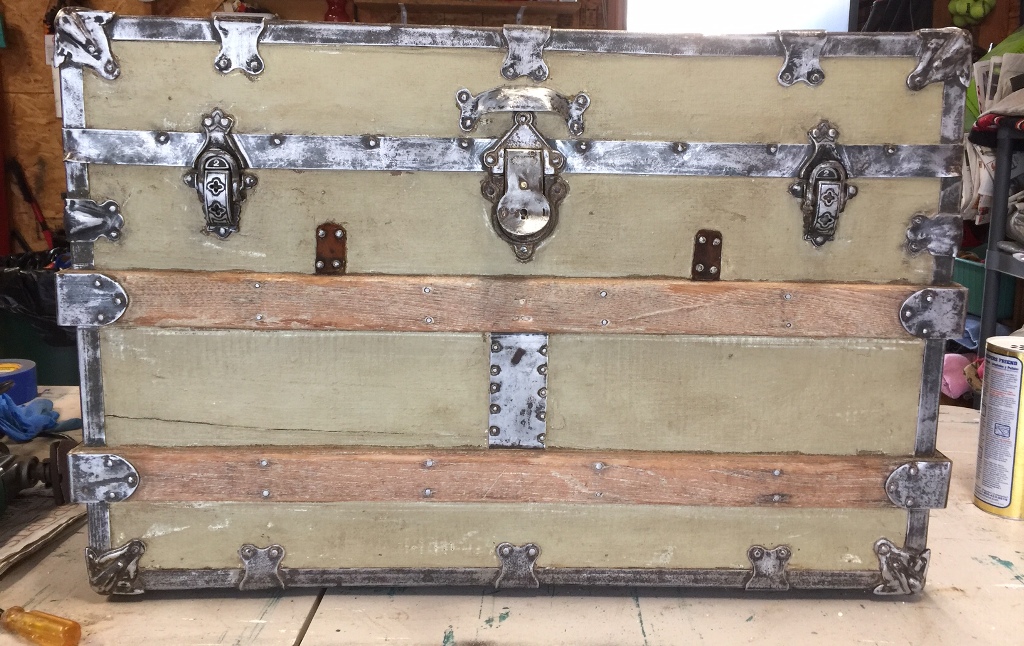
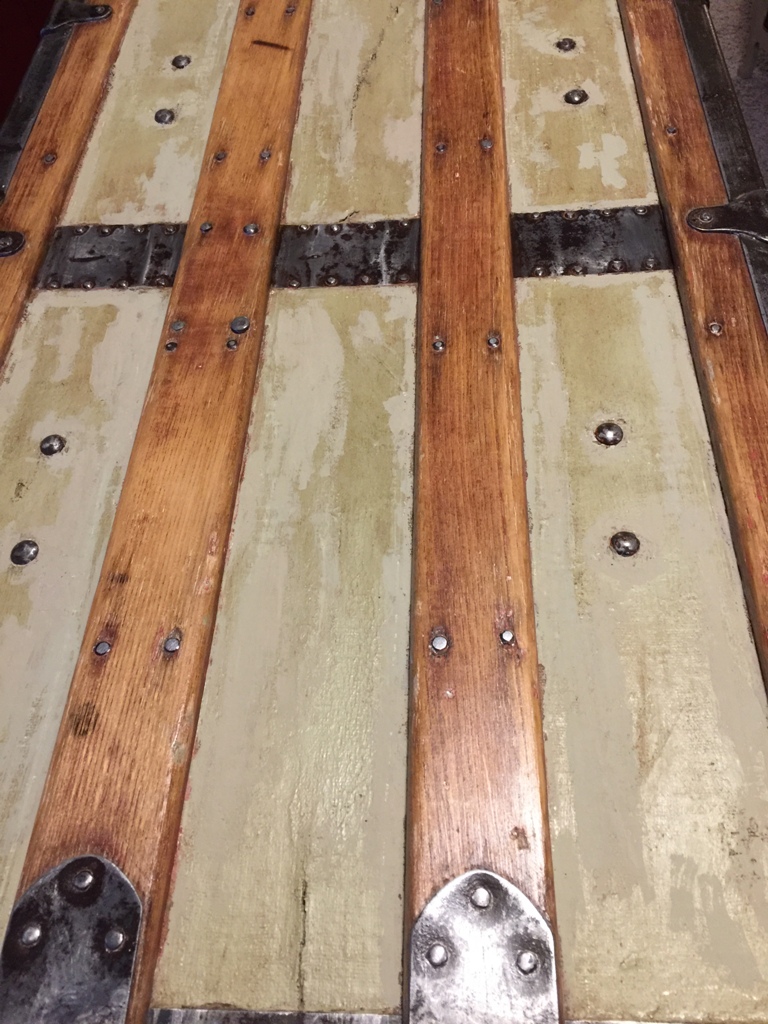
To keep the progress even on the trunk, I applied & removed one layer of the stripper to each side of the trunk before applying the second and third layers before turning the trunk right side up and working on the top. Not all of the paint could be removed as the first layer of paint had soaked into the wood like stain. As you can see, some of the metal started to rust. I read a tip that Bar Keepers Friend can be used to remove rust. I had some on hand because I have used it to clean windows (it works GREAT for those) so I grabbed it to use. The tip said to wet a cloth, sprinkle some of the powder on the cloth then rub it on the rusted metal. I did that and then wiped it down with a clean, wet cloth then used a dry cloth to dry it.
The stripping process
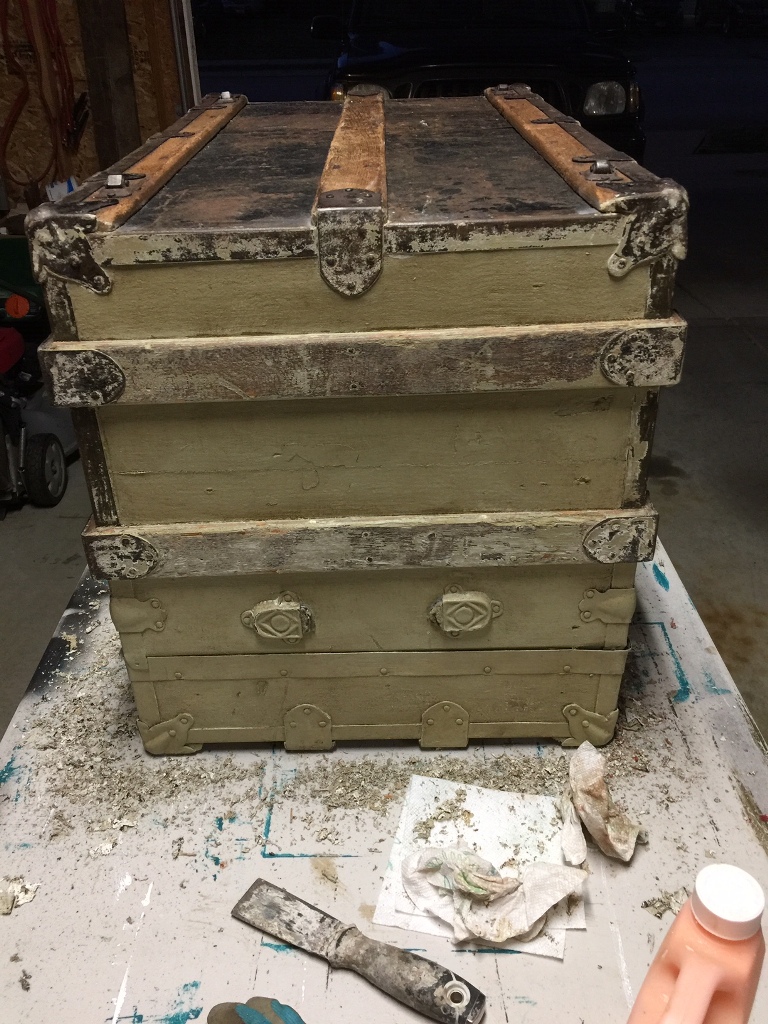
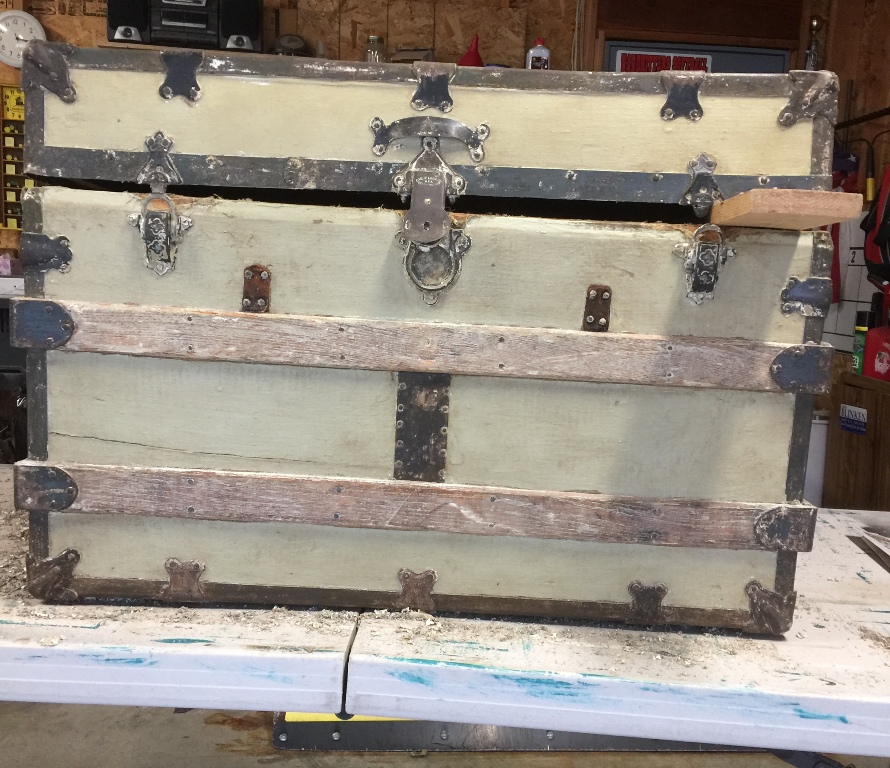
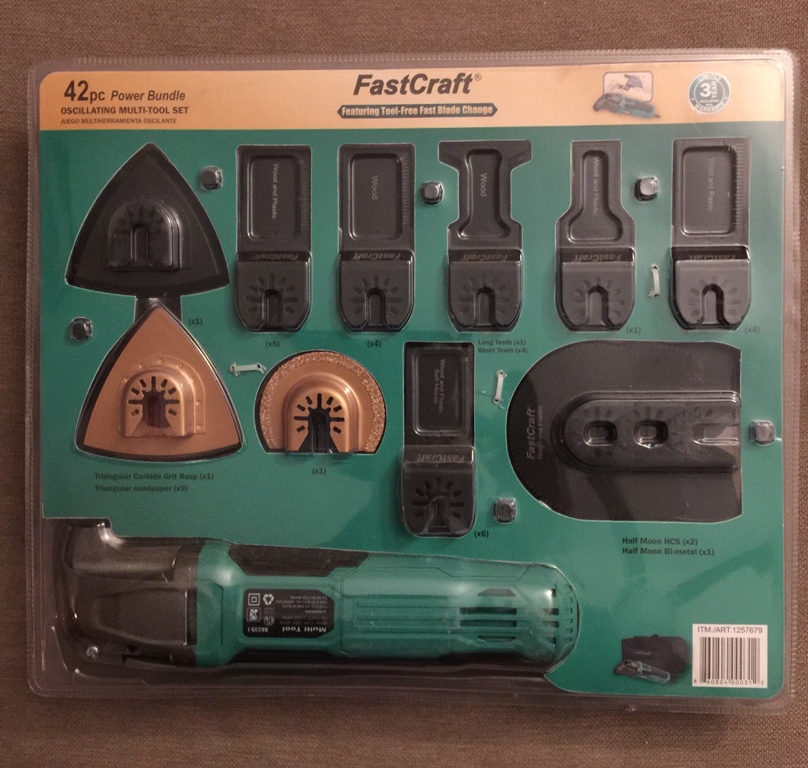
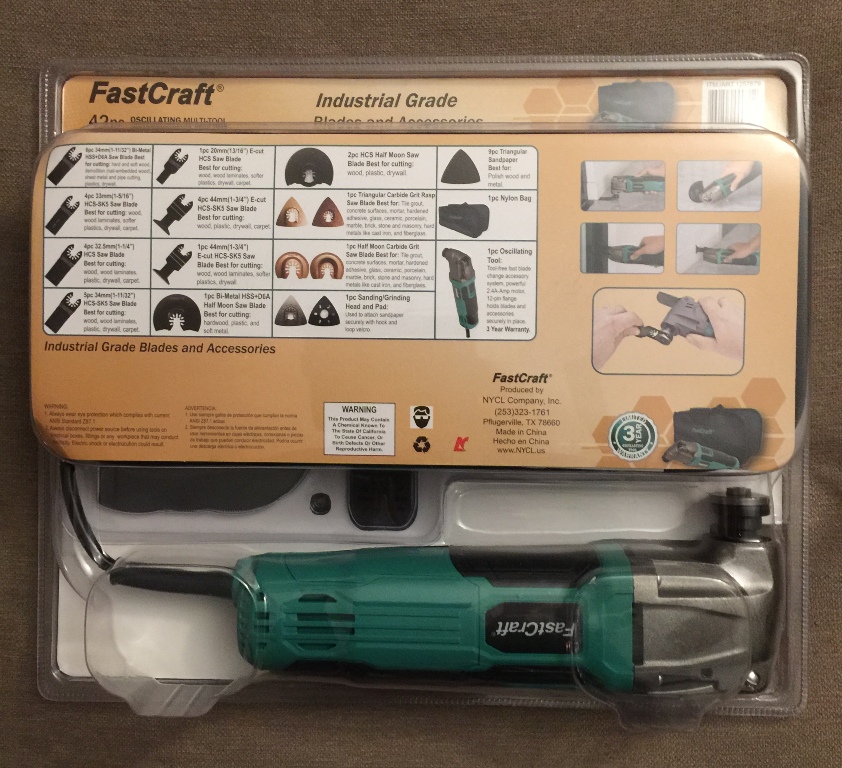
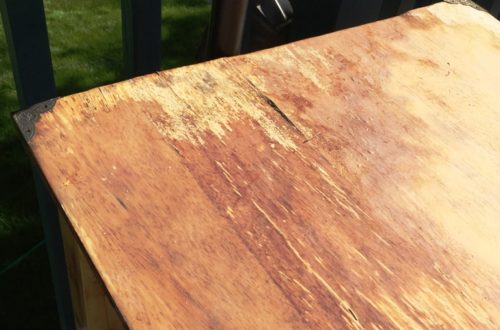
Once I had as much paint as humanly possible removed from the wood and metal, I brought out my mouse sander and began standing. I started with a piece of 120 grit sandpaper but that didn’t even budge the remaining paint so I went to the hardware store and bought 60 & 80 grit. The 60 worked really well to cut through most of the paint that was left in the wood and on the metal but I found that the mouse sander was too large to get into the detail of the metal and along the edges of the wood without also taking off the paint from the canvas. I tried to use a sanding block in 60 grit, but that didn’t work at all. Looking around the garage, I saw the FastCraft oscillating multi-tool kit that I had bought at Costco last spring but hadn’t yet used so I wasn’t aware that it had a nice small triangle-shaped sanding attachment and came WITH the sandpaper! Yes!!! I opened the packaging and got to work! This little tool is now my NEW favorite! The sandpaper pieces included ranged from 60-220 grit and I used some of each of the strengths.
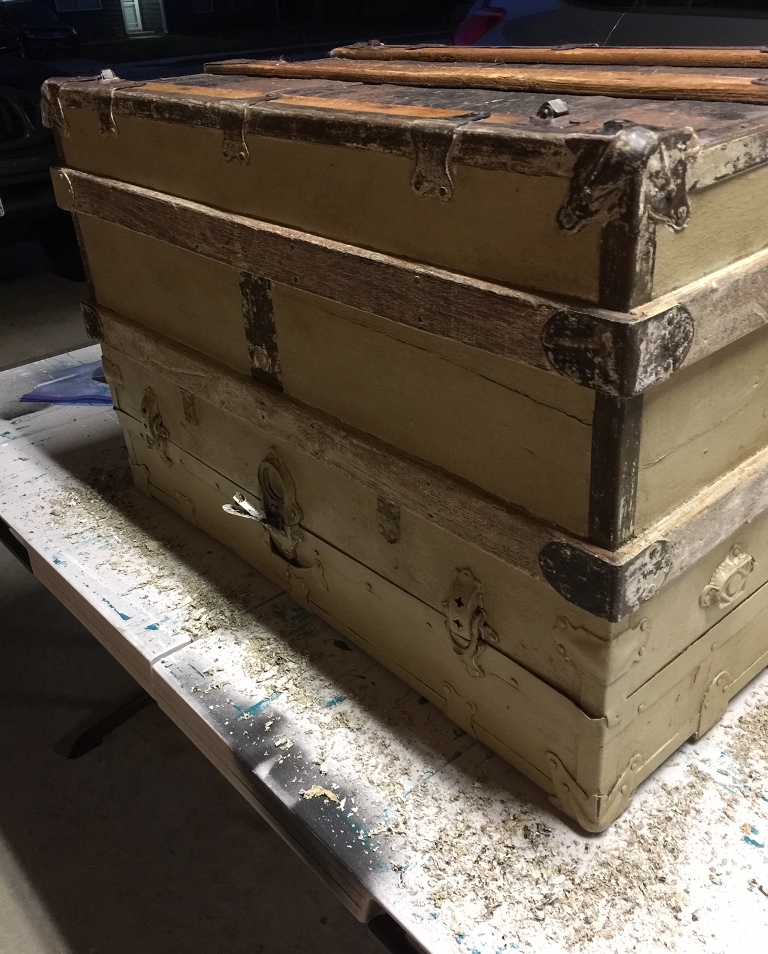
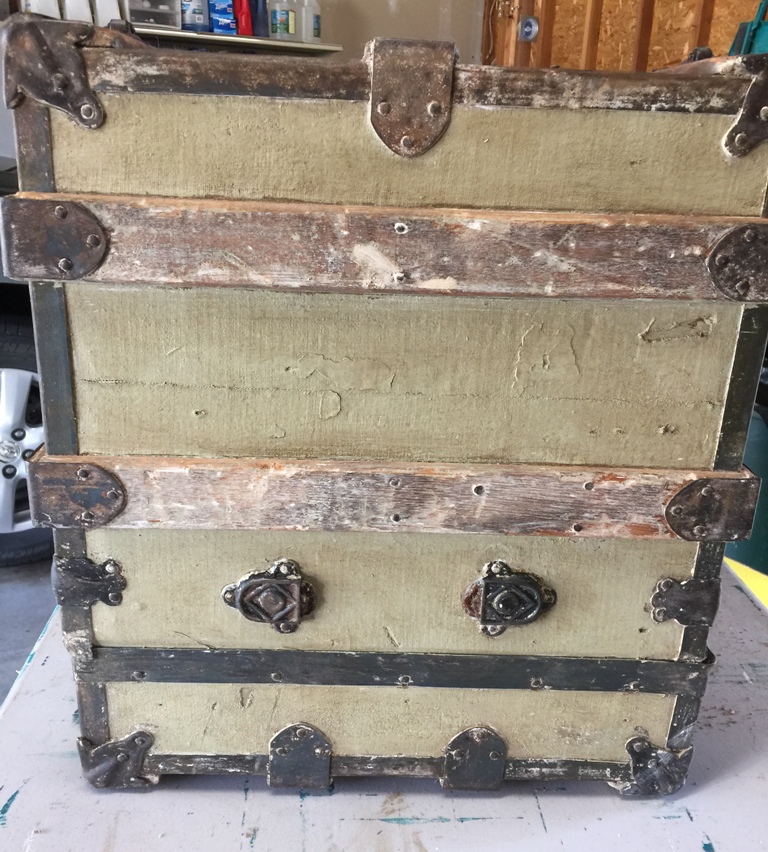
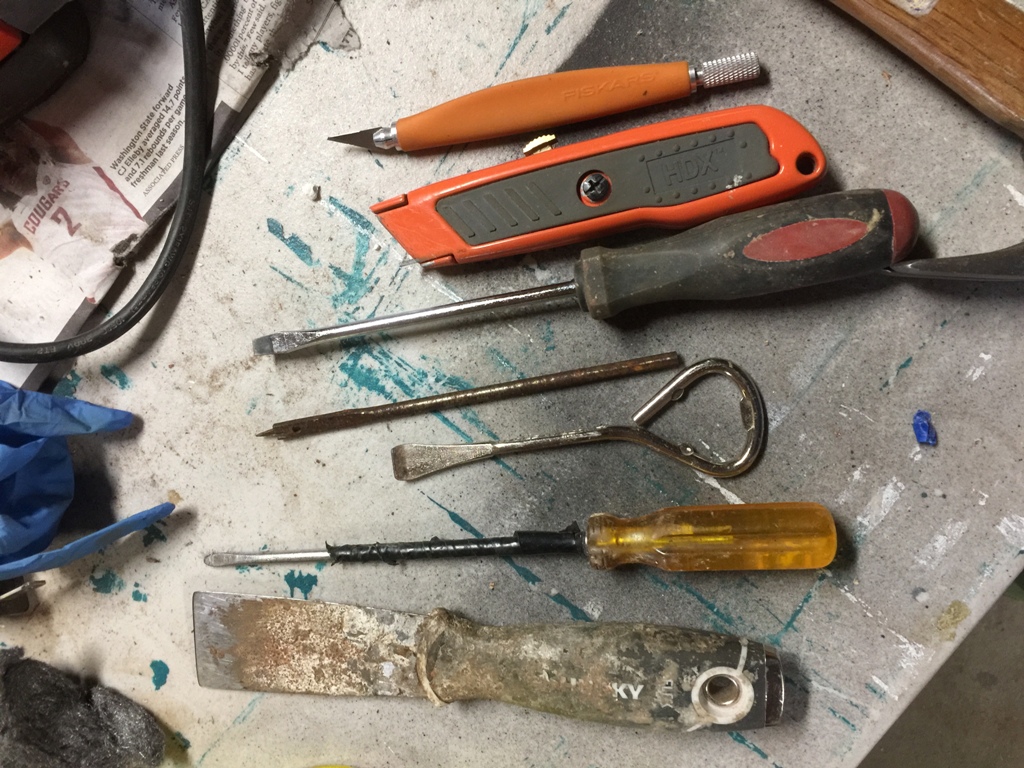
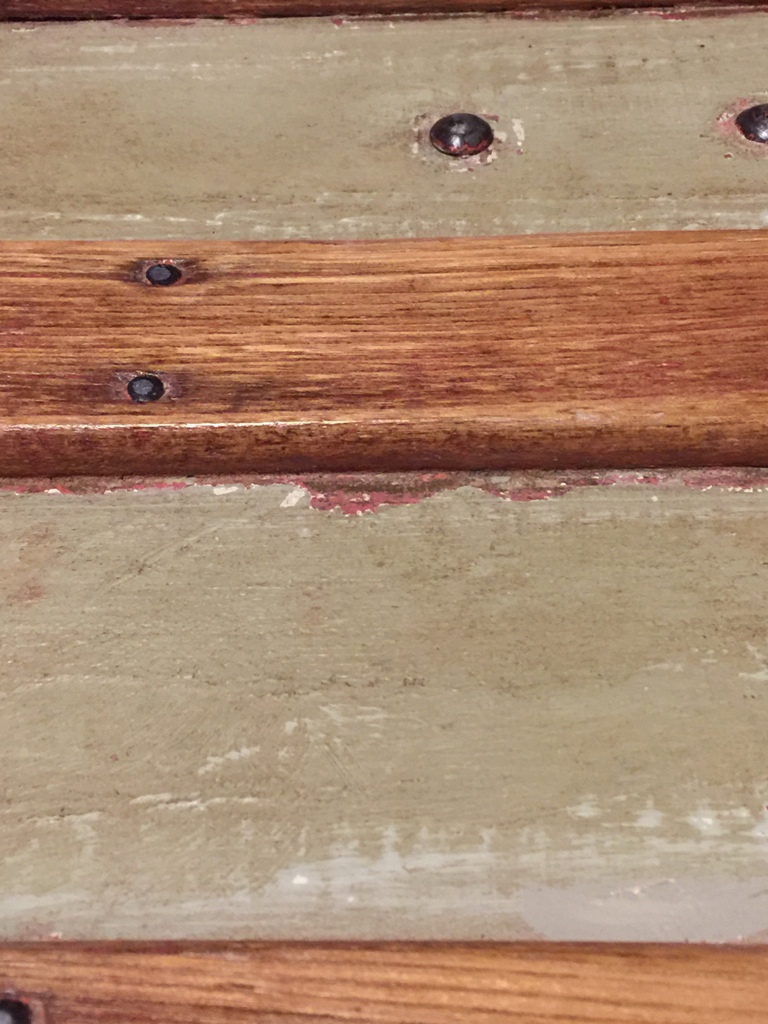
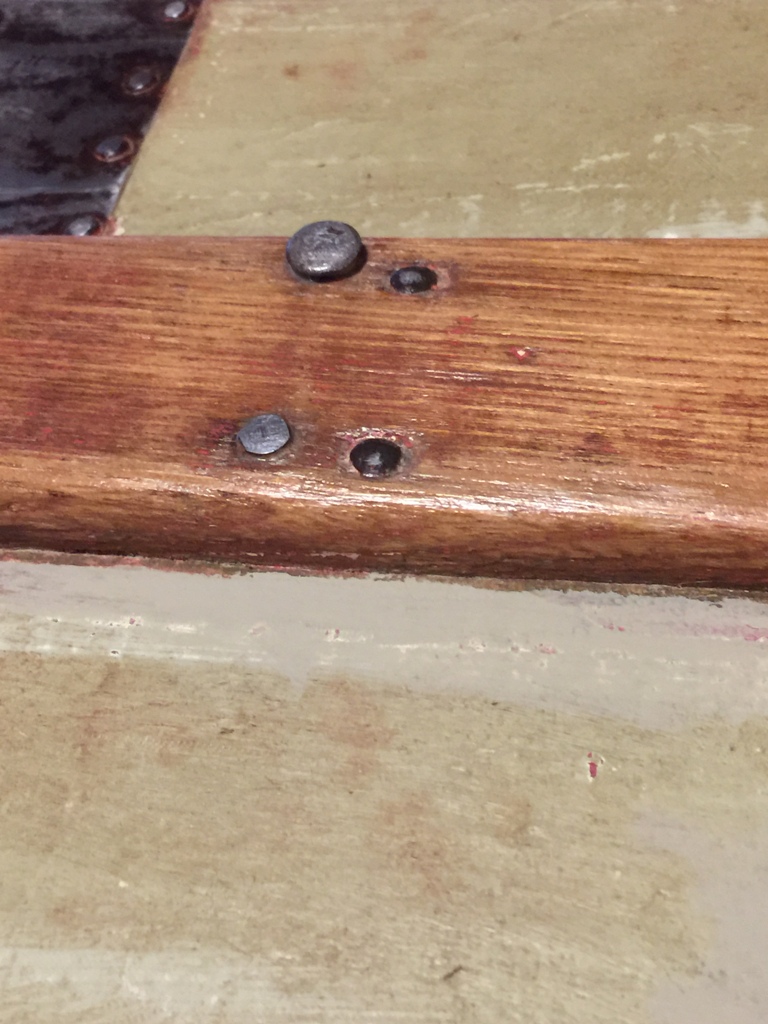
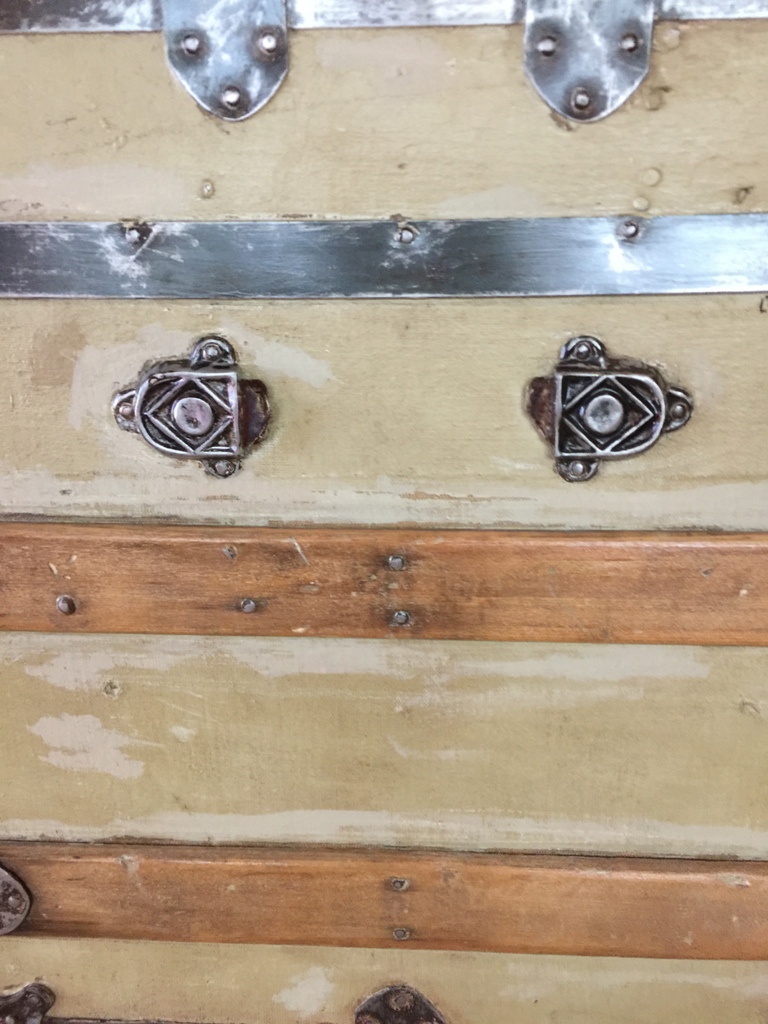
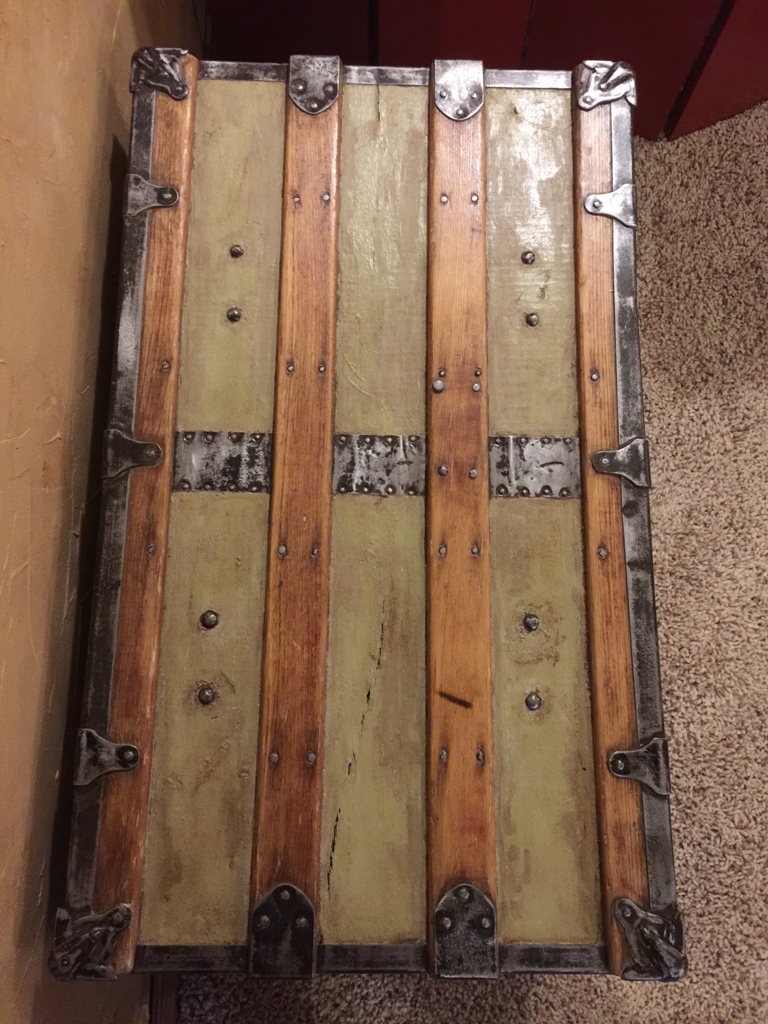
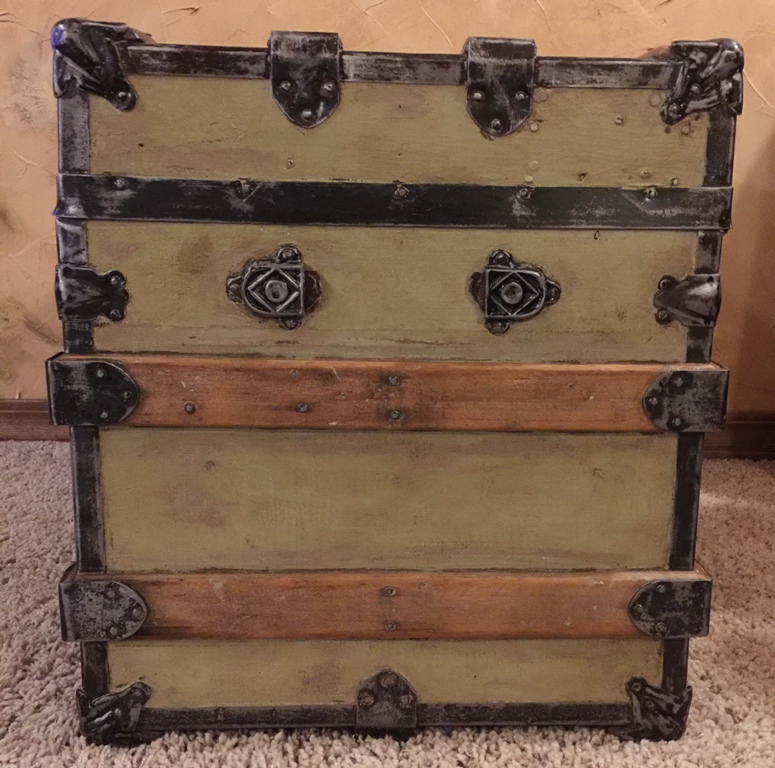
With a lot of sandpaper and elbow grease, the beauty of this trunk was starting to emerge. If I wanted to buy more sandpaper and spend many more hours, I know I could have had this metal shining like new but I wanted to keep the character that came with the age of the piece so I chose not to do any more work on it once most of the paint was gone. Stripping and sanding the small brads on the top of the trunk was probably the trickiest part, well, along with the closures on the front of the trunk. While I didn’t take the time to tape off all the canvas, I did so on the top of the trunk around the brads. I also used a variety of metal objects: screwdrivers, file with a very sharp point, paint can opener, to chip off paint from the metal where the sander couldn’t fit.
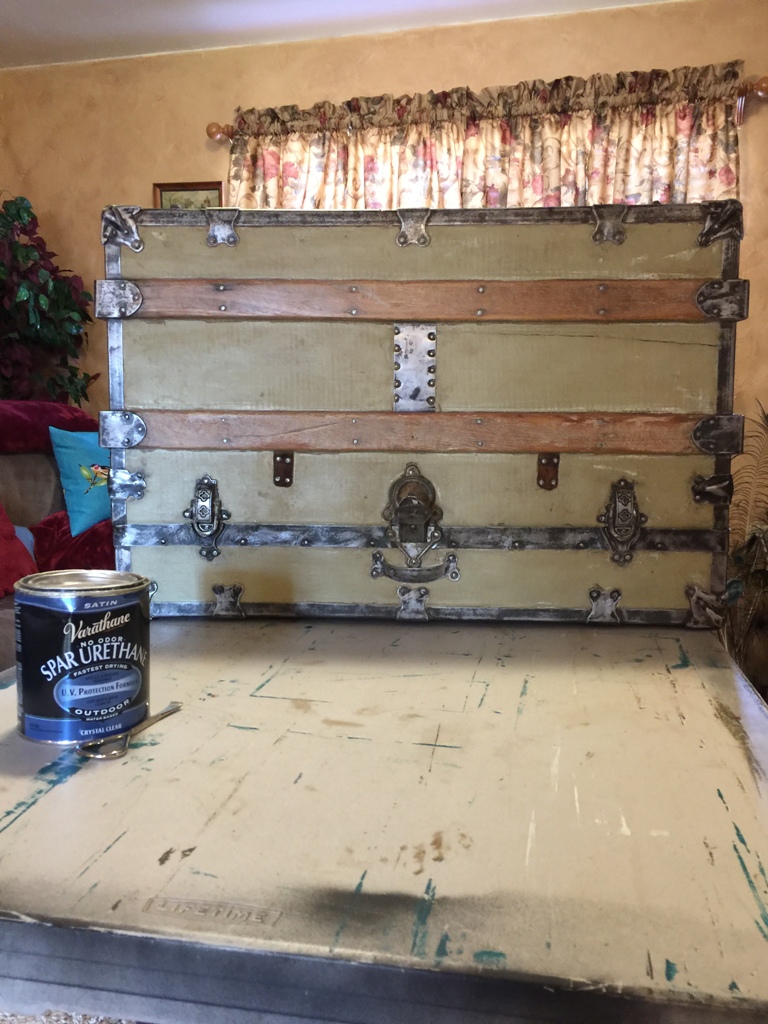
I started this project on September 21st but the weather turned the following week (we even got snow!). The trunk sat & waited for a long time before the weather warmed up enough for me to want to even try to work on it. On the days when the temps were above 40, I’d bundle up in sweats and my Uggs and head to the garage for a few hours before it was too cold to continue. So, once the sanding was done & the trunk was wiped down to remove all the sawdust, I brought the trunk and table into the house as it was way too cold in the garage to apply the polyurethane. For this project, I decided to use the Varathane brand of outdoor poly that I had on hand. I thought it might work better on the metal. I applied two coats with a small artist brush, letting each coat dry over night. I even sealed the metal on the bottom of the trunk.
Applying sealer
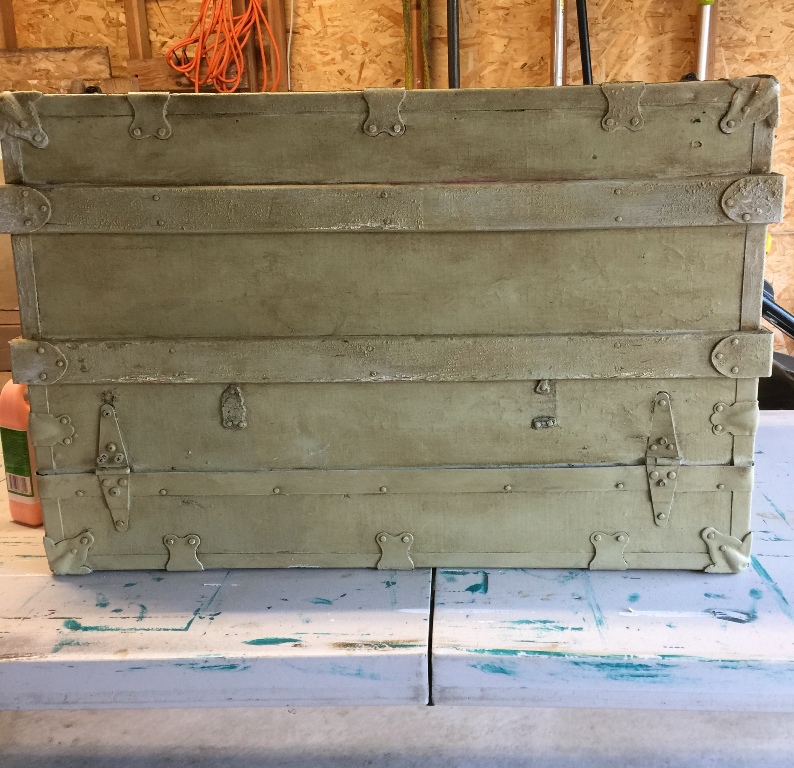
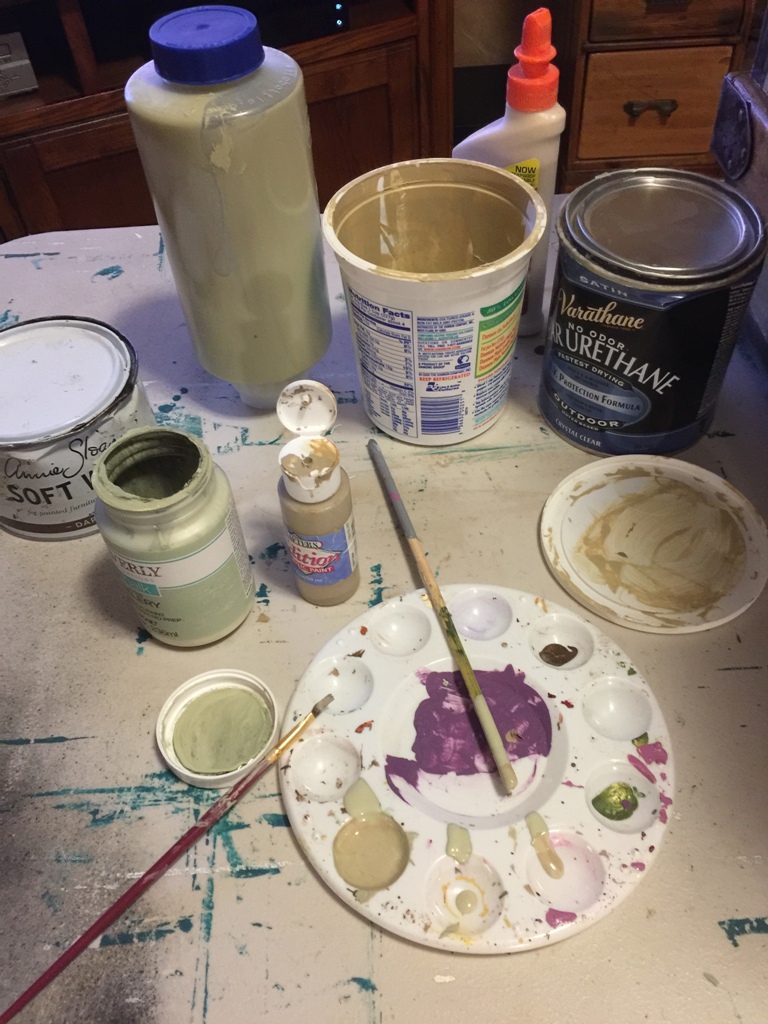
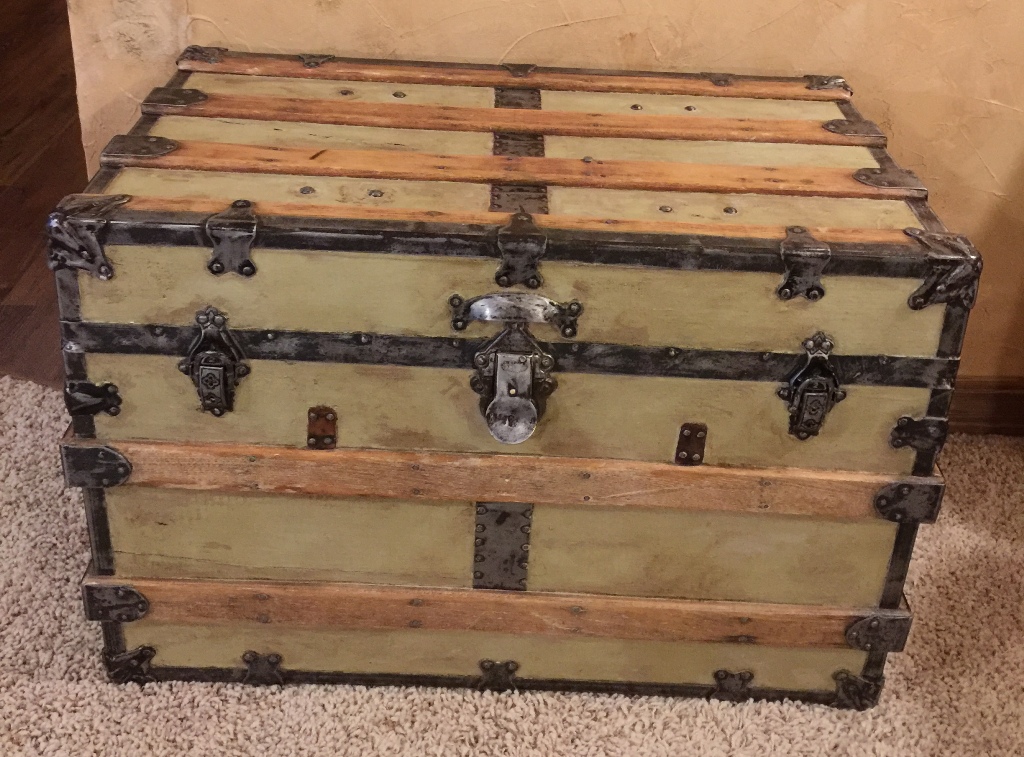
While I was sanding, I did manage to remove some of the paint from the canvas. I thought I would just be able to apply some of the dark wax I had left over from when I antiqued this piece but it didn’t work well to cover the white or salmon paint that was now showing. I went in the closet to get the Versailles paint only to find that it had dried in the container. Not wanting to drive to town and buy more or order it online and wait for who knows how long (it’s not available on Amazon), I went to my craft room and picked up a bottle of tan craft paint & a bottle of Waverly chalk paint in Celery. I mixed the two together and they were very close to the Versailles I had initially used on the trunk. I applied the paint with a small artist brush. When the paint was dry, I used an old, lint-free cloth and applied the dark wax. With another cloth, I buffed the dark wax to blend it with the rest of the trunk.
Repairing the paint
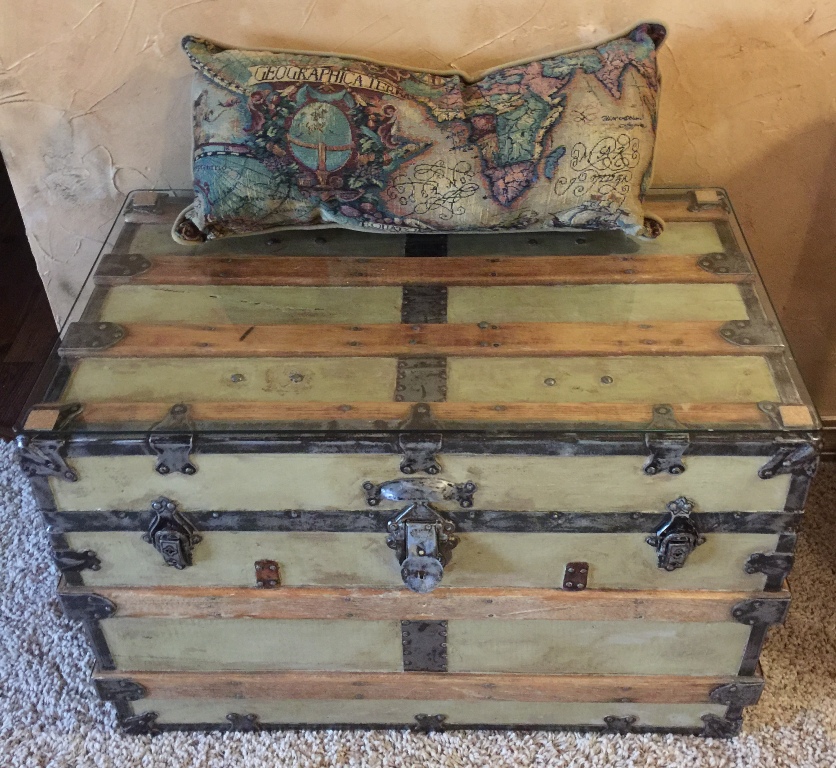
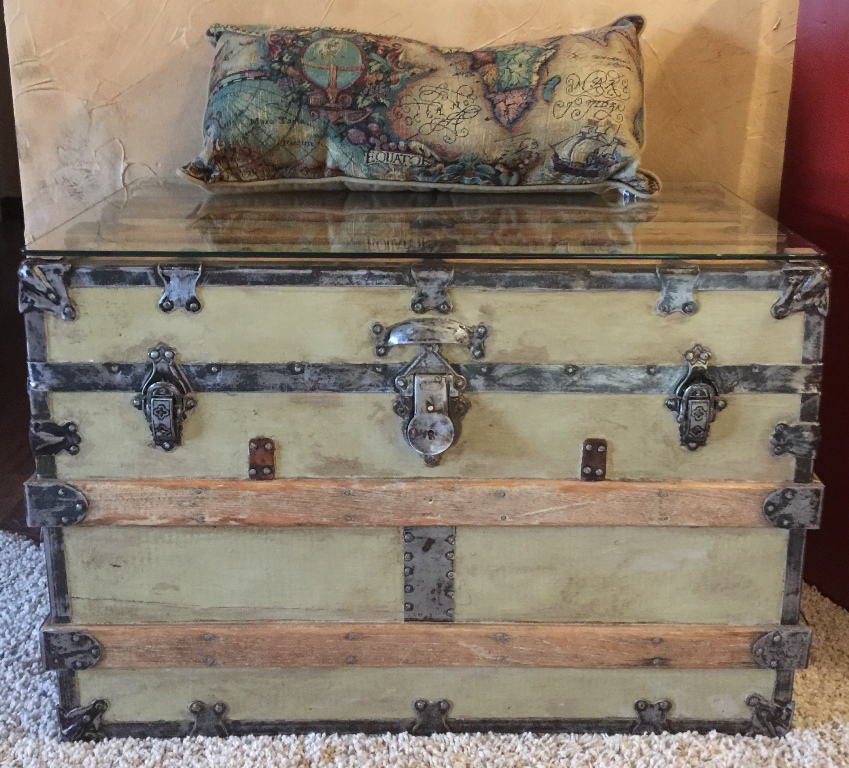
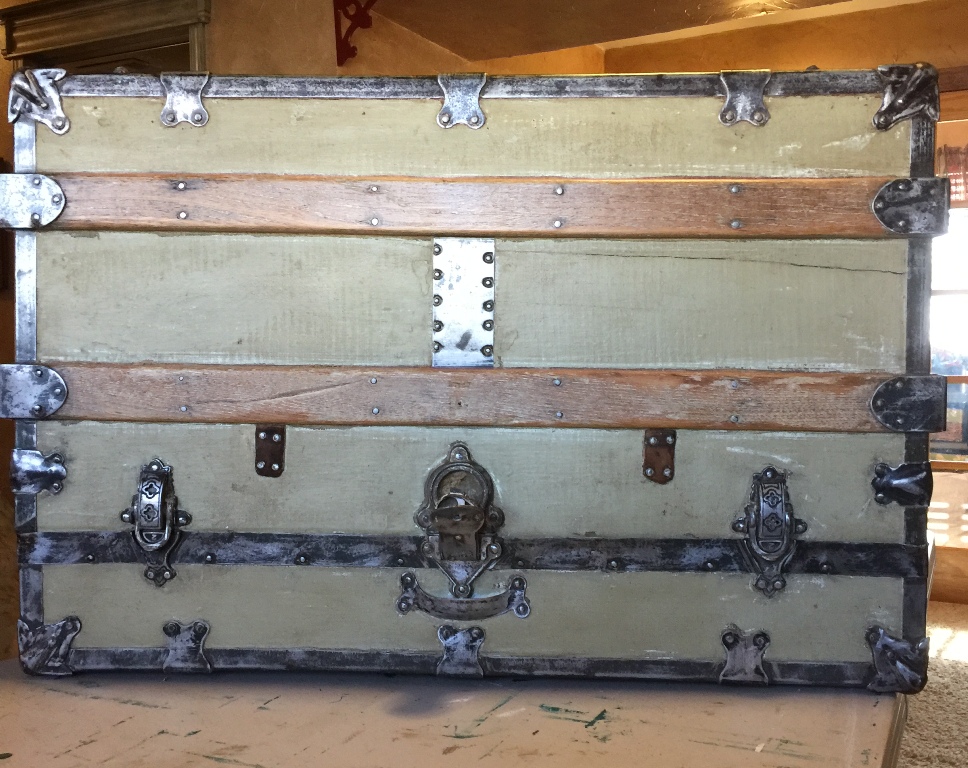
I have rearranged the living room since starting this project, so I am using the trunk as a decorative piece in the family room. How much time did it take? I lost count after 50 hours! Hubby and I both love the new look. It was worth the time and effort to refurbish it!
Finished project
Supplies Used
- Citristrip
- Varathane Outdoor Poly
- Small paint brushes
- Putty knife
- Tools – Screwdriver, small file
- Mouse Sander
- Fast Craft Oscillating tool
- 60-220 grit sandpaper
- BarKeepers Friend
- Paint
- Annie Sloan Dark Wax
- Soft cloths
I’m excited to share more projects with you as well as tips/tricks/freebies! Just enter your email below to be one of my Blog Peeps!



4 Comments
Rachel
Wow! Stunning job! I love old trunks, especially if they have a good old fashion key to go with it!
Jeanne
Thanks! It is, right?! Oh, I think I have an old key! Not one for the trunk but wouldn’t one look cute hanging by the lock?
Carol
Just gorgeous! I have my Grandad’s old trunk and it’s still in great shape.
Jeanne
It did come out gorgeous Thanks! Amazing how well constructed these trunks are!