

Let’s Landscape the Front Yard! Zone 2
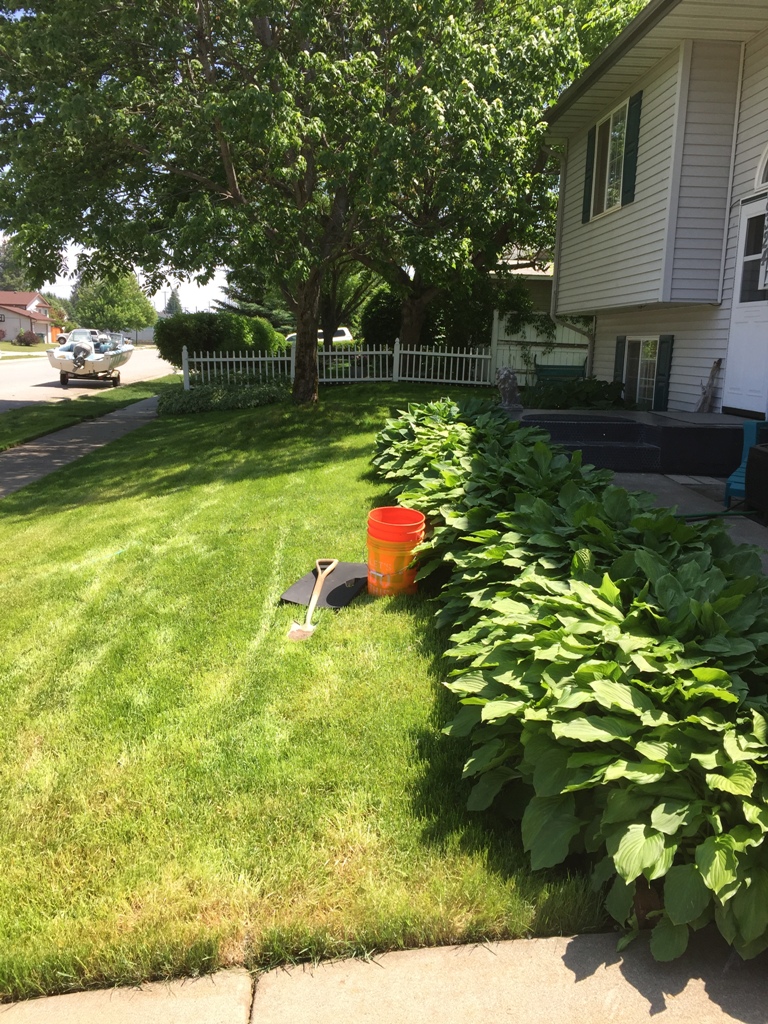
This year is the year of revamping the landscape in the front yard. What started out as a simple enlargement of one flower bed, morphed into a full-on Front Yard Refab! It all began when we decided to enlarge the area around the Hosta plants that are planted by the sidewalk in front of our house. I didn’t get around to dividing them this year like I’ve done many times over the years and they had outgrown their space. It was difficult to mow in front of them without taking out many of the leaves as they laid on the grass. Since it was too late in the growing season to divide them, we chose the more friendly option of removing sod to increase their home. You can read all about that and see the before, during, after pictures in the post on Zone 1.
These Hostas need more room!
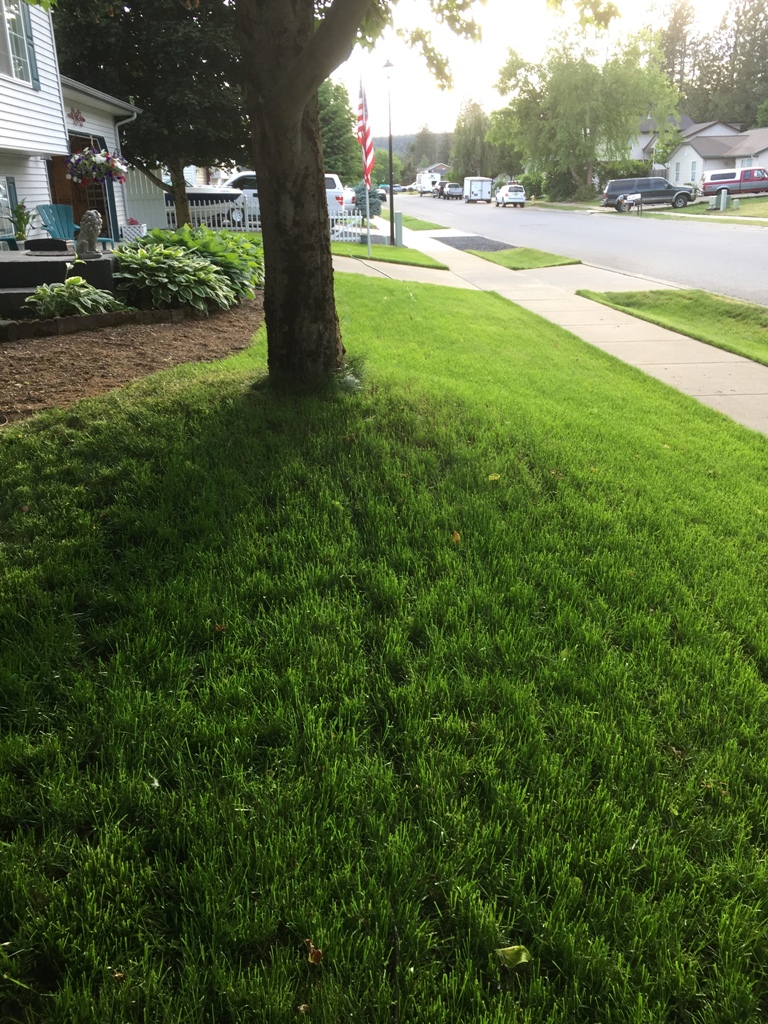
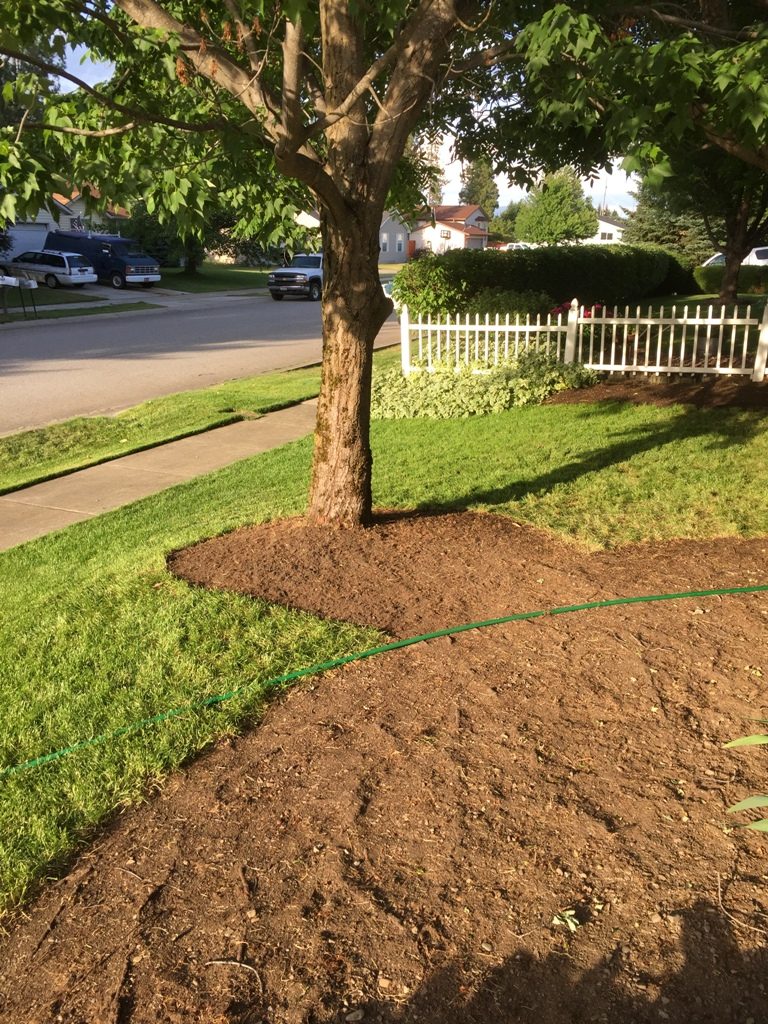
While working on the Hosta project, I thought it was a good idea to address the slope by the front tree. As you can see above, the yard is not level. The neighbor behind that picket fence raised their lawn by adding a retaining wall. I asked them about the process one day but was disappointed to hear that it was done when they built the house (before we moved in) when they had heavy equipment on hand. Ugh! I knew we could do it, but was pretty sure I’d need to hire help so I started looking around for other options, some I could do myself. I saw some ideas on Pinterest where I could just add a small, 1/2 moon shaped retaining wall close to the tree. That could work! I headed to one of the landscape supply stores to see what I needed. The gal helping me said it was totally doable and showed me their retaining wall bricks. She said that all I would need to do was to lay the first row about 3″ below the grass level ON TOP OF a 3″ – 4″ base of fine gravel mixed with water! Huh?! What?! I can barely dig an inch in this soil because of all the rock we have AND the roots on this tree are SO close to the surface, that I knew this was not a viable option. DRAT!
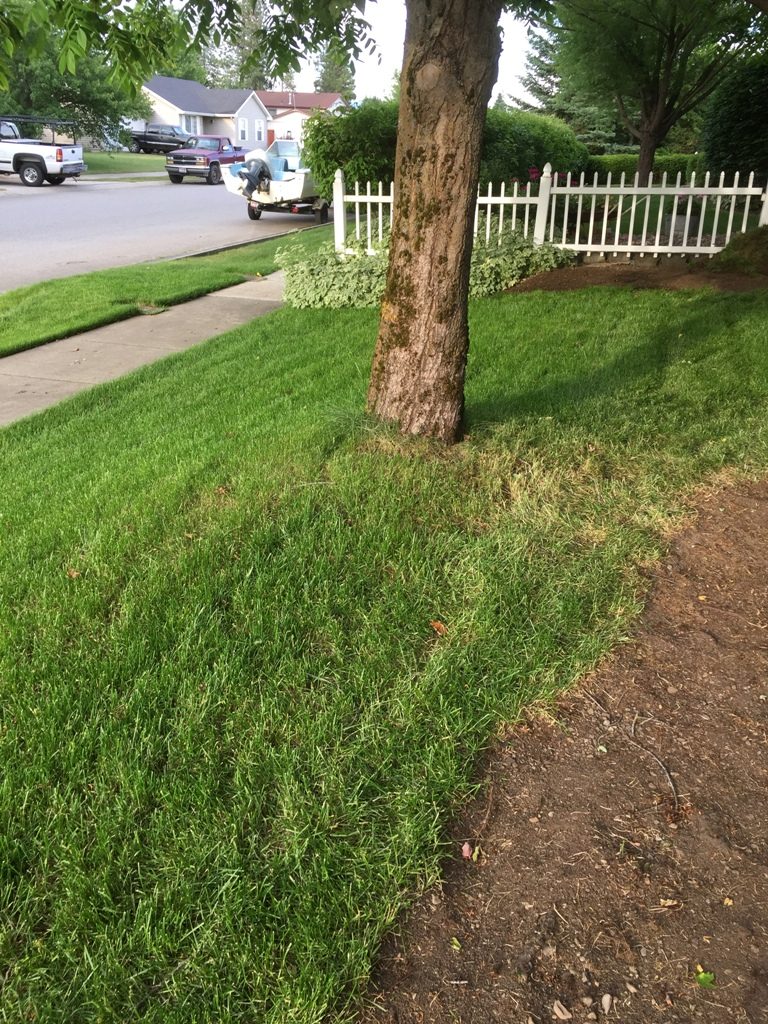
In the picture below, you can get a better view of the slope of the hill around the tree…it is a bit steep, especially when mowing. We have a self propelled lawmower and even with the help of that feature, I find it difficult to mow around this tree.
So, I headed back to the drawing board (i.e. Pinterest) for other options. I found many …. pulling up sod and leaving the area bare, pulling up sod and adding plants (too rooty for that), pulling up sod and adding rock (oooh!) I decided to pull up the sod and lay flagstone then edge it with some brick. Now that I had a new plan, the first step would be to determine just how much sod I would remove. If I went to the bottom of the hill, it would be just a foot or so from the sidewalk which would remove too much lawn, so I thought I would start with a radius of 3′ and see how that looked.
For your convenience, I have created a free printable with pics, Supply List & Instructions for you!

There are sod cutters you can rent but I’ve always just pulled the sod up by hand. Since I was working on a slope around a tree, a sod cutter wouldn’t have been the way to go anyway due to their size. Sometimes the sod comes up pretty easy and other times, it’s a bit of a struggle. I’ve found that if the grass and dirt are a bit moist, the job is easier. If there are trees close by and you run into small roots that are intertwined with the soil, it is more difficult. I keep a small garden cutting tool with me to cut those

Time to remove sod 
Tools needed 
Proposed radius

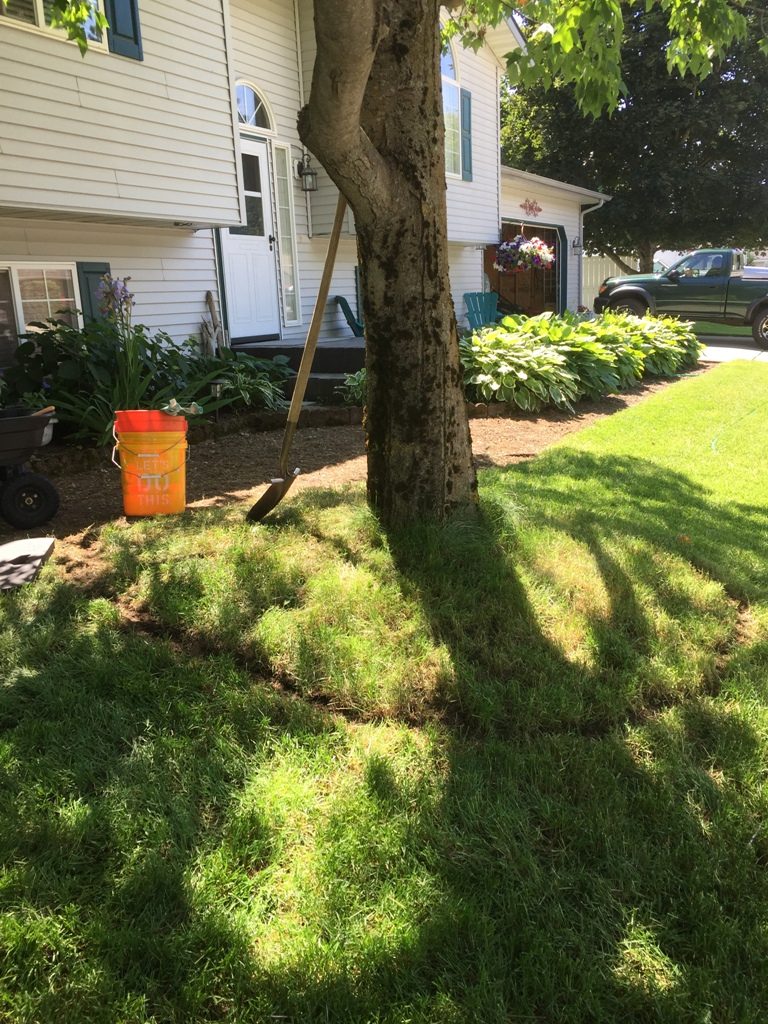
After deciding the radius, to begin the process of removing the sod around the tree, I grabbed my a garden shovel and started cutting through the sod to the soil, making that cut about 2″ deep. Once that was done, I used the shovel to cut the sod into smaller sections; doing so creates pieces that are easy to remove and use in a new location. To remove the sod, I used a garden knee pad, got down on my knees and used a small garden rake to pry the sod from the ground. As each piece was loose, I placed it in my garden wagon and when the wagon was full, I took it to where I was storing the sod until the project was finished.

Storing the sod until we can take it to a friend’s property for her to use
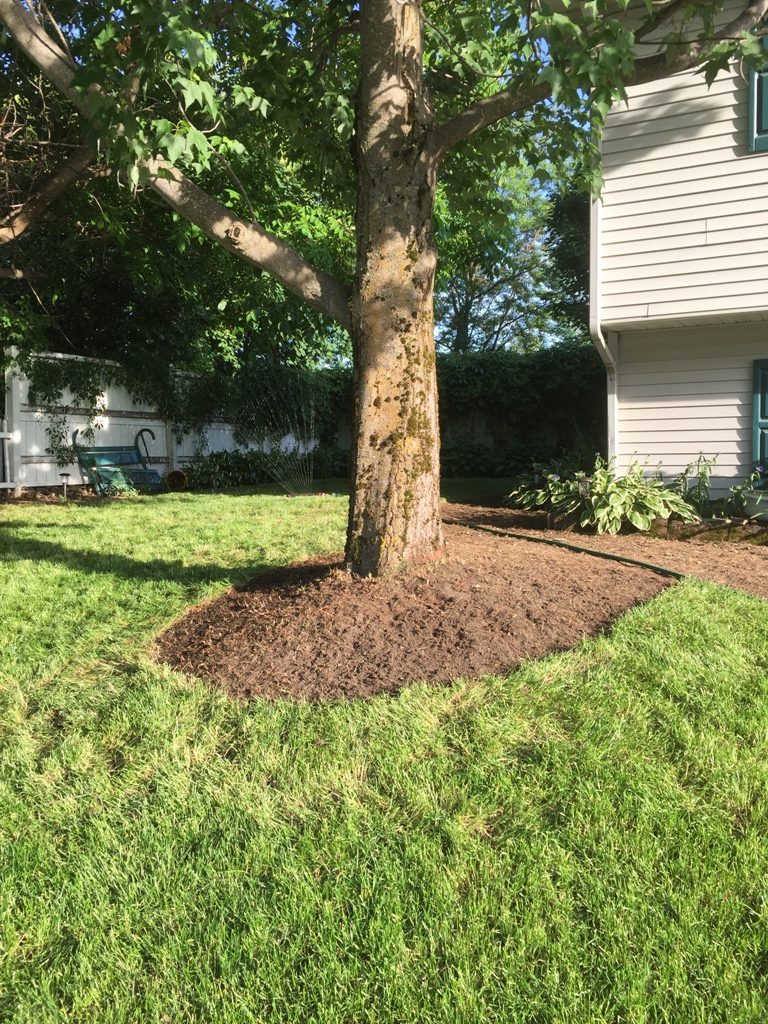
After removing the sod, we decided this 3′ radius was adequate (although I’ve mowed since completing this project and now I think it could have been a bit bigger).

Sod removed 
Ready for stone
I found some flagstone that I liked at one of the local landscape places, it had grey tones that would look great with the color of the house and the bullet bricks I used to edge the front flower beds. The yard guy was very helpful in choosing the sizes of the stone pieces and amount needed based on how I described the space. The price was $0.17 per lb and the pieces we picked out added up to 240 lbs. He loaded them into my Rav4 and I headed home.
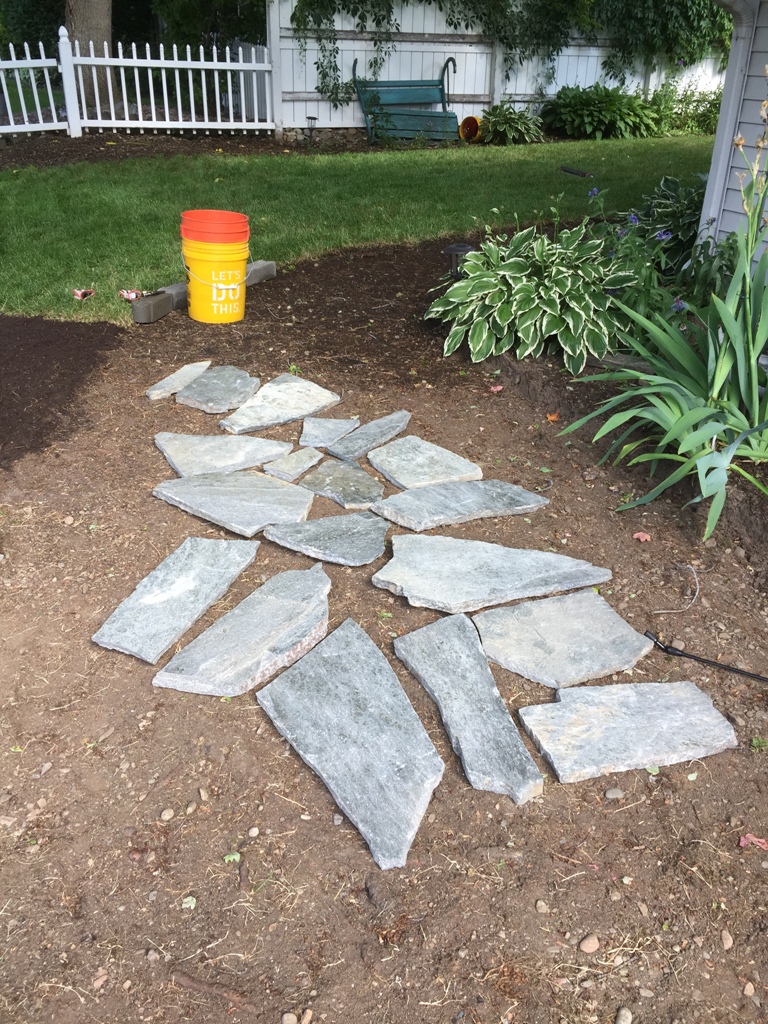
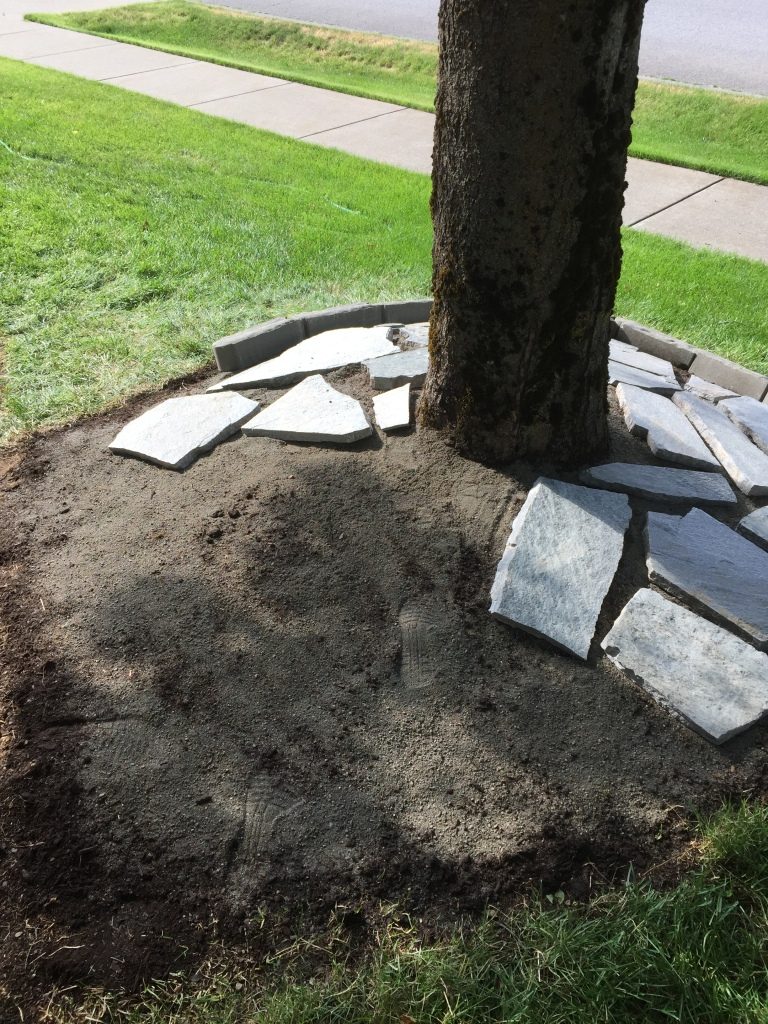
When I got home, I used my garden wagon (love that wagon!) and load, by load, brought the flagstone from the car in the garage to the flower bed by the tree. The next step was to add some soil around the tree where the sod had been removed and then some sand to level the area before laying the stone in place. It didn’t take too long to arrange the stones so they looked right, it is like piecing together a puzzle 🙂 Unfortunately, I ran out of flagstone; guess 240 lbs was not quite enough. I had bought enough to do about 2/3 of the project so I headed back to the landscape place the next day, buying an additional 129 lbs worth of stone. I used the bullet bricks I had on hand to line the perimeter while I was laying the stone but knew I would be using a different style brick to edge the area once I had the time to go get them.

Laying flagstone 
Will need more stone
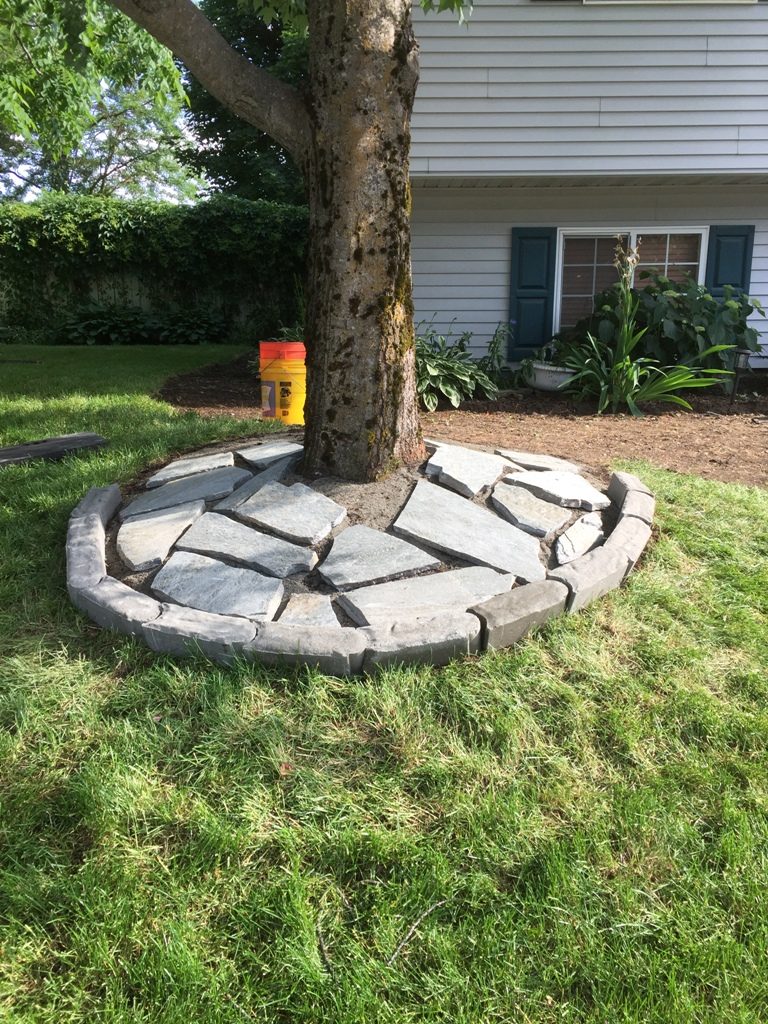
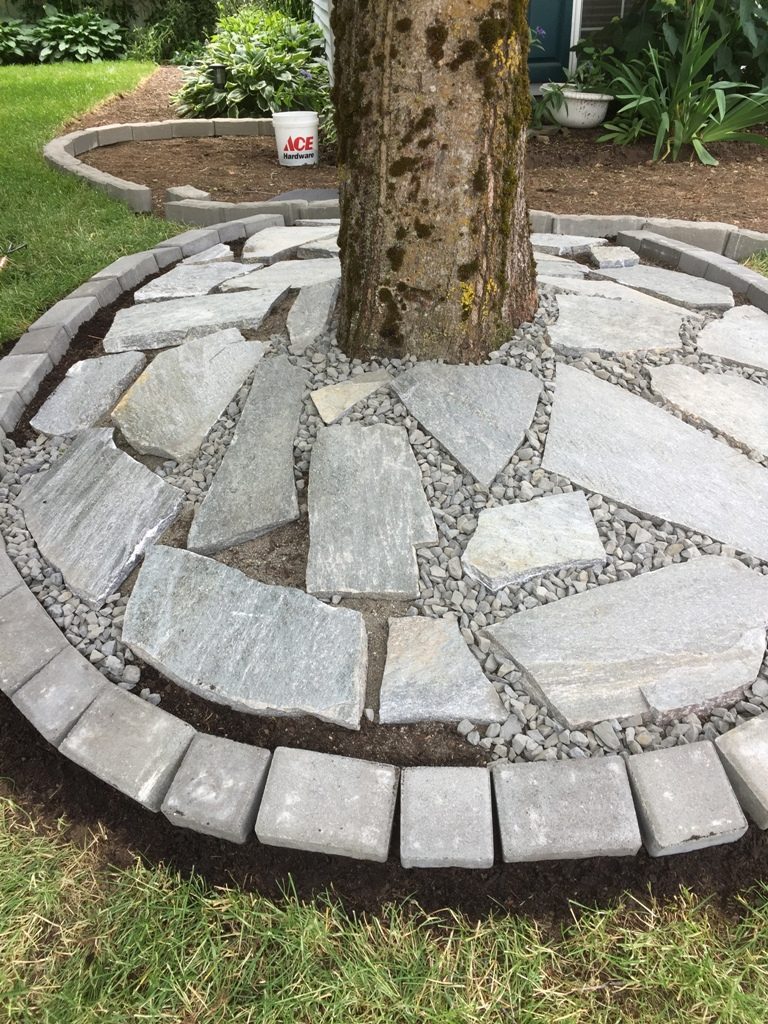
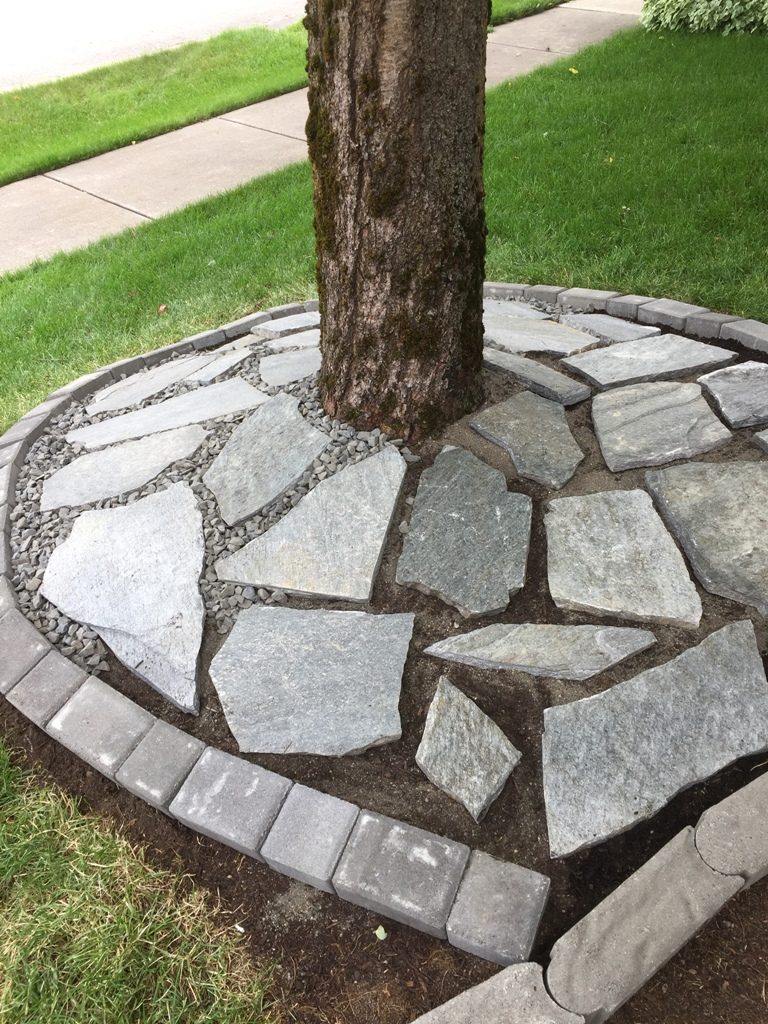
After adding the additional flagstone, I bought some cobblestone pavers to line the perimeter. I have used these before to create a patio under a garden bench in the back yard. They come in a pair, one large brick and one small brick and sell for $1.15 a pair. I bought 20 pair and ended up with an extra 3 bricks. To fill the spaces between the flagstone, I bought two Home Depot sized buckets small rocks. They sell for $5 per bucket. It’s more economical to buy the rock by the load, but I didn’t need that much. You’ll see that I didn’t add landscape cloth under the stones, I am hoping the grass and/or weeds don’t come up too badly. I have been using a mixture of vinegar, Dawn dishwashing soap, and Epsom salts to help prevent weed growth in other areas of the garden beds and figured I could spray that on any weed growth. Fingers crossed!
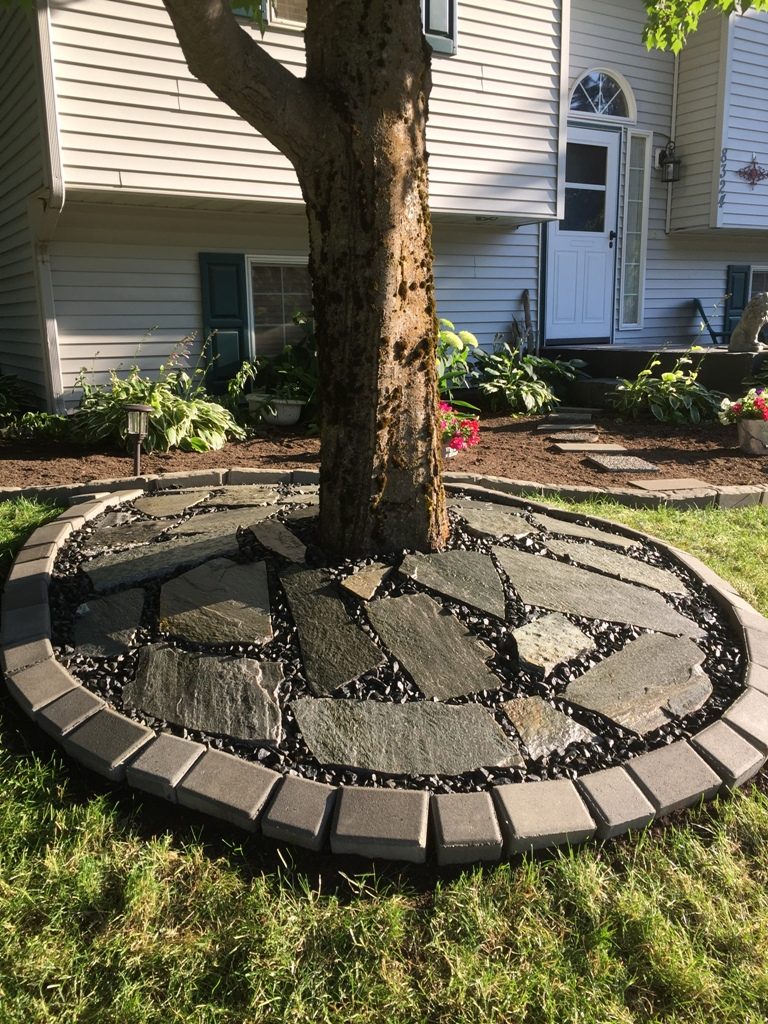
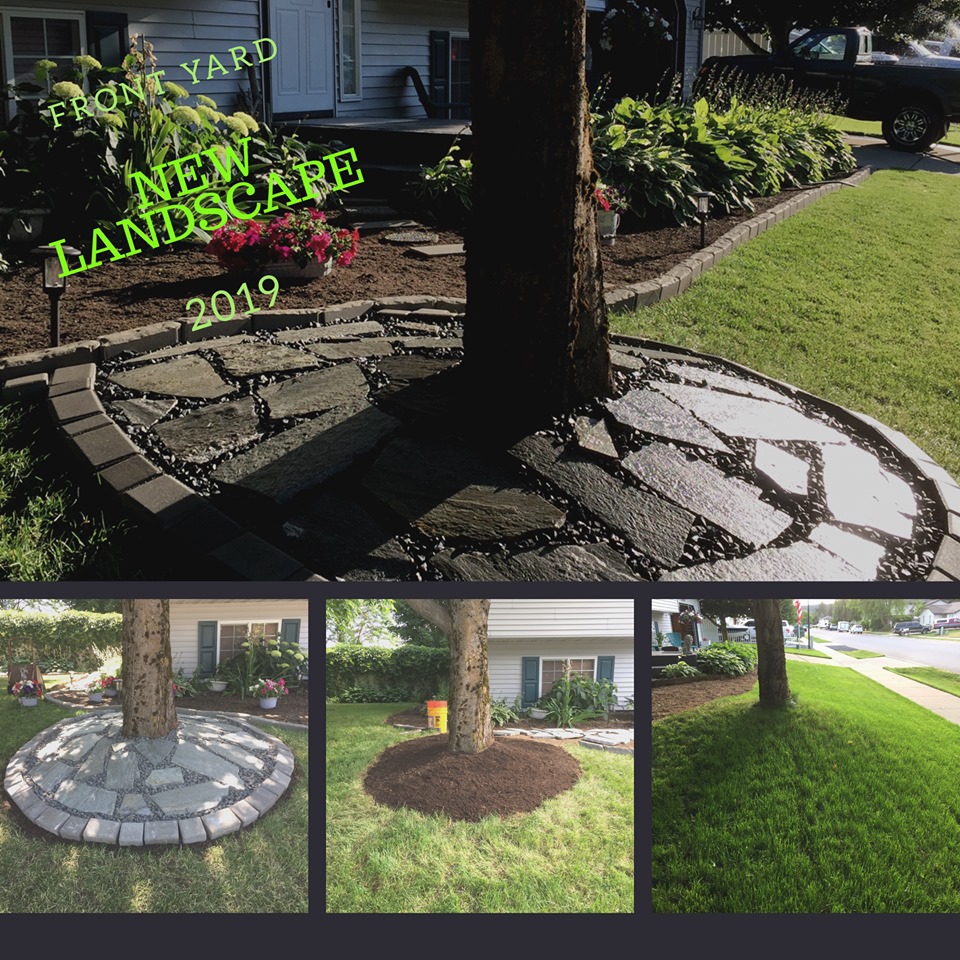
We are SO thrilled with the look of this landscaping around the tree! All the neighbors have commented on how nice it looks and how much they like it too! After the installation of the flagstone was done & we were watering the lawn next to it, we noticed how much the color of the stone popped when it was wet. I wondered if I could buy something that would create that look so I did a little research. I found an exterior lacquer that had great reviews and ordered it – even though it was $69 a gallon! After ordering it, I was back at the flagstone place buying even more stone for what would eventually be called Zone 3 of this project and asked the salesman, Mike, what he thought about using lacquer on flagstone. He said it would work but it could yellow. Hmmm, I didn’t want that. He said they use a water-based sealer that came in mat, shiny, or high gloss and would last about 2 years in a low/no traffic area. The price was $45. Water-based and over $20 less?! SOLD! I grabbed a gallon and returned the lacquer.
I bought an inexpensive garden sprayer for $7 to apply the sealer which made the process quick and easy. Mike had said two coats would give it a nice glossy finish so that’s what I applied. I waited about an hour and 1/2 between coats, making sure the 1st coat was no longer tacky before adding the 2nd one. He also said that if the stone wasn’t completely dry, the sealer would have a milky finish. We stopped watering for a few days before I planned to apply the sealer to

Two coats of sealer 
Finished landscape

Supplies Used
- Garden shovel
- Small garden rake
- Garden cutting tools – small & large
- Garden wagon
- Garden gloves
- Garden sprayer
- Small foam brush & roller
- 369 lbs of Flagstone @ $0.17 = $63
- 2 buckets of rock @ $5 = $10
- 20 sets of Cobblestone brick @ $1.15 = $23
- Soil &
sand - 1/2 gallon of sealer @ $45/gal
Instructions
- Measure the size of the area where you are removing sod
- Mark with a string line or garden hose
- Using a garden shovel, cut through the soil along the line for the new area
- Pull up the sod and set aside
- You can use the shovel to loosen the sod or a small garden rake
- Add soil & sand to create a level area for the Flagstone
- Arrange Flagstone
- Fill in spaces with small rock
- Use edging bricks to line the new area
- Apply 2 coats of sealer following Manufacturer instructions
Remember to grab your free Supply List & Instructions for this project – Get it here!
Next up – Zone 3!
Thanks for reading! If you love this project, please leave a Comment below and share with your peeps on Social Media! Stay tuned for Zone 3!!!


7 Comments
Afton Jackson
I absolutely love how you showed how to use something like flagstone around trees. This could really add some extra style points to our front yard while getting some much-needed contrast to all the plants and grass. I’ll ask for this for sure when I work with a landscaping expert in the area.
Jeanne
Thanks! I love the look of flagstone and we are fortunate that it is mined close by.
Anna
What a horror! It is like putting a burka on a tree. What were you thinking? Poor tree!
Jeanne
Hi Anna, I received similar feedback not long after I finished this project. I decided to remove the flagstone & rocks closest to the trunk and plant some ground cover. I will update the post to include this design change.
Frederick
That was actually a genius idea! I am new to the landscaping business and am always looking for new and creative ideas such as yours. That was definitely an outside the box idea, and it turned out to be absolutely marvelous! Thank you for taking to time to lay out how you accomplished such a work of art. I absolutely love it 🙂
Retaining Wall Repair Company
I really enjoyed the ideas shared in your post about landscaping the front yard, especially the focus on creating distinct zones that serve both aesthetic and practical purposes. I appreciate how you break down each aspect of the landscaping process to make it feel manageable. As someone who works with retaining walls in construction, I wonder if you’ve considered incorporating a low retaining wall in the front yard zone for added visual interest and functionality, such as defining planting areas or addressing uneven terrain. What are your thoughts on using retaining walls in this type of landscaping?
Jeanne
Thank you! The neighbors to our east have a retaining wall and it does provide much more usable space for landscaping. I do feel like our yard would benefit from one and would love to have one. Maybe some day in the future.