

Let’s Create Some Arbors!
Always on the hunt for fun features to add to the backyard garden, I decided to build a couple of simple arbors, one for the north corner and one for the south corner. After doing a little research on arbor styles, I headed to Home Depot to buy supplies.
I knew I wanted the arbors to be 8 foot tall, so I came home with four 8′ 4″ x 4″ posts, four 6′ 1″ x 4″ boards, two 1″ x 2″ boards 8 foot long and 4 decorative shelf supports. I bought treated wood since the posts would be ‘planted’ in the soil.
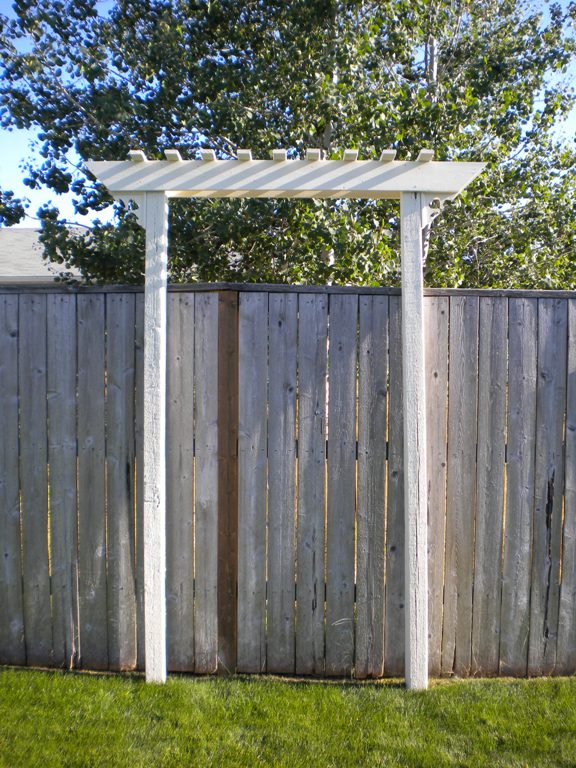
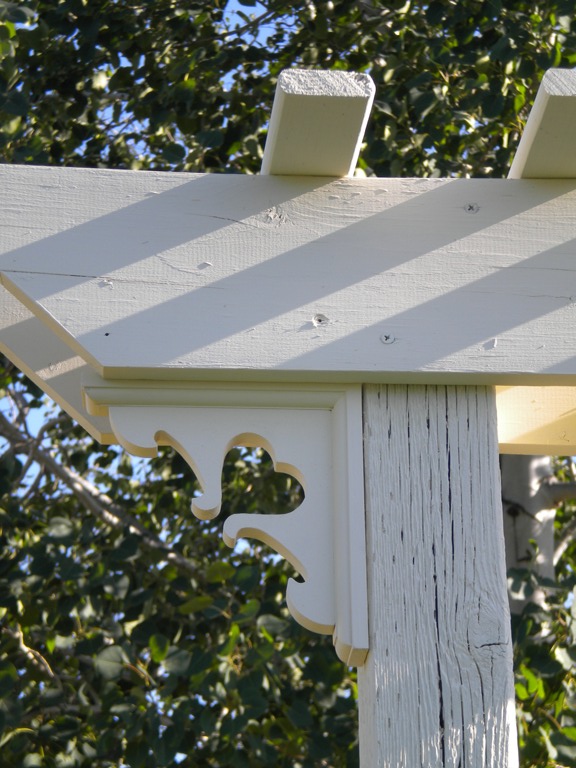
The first step in this project was to paint all the wood with some cream paint I had on hand; I applied two coats. Assembling the arbors was actually really quick and simple. To create the main structure, the only step really, was to attach the 1″ x 6″ boards to each side of the 4″ x 4″ posts at the top. To decorate the arbor, I then added 9 1/2″ pieces of the 1″ x 2″ board to the top of the 1″ x 6″ boards (boy, does that sound confusing – see picture). Finishing the decoration, I attached the two decorative shelf supports at the top of the arbor.
Once the arbors were built, hubby and I carried the first one to the back yard. It was at this point that I realized that my 8 foot arbor would not be 8 foot tall once I dug a hole to ‘plant’ the posts. Ugh!!! Redesign time!
Too keep the height of 8′, I had to figure out a way for the arbors to stay upright. After some research, I decided to ‘plant’ the posts into planters….so, off to town I went to find 4 planters large enough to support the arbors. I wasn’t able to find any cream ones so I bought green.

Decorative touches 
Shelf support decoration

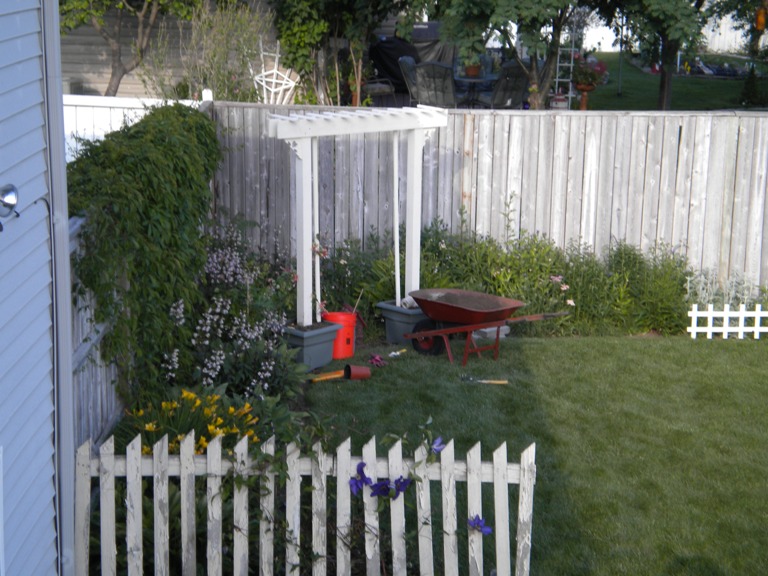
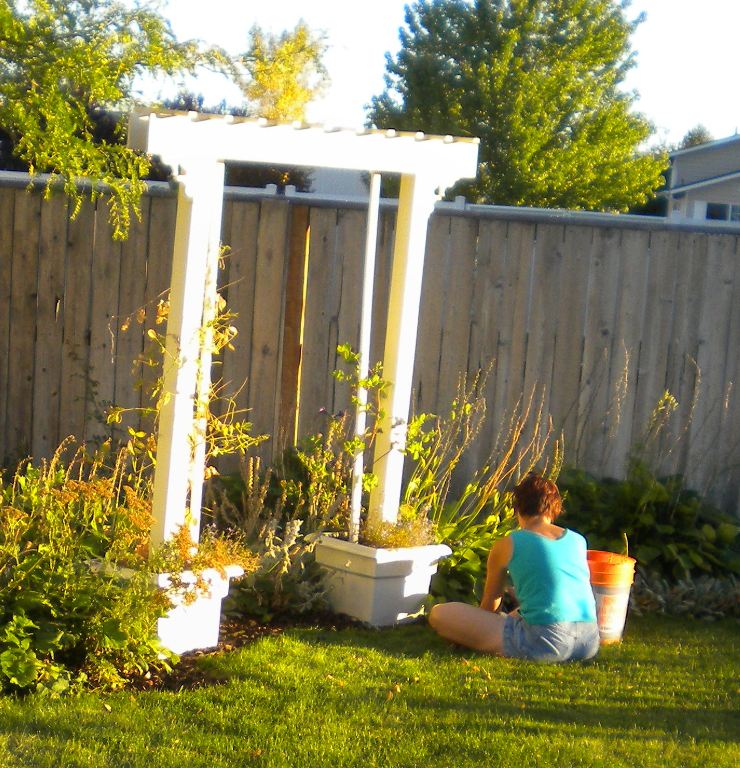
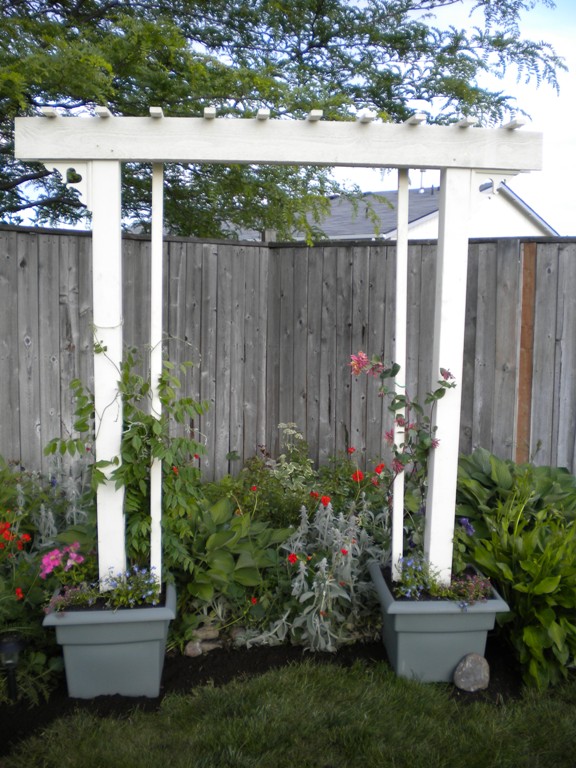
With planter boxes in hand, it was time to get back to the project. Starting with the first arbor, I set the planter boxes 4 feet apart, the width between the posts of the arbor. Adding some rocks in the bottom of each planter helped provide weight and would stabilize them when the arbor was set. Hubby and I then placed the arbor posts in each planter. While he held the arbor in place, I attached a stabilizing 1″ x 2″ post and then filled each planter with potting soil. Since I couldn’t find cream planters, I used the same paint used on the wood and applied two coats to the planters.

Adding potting soil to planters 
After planters were painted 
Planter 1 with plants 
Planter 2 with plants

Supplies for arbor
Cost of supplies is approximately $60. That cost will vary depending on where you purchase your supplies, what you have on hand (I had the paint), whether you use decorative shelf brackets or plain and if you use planter boxes or simply install your arbor in the ground.
- Two 4′ x 4″ posts – determine your height and add 1-2 feet as you will want to ‘plant’ the posts in the ground
- Two 1″ x 6″ cross beams – determine the length once you know the width of your arbor
- One 8′ 1″ x 2″ board – cut into ten 9 1/2″ pieces
- Two 8′ 1″ x 2″ boards for supports
- Two decorative shelf supports
- Screws
- Paint
- Planters if you prefer the look I have
Instructions
- Attach 1″ x 6″ cross beam to each side of the 4″ x 4″ posts using screws
- Cut the 1″ x 2″ into nine 9 1/2″ pieces
- Attach pieces to the top of the cross beams with screws or nails
- Attach 1″ x 2″ posts to the inside of the 4″ x 4″ posts using screws
- Using exterior paint, apply 2 coats
- Install the arbor in the ground or planter boxes
- Hang shelf brackets to both sides of arbor
- If using planter boxes, add rocks around the base of the 4″ x 4″ posts to stabilize then add soil and pack well
- Plant your choice of flowers, vines, ground cover in the planter boxes
For building supplies, see this post
For painting supplies, see this post
This post may contain affiliate links. Please read our Disclosure Policy for details.


5 Comments
Linda
Lovely post, Jeanne…Just a quick clarification – is the width of your arbour the 4×4 post plus the the 1×4 rail? In other words the arbour is not made with 2 posts at each end. I really like the look of it.
Good lucjk with the blog!
Linda
Jeanne
Hi Linda: The width between the 4×4 posts is about 4 foot. Yes, the arbor is made with the two 4×4 posts and held together by the header cross pieces – one screwed to the front of the 4x4s and the other to the back. Hope that makes sense 🙂 They are really easy to put together. If you build one (or some) please let me know!
Joyce
Jeanne; I like the added visual photographs. I am very visual so I learn best with photos. Your writing is wonderful and so is your blog.
Jeanne
Thanks Joyce! I’m happy to hear the photos help. I am also a visual learner so the more detail, the better for me. I appreciate your kind words and happy to hear you are enjoying the blog!
Pingback: