

Let’s Build a Tree Bench!
It was a Sunday and I received a text from Jen, our neighbor who lives across the street. She asked if I had any laxatives or stool softeners. I thought it odd that she hadn’t walked over to ask but then thought maybe she was not in a position to do so.
I answered that we did have both types of pills and asked if she wanted me to bring some over and if so, how many. She replied that she and the family were out of town but heading home. Well, now I’m even more confused….then she texted that the pills were needed for one of their dogs…? They have two large labs, a chocolate one and a black one. She then told me that their housesitter had noticed that the chocolate one, Kona, had managed to consume one of his rubber toys and hadn’t been able to do his ‘business’ since he had done so. But, she didn’t notice it until right before needing to leave for work. Jen felt like Kona would need some ‘help’ before they were able to get home from their trip and asked if we could do her a BIG favor!
At this point, I’m wondering just what might be involved in this favor she was going to ask us to provide. She asked if we could take a couple of pills and put them in a ball of cheese then go across the street and feed them to Kona. Tentatively, I said SURE! while asking hubby if he was game to go with me since he has been the one to go over to feed the dogs in the past. He said he would come along. I created two balls of cheese – one with pills and one without – and we walked over to see the dogs.
Both dogs were thrilled to have company and gobbled down the cheese balls – I had taken the one without pills for the black lab so he wouldn’t feel left out. We then hung around for awhile and played with them before heading back across the street. Jen texted after they got home to say Kona was doing great!
While we were playing with the grown pups in Jen’s backyard, I admired her wrought iron tree bench. It was there when they moved into the house and had that nice, worn, antiqued look that I love so much! We have a large maple tree in our backyard and seeing her bench had me thinking that adding one that encircled it would be a great addition to the backyard landscape. So, the hunt for one began!

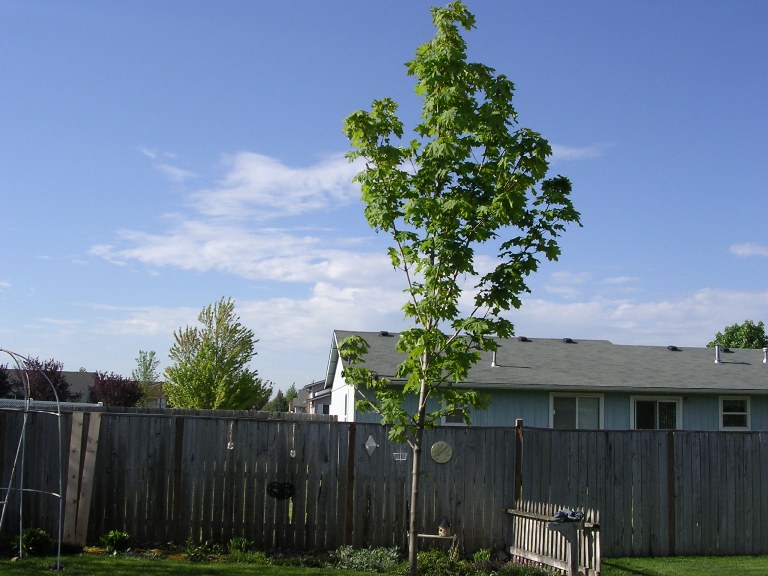
Newly planted maple tree 2006 
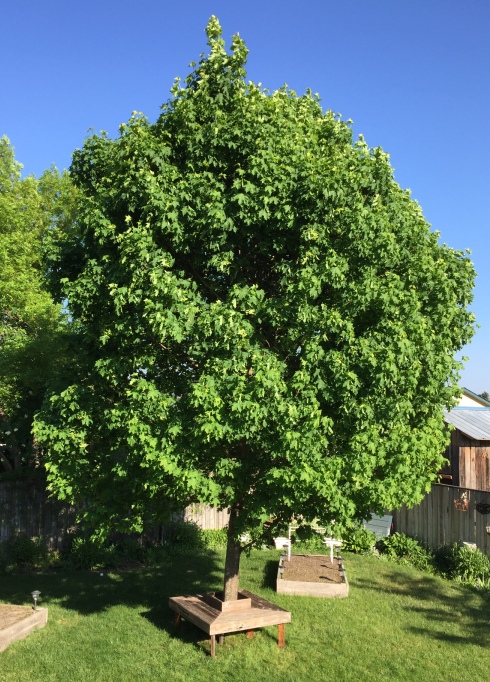
Maple tree 2018

Have you searched for wrought iron tree benches? They are spendy!!! Gorgeous, but spendy $$$! Hundreds of dollars. I wasn’t ready to invest that kind of $$, so I started looking for one to buy 2nd hand but didn’t have any luck. After much searching, I decided this new item would have to wait. About 6 months later, though, Mother Nature came to the rescue!
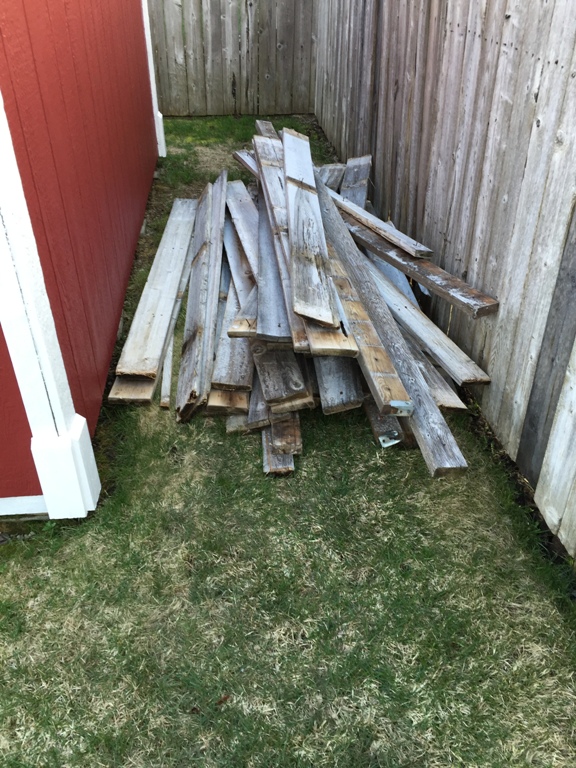
It was November and I was out of town visiting my family in sunny Cali when I got a text from hubby breaking the news that we had a huge windstorm and a section of our fence fell down. Lovely. I wasn’t overly surprised as our fence is old and weathered. While I love the look, we have had to either replace or nail up fallen boards many times. The section that fell was on the west side of our property so we asked our neighbor, Jake, if he would be interested in building a new section if we paid for it; he agreed and started rebuilding it the following week. I came home from work on day 2 and Jake was digging holes for the fence posts. I asked where the old boards were and he said they were on his burn pile!!! – gasp! – old weathered wood in a burn pile??!! Even though I had no idea what I would use the wood for, I asked him to stack the old boards behind our shed; with a confused look, he did just that.

Weathered fence planks 
New section of fence

The old fencing laid behind the shed for months until one day as I was browsing Pinterest, I saw plans for a wooden tree bench! Oh, YES! I looked over the instructions and figured it was a project I could tackle and best of all? FREE! Well, almost free, I would still need to buy some screws. (List of supplies and full instructions are at the bottom of this post. Or, if you prefer to buy a Tree Bench, Amazon has some great options, just click on their link to see what they are)
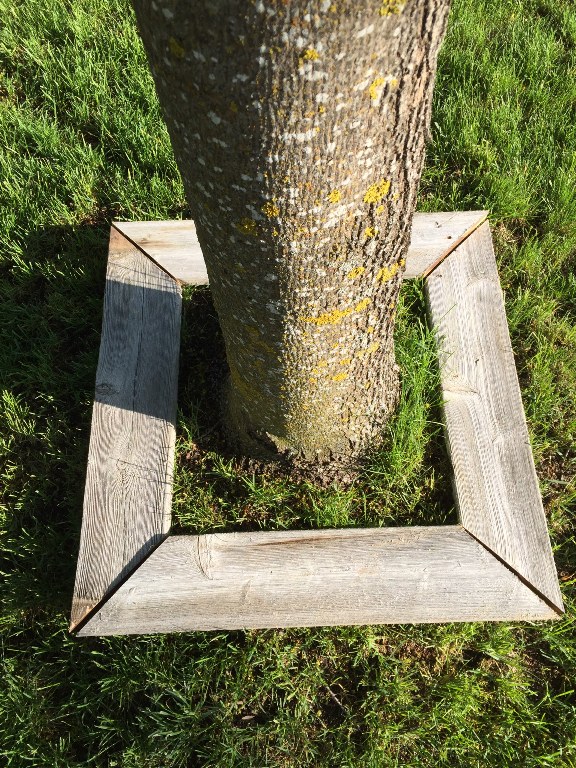
The first step in building the tree bench was to decide how large to make the inside row for the seat. I measured around the tree, allowing for growth then cut 4 pieces of wood. Before proceeding, I took them out to the backyard to make sure they were the right size.

First step in the tree bench project 
Viewing from a distance

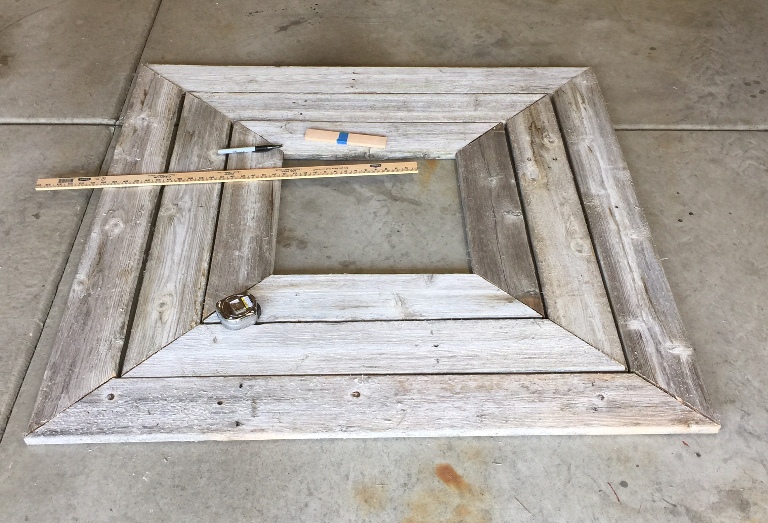
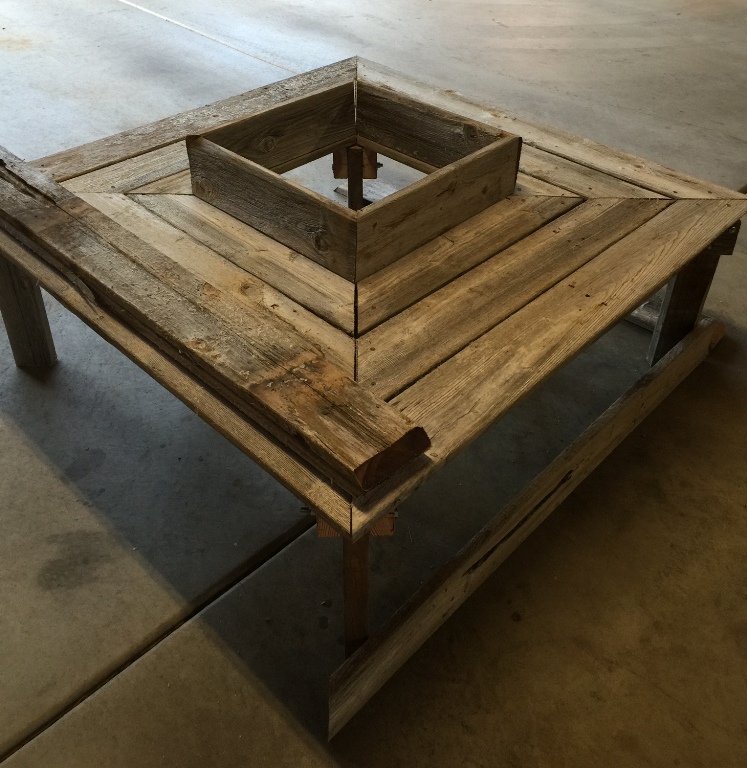
Once I had confirmed that the first row for the seat was the correct size, it was time to cut the remaining two rows. I used a thin piece of wood as a spacer to decide what size each piece needed to be to form the next rows. I found that using my compound miter saw for the 45 degree cuts worked very well! Laying the seat out on the garage floor was a great way to view the size and also provided an even surface to work on.
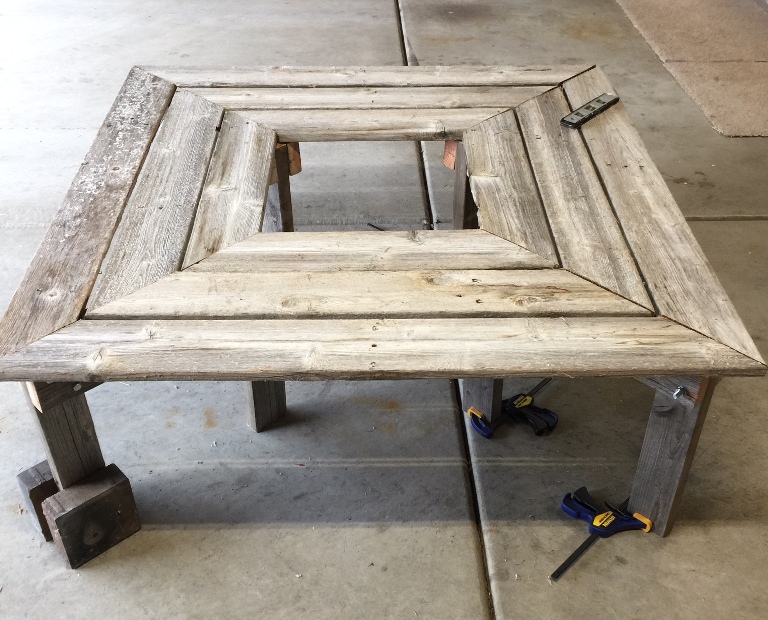
Now that the seat section of the bench was cut, it was time to decide on the height. Measuring an existing bench, I cut eight 18″ sections of a 2″ x 4″, two legs for each corner of the bench. I also cut eight 18″ sections of 2″ x 4″ to use as supports for attaching the legs to the seat. After all the sections were cut, it was time to create the legs. I drilled holes in the supports and then attached them to the legs with nuts and bolts (see picture below). Once the 4 legs were assembled, I propped them upright on the garage floor and began screwing each seat board to them beginning with the outer row. Next to be cut was the seat back and the facia.

Legs completed 
Attaching top of bench to legs 
Back of seat sections cut 
Cutting facia pieces


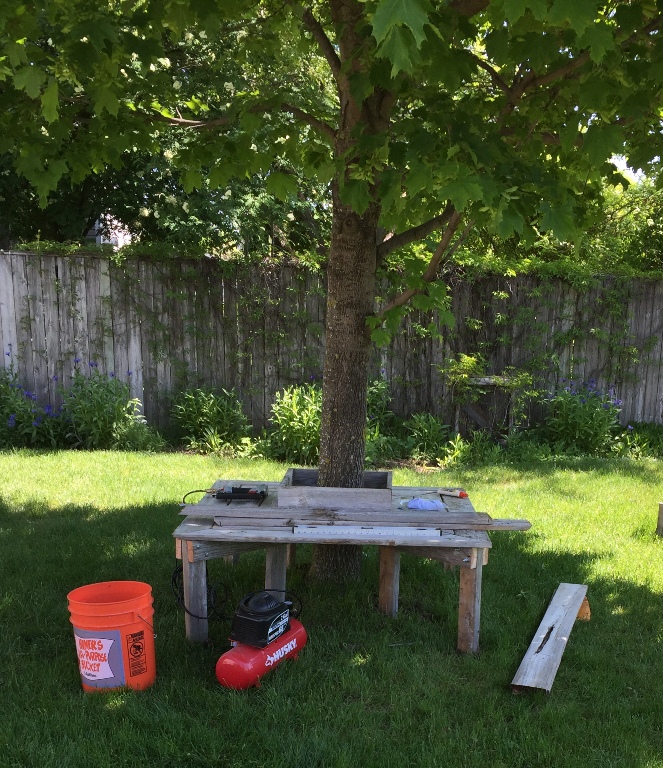
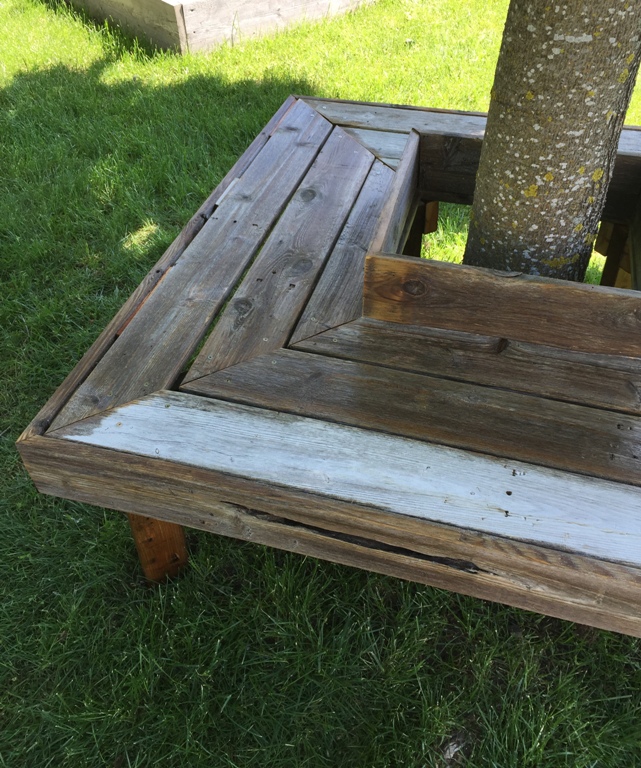
In order to install the bench around the tree, I needed to leave one side of the seat open. After securing three sides of the bench seat to the legs, hubby and I carried it to the backyard and set it around the tree. With the 3-sided bench in place, I was able to attach the last three pieces of the seat. Next, using a nail gun, I attached the back pieces and facia to the seat to complete the bench. The final step in this project was to apply a sealer to the wood to help protect it from the weather.

Attaching 4th side of seat 
Back & facia attached 
Applying sealer 
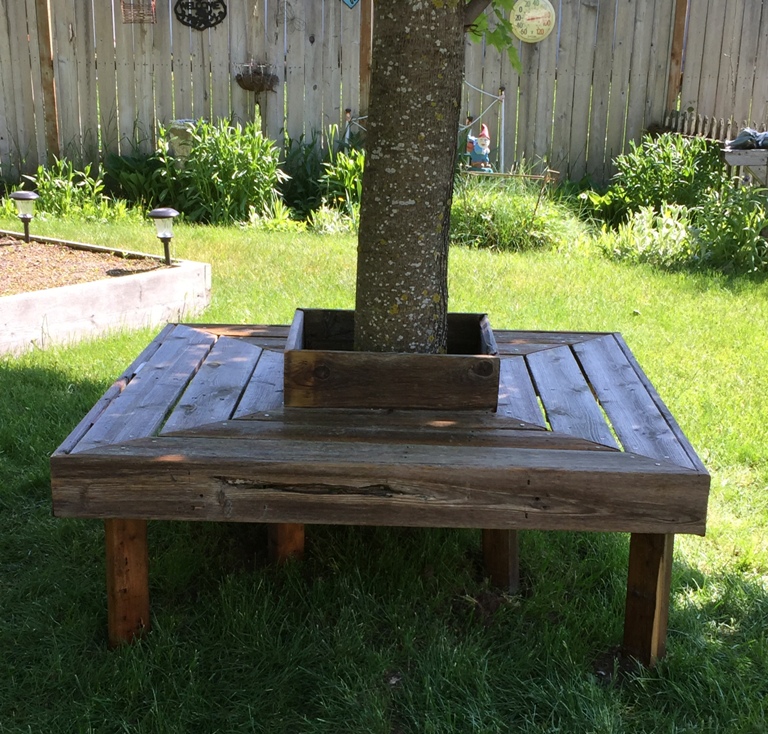
Finished Bench 
Tree bench created with reclaimed fence wood

Supplies Needed
- Four 8’ pieces of 1” x 6” wood
- Three 6’ pieces of 1” x 6” wood
- One 6’ piece of 2” x 4” wood
- Screws
- 16 3” Bolt/Nut sets
- Drill
- Skill saw or Miter saw
- Brad nail gun
- Weaterproofing sealant such as Thompsons Water Seal
- Paint brush
Instructions
- Decide how large to make the inside row for the seat
- Using your saw, cut 4 pieces of wood for the inside row
- Dry fit around the base of your tree
- Cut 4 pieces of wood for the 2nd row
- Cut 4 pieces of wood for the outside row
- For legs: cut eight 18″ sections of a 2″ x 4″, two legs for each corner of the bench
- Cut eight 18″ sections of 2″ x 4″ to use as supports for attaching the legs to the seat
- Drill holes in the supports & attach them to the legs with nuts and bolts
- Attach 3 sides of each row of the seat to the legs with screws
- Leave the 4th side open and attach on site
- Once all rows of the seat are attached to the legs, using a nail gun, attach the seat back and facia
- Apply sealant with brush to protect the wood from weathering to quickly


15 Comments
Tracy
I LOVE this!! My Daddy did this with one of our HUGE oak trees we had when I was a child. He has since passed away, and the tree has been removed, but such great memories.
Jeanne
Thanks Tracy! It’s a fun project and we also love it! That’s a great memory of your dad 🙂
Mandy
I’m a forestry girl and a sucker for anything trees. I love this! It will also protect your tree from the weedeater damaging the bark. Great job on such an easy to follow tutorial.. I’m going to try and talk my husband into this!
Jeanne
Protecting the tree was one of the reasons I wanted a bench around it. I have added cement blocks around my smaller trees for that reason. It’s a fairly quick and pretty simple bench to build. Let me know if hubs takes you up on the request 🙂
Jaden
Your bench is beautiful and your tutorial is very detailed and easy to follow! Great job!
Jeanne
Thanks! I just love it and am happy I was able to use the wood from the fence. I’m glad the tutorial was easy to follow, I tend to get a bit wordy.
Ashley
Such a fun and practical project. My children would love to have a tree bench like this one in the yard.
Jeanne
It was a fun project and surprisingly simply to do! Yes, your kids would love one like it! If you build one, please share.
Trish
I’ve always wanted a tree-bench. Really loved reading your adventures on the way to getting yours!
Jeanne
I had always wanted one too but never thought I’d be the one building it! It was a lot of fun and I love looking at it.
Vanessa
You made this look so simple to build, and it makes me wish I had a tree in my yard. Great story too!
Jeanne
Thanks! It actually was pretty easy 🙂 I’m glad to hear you enjoyed reading it!
Kathryn Felgenhauer
Hilarious intro ! Love the idea of a tree bench – thanks much for the tutorial !
Jeanne
Thanks! It was such an odd request and I am SO happy hubby was home with me on that adventure with the neighbor’s dog! You’re welcome! Let me know if you give it a try!
Pingback: