

Oops! Crown Molding
A few years ago, I decided to install ‘crown’ molding in the living room, hall, master bedroom and office. Of course, I didn’t have the money to buy real wood or real crown molding. What I bought was MDF trim. Now, there’s nothing wrong with being frugal or with using MDF….combine that with inexperience and lack of tools and you get something akin to what you see in this first picture.
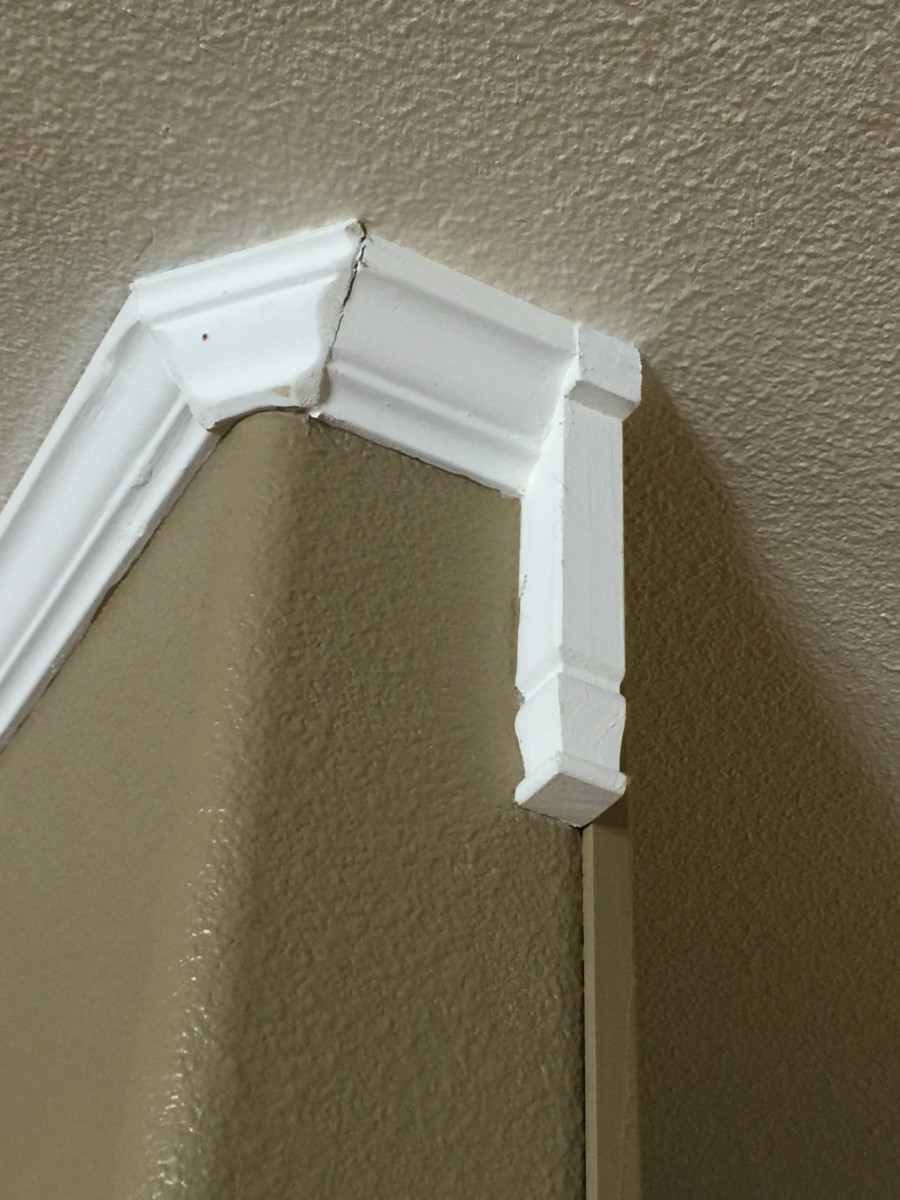
When I installed this molding, my tools consisted of a hammer, finishing nails, caulk and a miter box. I didn’t know how to finish off the edges, so I bought wood pieces and caulked them on. Honestly, I used SO much caulk that I was worried I wouldn’t be able to remove the pieces in the future if I wanted to change the look. I also have a difficult time hammering in a finish nail and there were many that ended up bent and I’d have to pull them out. Several were just hammered into place, bent and all. Inexperience mixed with impatience is not a good thing!
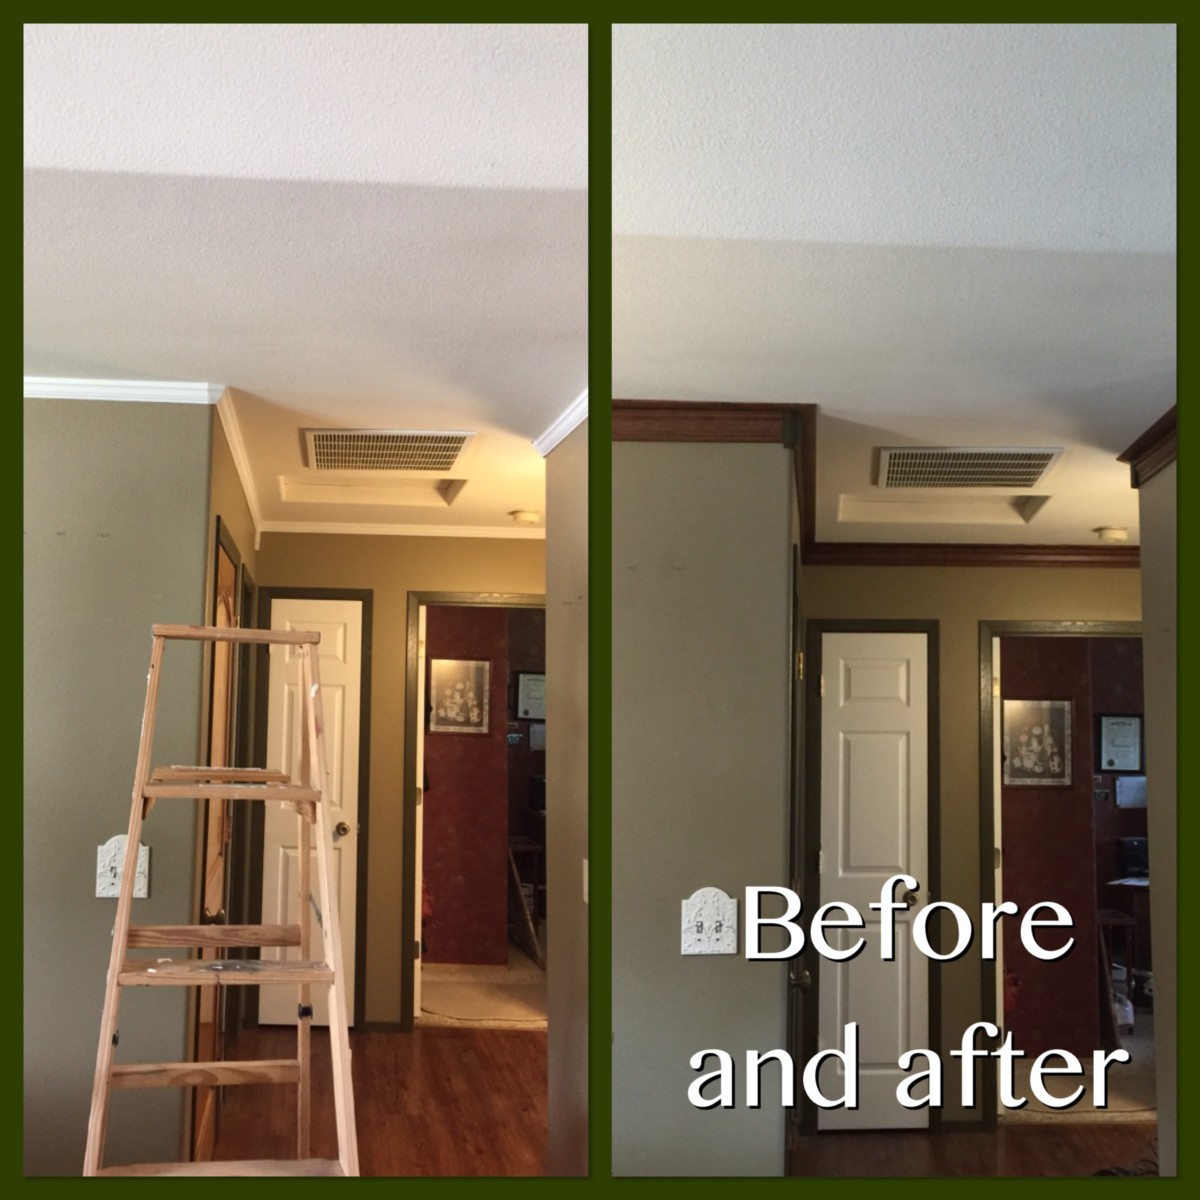
Recently, I did get up the courage to rip down the old ‘crown’ molding in the hall and living room. Shockingly, it came down with hardly any elbow grease! It did rip a bit of the wall texture in a few areas but not enough to matter. I have done some research on installing actual Crown molding and it does take skill and patience. While I might have the skill with my miter saw now, I lack the patience to give it a try, so I devised an alternative style. I used the same molding I’ve been using to trim the doors and replace the baseboards, added a piece of smaller baseboard to the mix and ended up with a custom look that both hubby and I really like. The best thing about it is the ease of cutting and installing it.
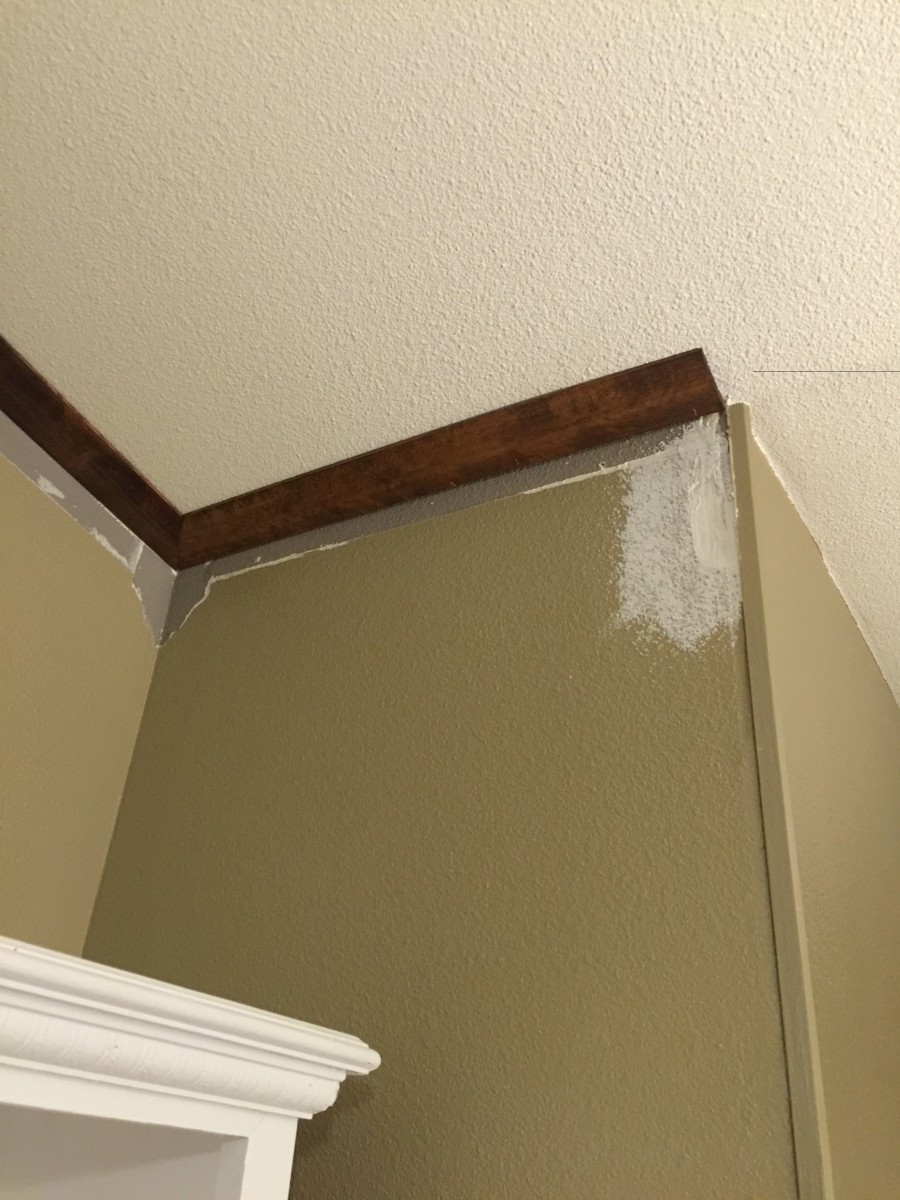
The trim I’ve been using around the doors and for the baseboards is wood. I first gave each piece a quick sanding with 100 grit sandpaper, wiped down the dust, stained and applied polyurethane. Next, each piece was cut to size. Installing was quick and easy with the nail gun and since the trim is reasonably light weight, I could do it my self 🙂


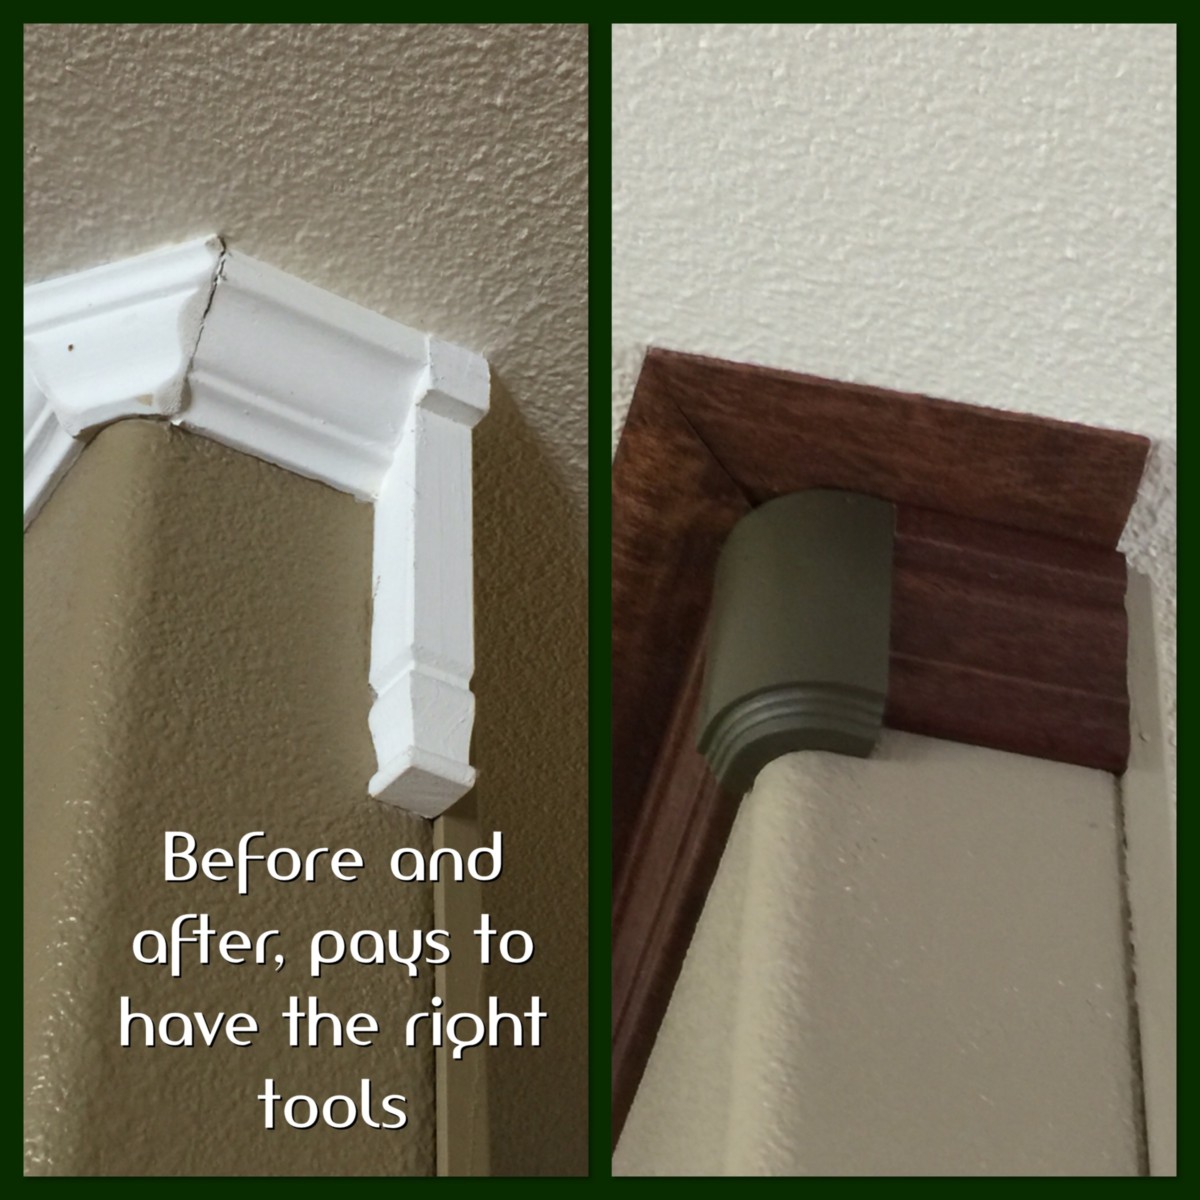
Before & After crown molding
Lessons Learned
- Do some research on the project you have in mind
- Ask for professional advice ( I’m not saying I’d have taken the advice, but asking anyway would have been a good idea)
- Look into obtaining the right tools.
- You don’t need to buy new, there are several options for purchasing 2nd hand for your starter tools…Habitat, Craig’s List, thrift shops. Or put them on your Christmas list! One of my favorite birthday gifts was from my team at work – a skill saw!!!! I am in love with both my compound miter saw – a bit over$100 at Lowe’s and my nail gun – around $20 at Harbor Freight; course, you need a little compressor too. My son had one here that I used in the beginning.
- Finally, if you can afford it, use real wood
For building products, check out this post
~ We May Earn Money Or Products From The Companies Mentioned In This Post ~


