

Let’s Repair & Repaint the Storage Shed!
Yes, we have a storage shed! Yes, we have too much stuff. However, most of our stuff is in the house. I don’t know if that’s a good thing or a bad thing; it’s just how it is. We bought the shed when hubby was organizing & running softball tournaments. It was mainly used for storing softball equipment & awards to be given out. We also used it (and still do) for our Christmas decorations & outdoor furniture cushions, decor, etc. The shed was built in 2005 and I have painted it a few times. All those details can be found in this post. It’s been a few years since the last time I painted it so it was time to repaint.

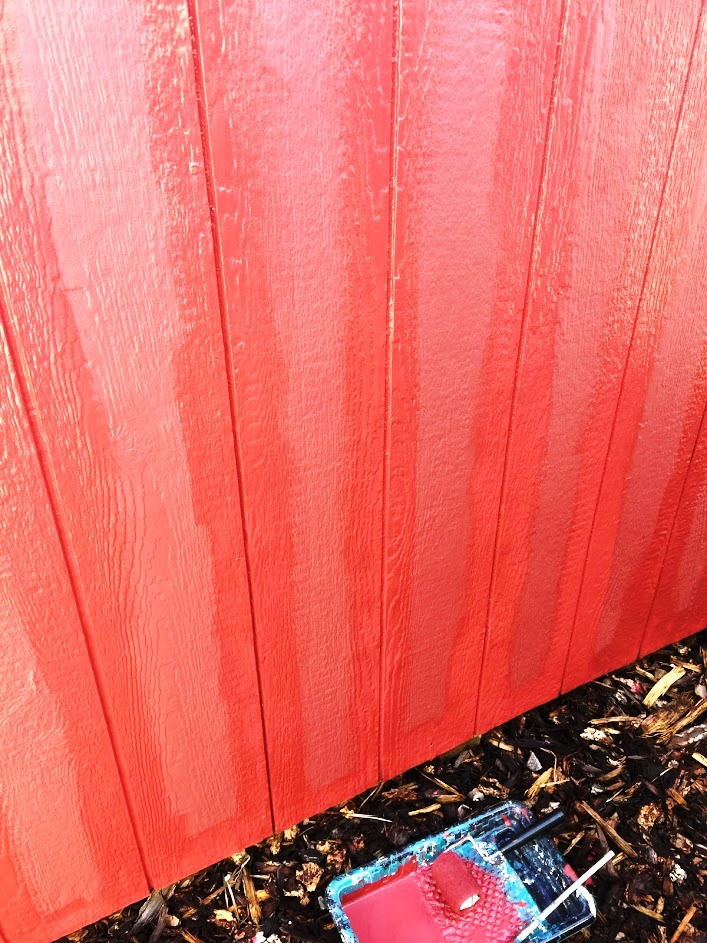
Time to repaint
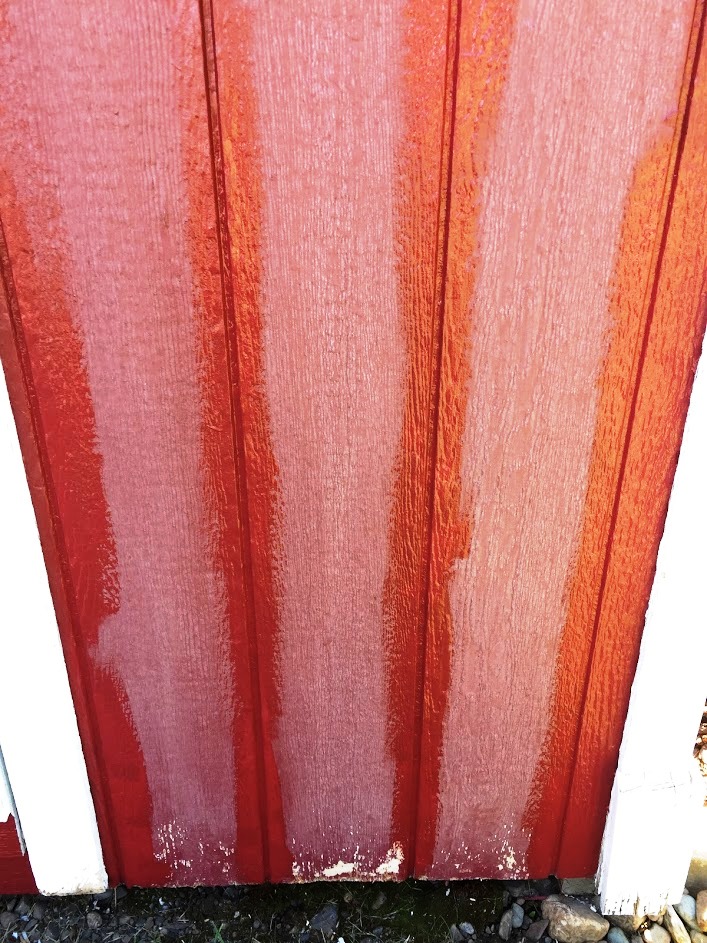
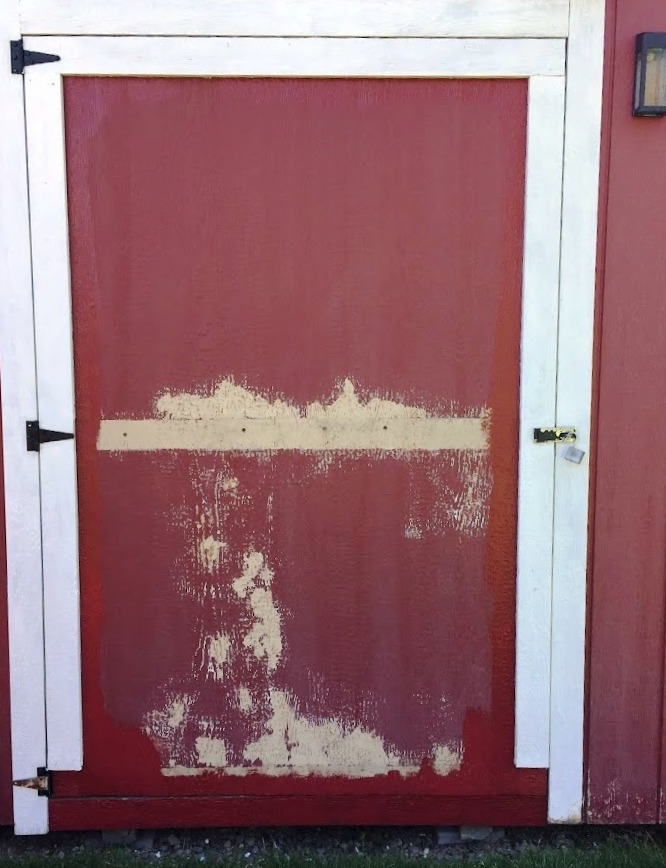
I had been thinking about repainting the shed for months but with the hotter than normal temps this year, I just kept putting it off. As you can see, the red has faded badly, especially on this side of the shed where the sun beats on the wood all day! The paint on the letter V has started to peel off. I took advantage of a summer day that was cooler and started on this project.


The first step was to assess the shed. Was it going to be just a repaint or did I need to chip away cracked paint first? The door of the shed gets full sun until the evening and gets wet when the grass in front of it is watered, so this paint wears faster than the other 3 sides of the shed. Because of those things, I wasn’t surprised to see that the paint on the door was cracked and lifting. It didn’t look too bad so I grabbed a putty knife and started chipping it off.
Finding damage

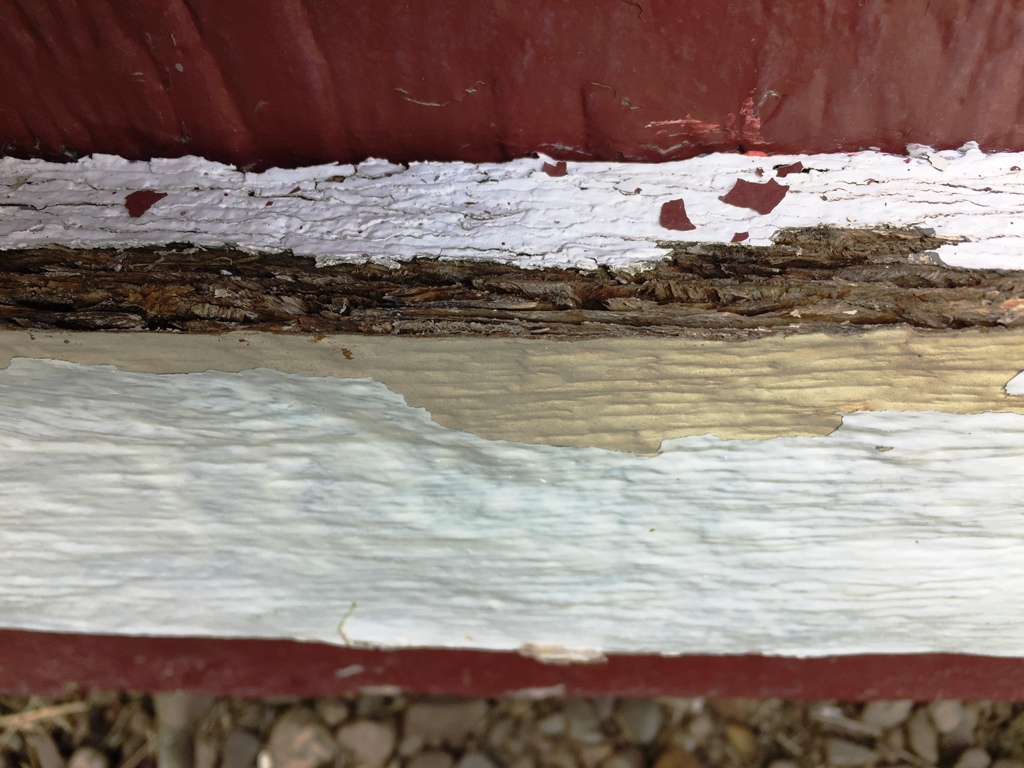
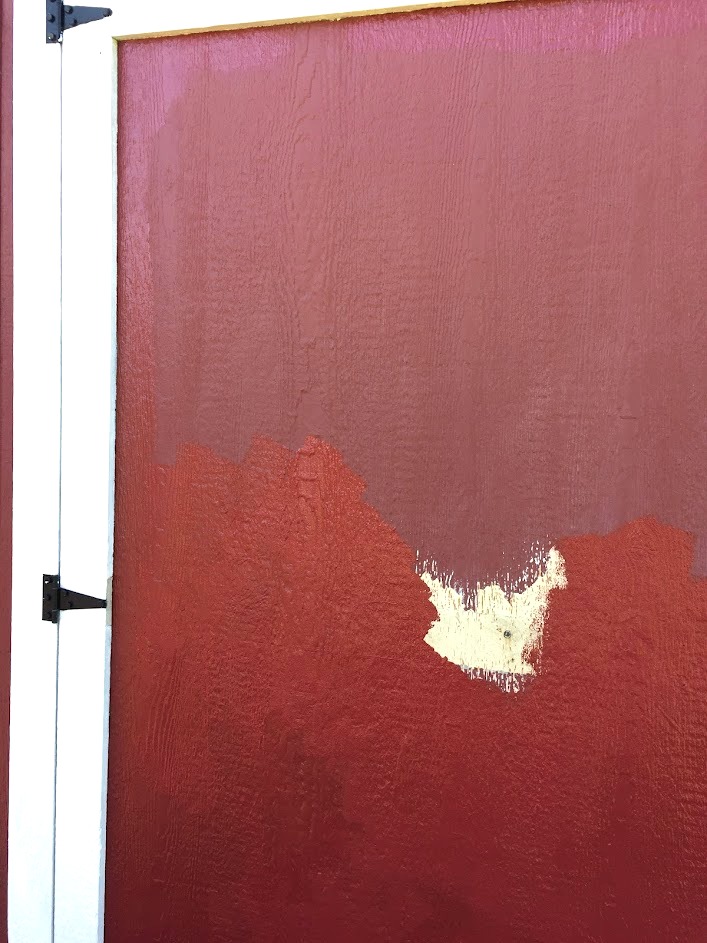
After removing the loose paint on the door, I started chipping it off the lower trim. After removing some of the loose paint, I noticed that the trim was damp – even with all the intense heat we had been having.
When the shed was built, we weren’t thrilled that particle board was being used for all the trim, but using it kept the cost down but now it was becoming an issue. The trim was not only damp, it was swollen and coming apart. Because the trim was swollen, the hinge hasn’t been working correctly. To open the door, we have had to lift up on the handle. This was no longer a simple repaint job. I was going to have to replace this piece of trim also.

Removing trim
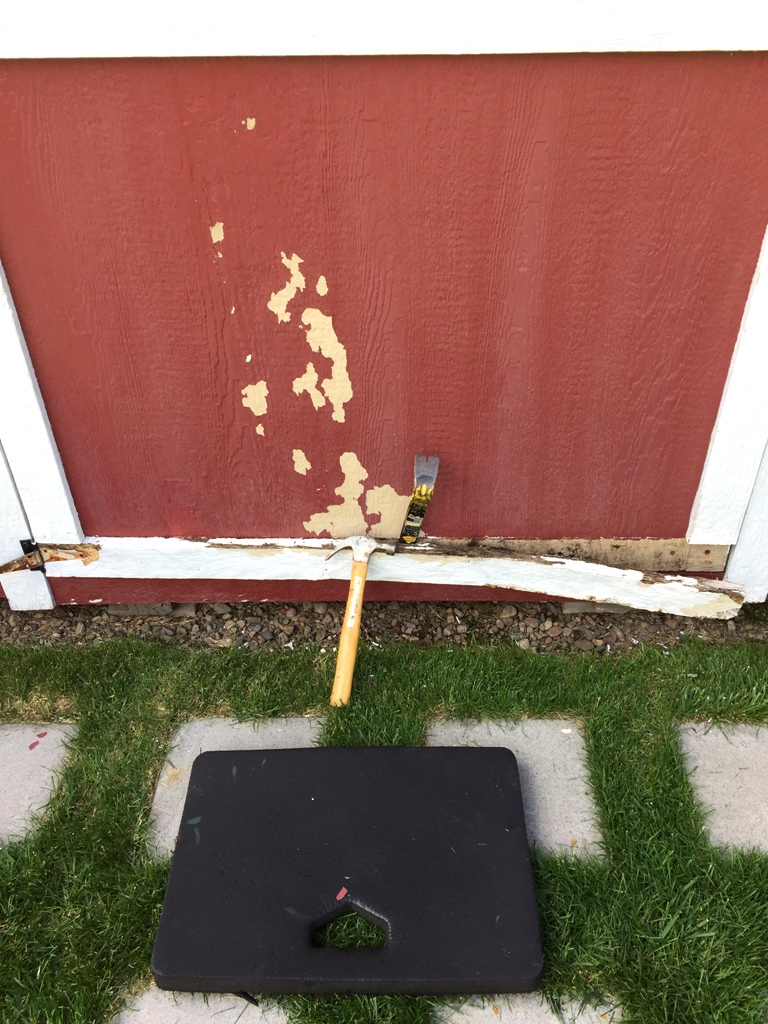
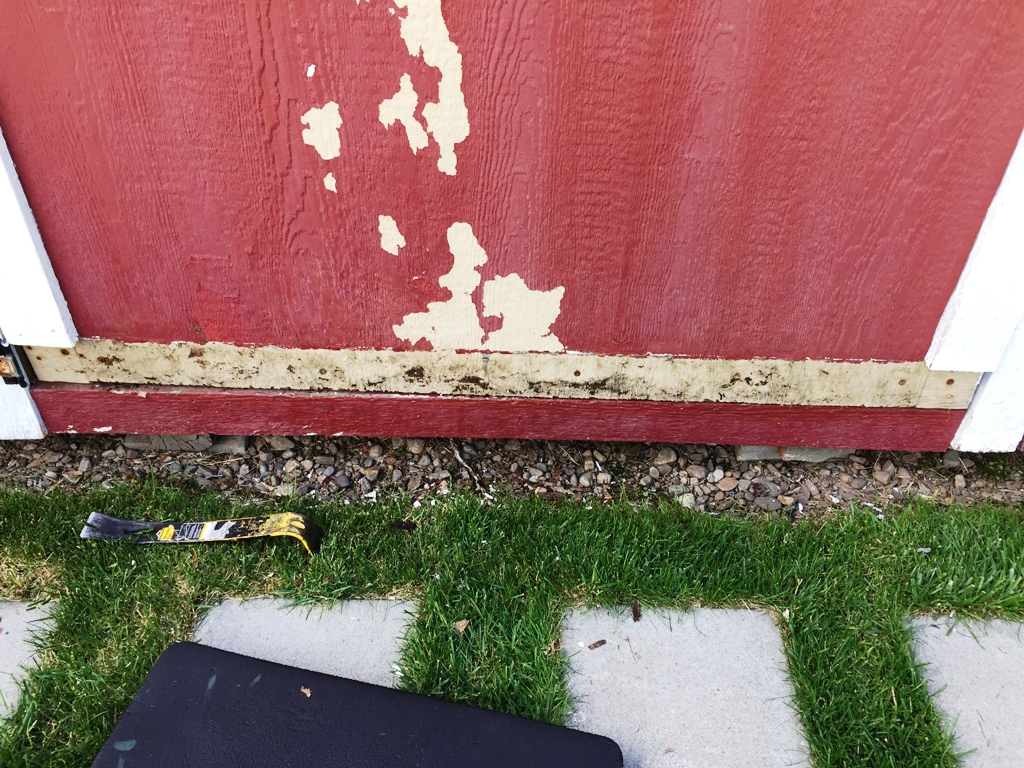
In order to remove the trim, I had to disconnect it from the hinge. I removed the 3 bolts that held the hinge to the trim then used my crowbar & a hammer to remove the board. The wood had been nailed to the door so the trim came off easily. After removing the bottom piece of trim, I assessed the rest of the trim on the door. All of the trim with the exception of the middle crossbar was still in pretty good shape so I decided to just remove the crossbar at this time.
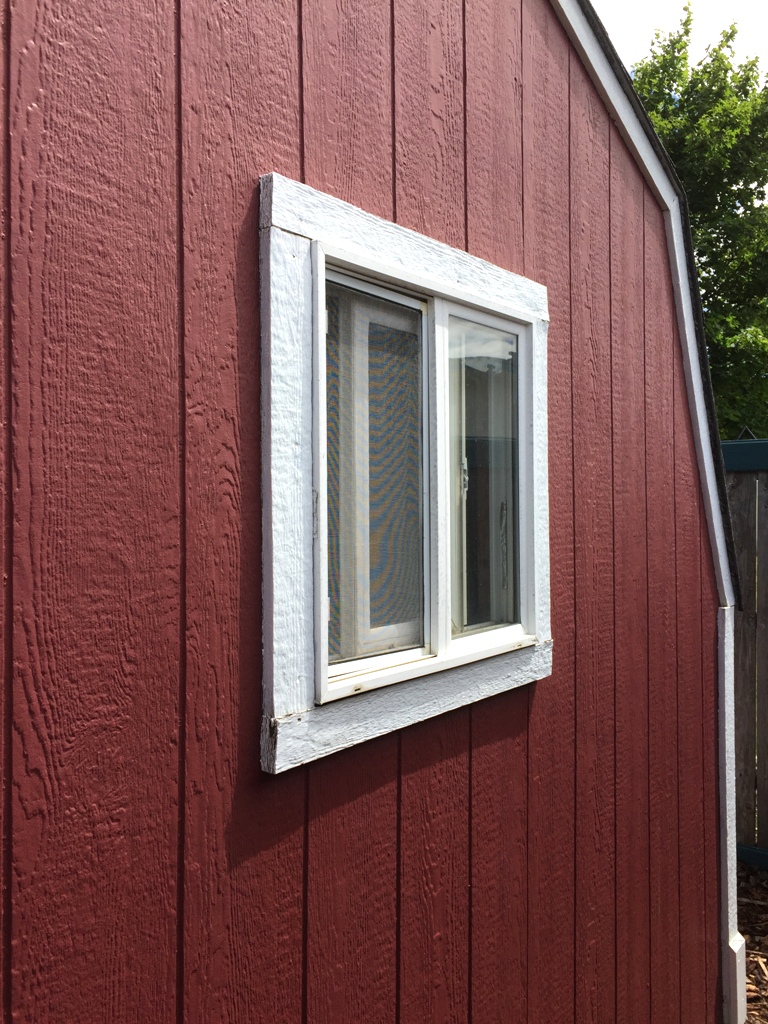
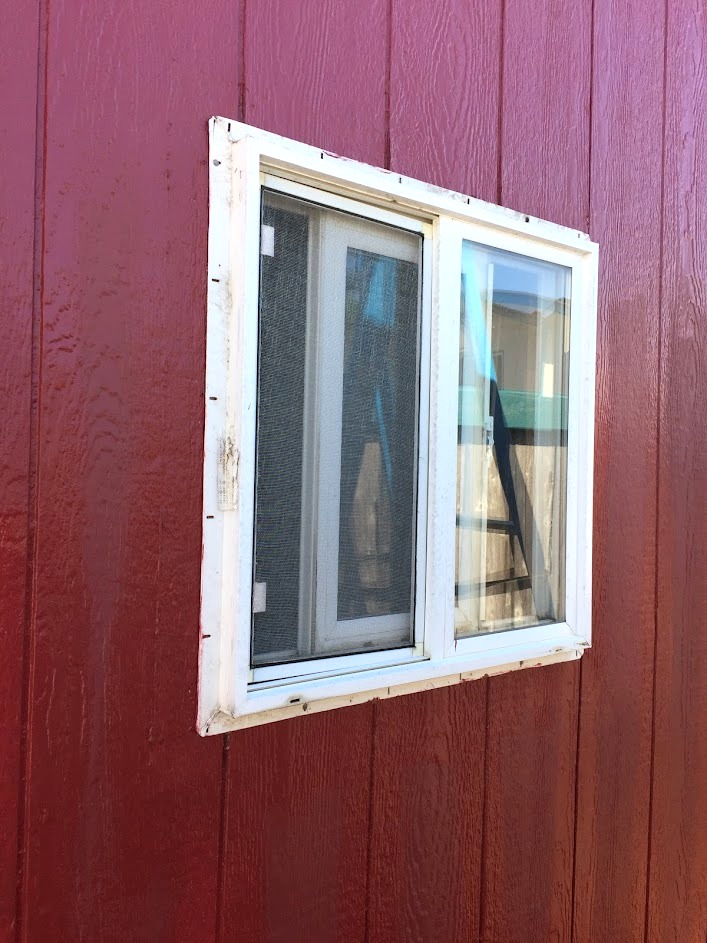
With the trim removed from the door, I thought I should check the window on the opposite wall. This side of the shed gets very little sunlight so the trim was not quite as bad but like the door trim, it was starting to swell. I removed the 4 pieces of trim around the window using the hammer and crowbar.


Here is the backside of the lower piece of trim. It was in really bad shape! I had a piece of plywood that was the right size but I realized I would just have to replace it in the future so I decided to use some of the wood saved from our old decking.
Making new trim

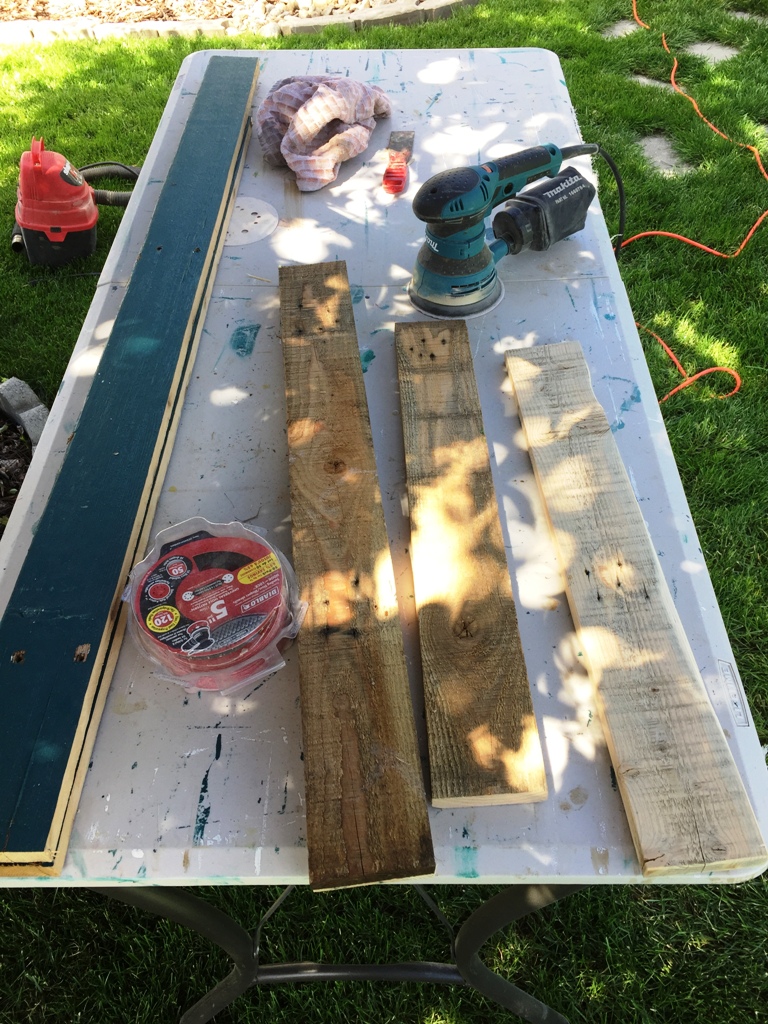
For the door trim, I used a 1″ x 8″ board. I clamped the wood to a couple of sawhorses so it would be stable when I cut the board in half. Using a yardstick & pen, I marked the board & then used my circular saw to cut along the line. Once the board was cut in half, I cut the two pieces to the length of the original trim.
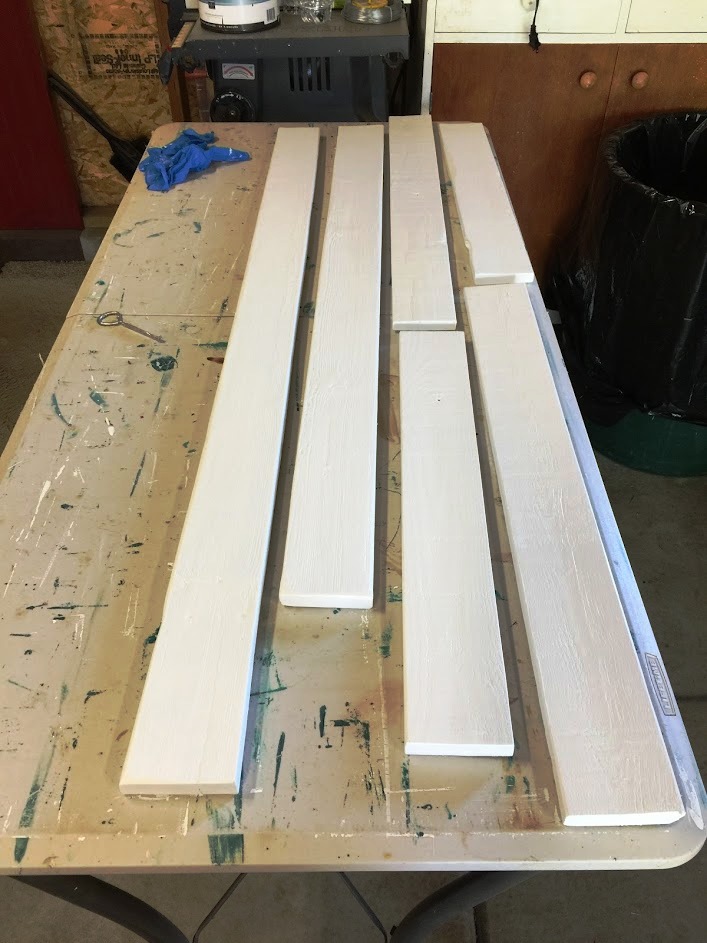
I had small pieces of 1″ x 4″ boards that were perfect for the window trim. These pieces were a little rough so I used 120 grit sandpaper and smoothed them out with my orbital sander then trimmed them to length with my miter saw. Since the wood I was using for the door had already been painted, I only needed to sand the cut edge. Once all six pieces were ready, using a paintbrush, I applied a coat of primer and two coats of white exterior paint.

Sanding trim boards 
Trim pieces painted
Painting the shed
To make the painting job easier, I decided to paint the shed before installing the trim. When I paint the shed, I use a 1 1/2″ angled brush and paint the grooves. After the grooves are done, I use a small roller for all the flat surfaces. You could use a large roller for this part but I find it easier to have the paint in a smaller container so I can carry it up the ladder with less effort. I also primed the letter V and then applied two coats of black exterior paint using a paintbrush.
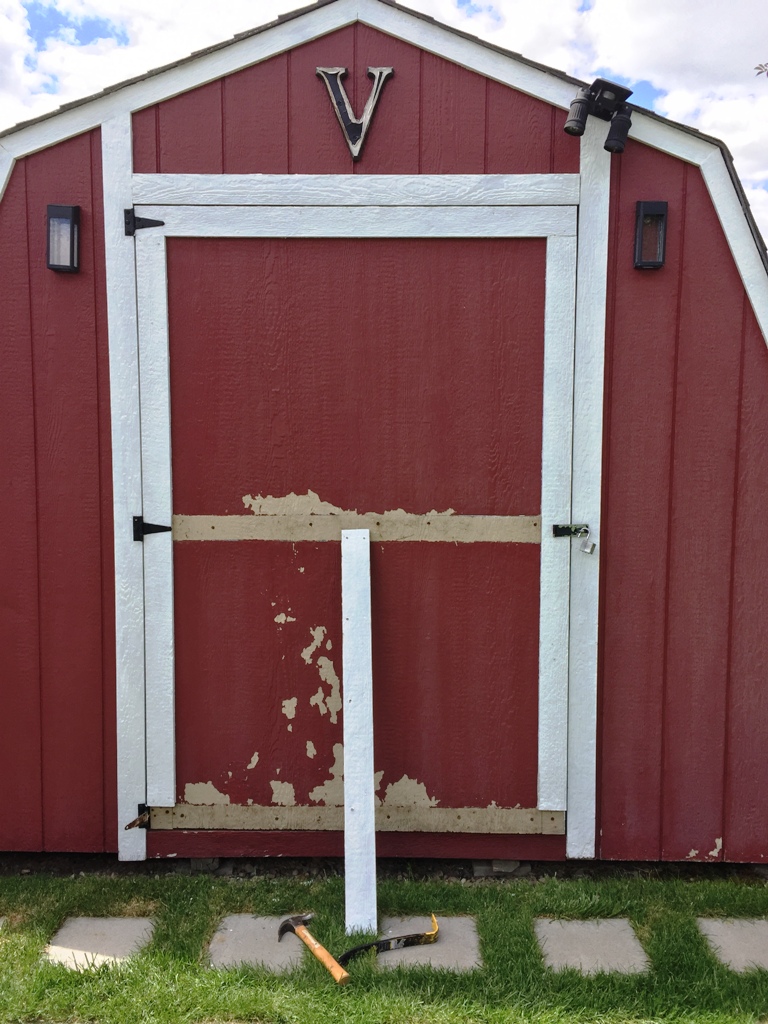
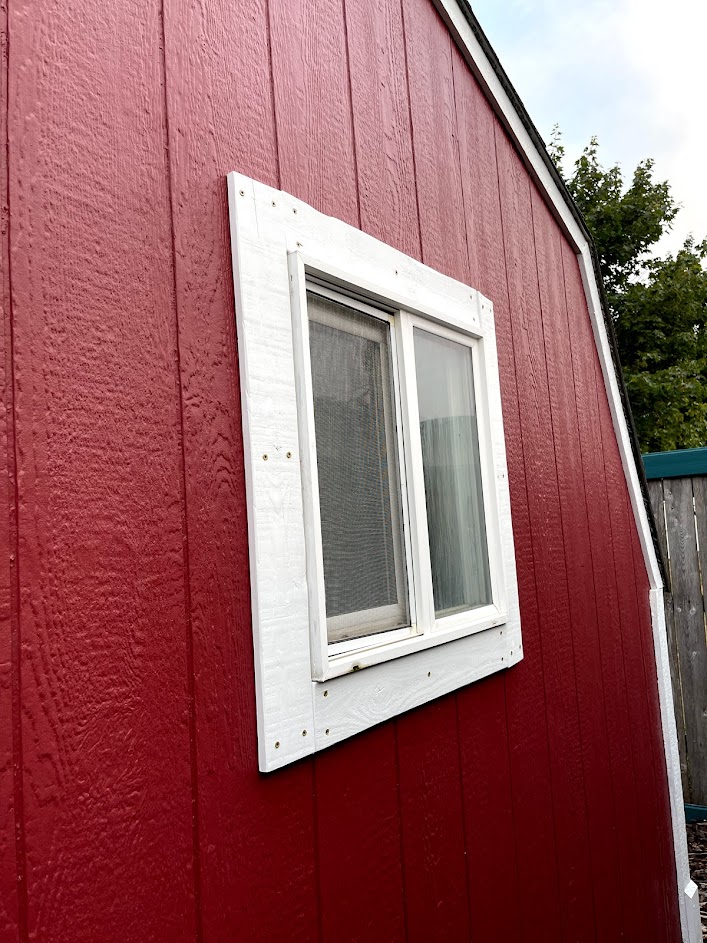
Installing the trim
I painted the wood around the window when I painted the rest of the shed. Using 2″ star-headed screws, I installed the top & bottom pieces of trim first, followed by the side pieces. Since the window is at the back of the shed, close to the fence, I didn’t paint over the screw heads. That’s also the reason that the window is pictured from the side. Installing the trim to the door was quick. I also used brass screws to attach these pieces to the door.
Fixing the hinge

As I mentioned earlier, the lower hinge on the door wasn’t working well before I removed the trim making it necessary lift the door to get it to close.
When I attached the hinge to the new piece of trim, the door wouldn’t close at all. After looking at how the hinge was sitting, it appeared like it needed a spacer to bring the side trim even with how the door lined up. To fix it, I removed the hinge bolts from the side trim and attached a board under the hinge that was the width of the trim and 1/2″ in depth. I was so thrilled that when I bolted the hinge into the new piece of wood, the door swung open and closed like it was supposed to!!!
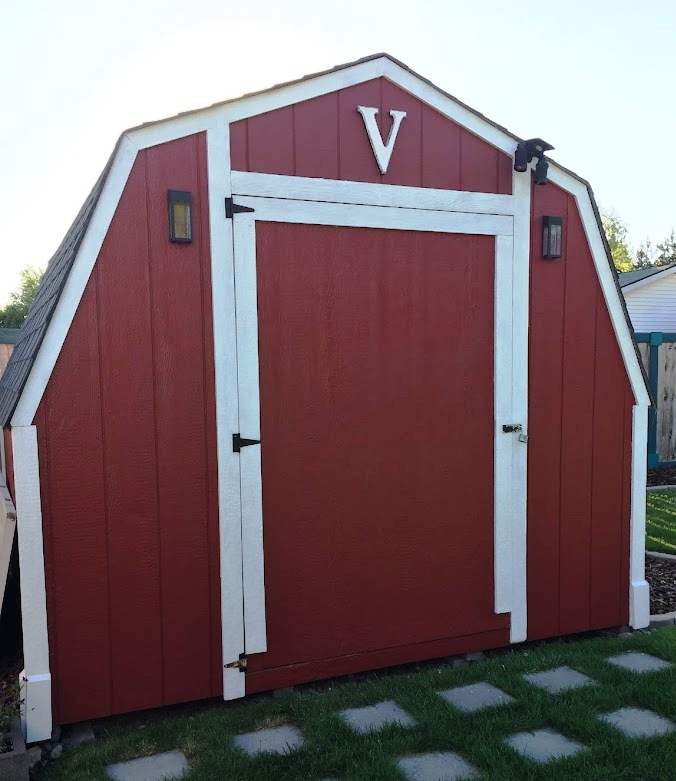
Finished project
While this project was more involved than I had anticipated, it was fairly quick to do. There are other trim boards on the shed that could be replaced and I’ll probably do that in the future. The cooler weather wasn’t lasting long enough for me to want to tackle that work at this time 🙂


Supplied Used
- Orbital sander
- 120 grit sandpaper
- Miter saw
- Kilz primer
- White exterior paint
- Black exterior paint
- Small paint roller
- 1 1/2″ paintbrush
- Paint pan
- Drill with screwdriver bit
- 2″ brass star-head screws
- Step ladder
- Kneeling pad
- Hammer
- Crowbar
Instructions
- Using crowbar & hammer, remove old trim
- Cut new trim from 1″ x 4″ wood
- Sand wood as needed
- Apply 1 coat of primer & 2 coats of exterior paint
- Paint shed with 1 coat exterior paint
- Attach trim using 2 1/2″ brass screws
- Paint decorative letter
For your convenience
This post contains Amazon affiliate links. If you choose to order through these links, it will be at no extra cost to you


Printable checklist for tools & supplies
Here is a checklist if you are new to DIY or have yet to start building your tools and supply stash. Just print it out and check off the items as you get them.

Want more project ideas?

Let’s Stay in Touch!
I’m excited to share more projects with you as well as tips/tricks/freebies! Just enter your email below to be one of my Blog Peeps!


You May Also Like

Let’s Change the Planters from Plastic to Concrete!

Perpetual Deck Project!

