

Let’s Refurbish a Pub Table!
Recently, I refurbished a table to go with a couple of chairs that hubby brought home. He had found them on the side of the road and figured I could fix them up so we could use them outside.
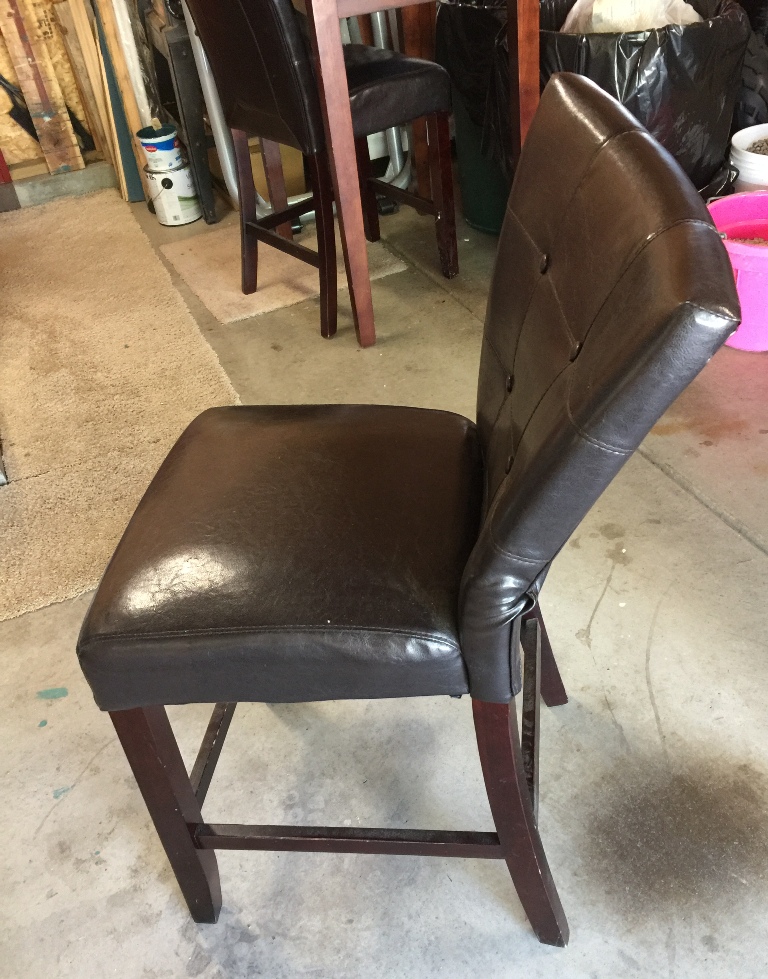
Free chairs – Before
Here is the ‘before’ pic of the chairs that hubby found on the side of the road. All the details are on this post: Let’s Upholster with Burlap!

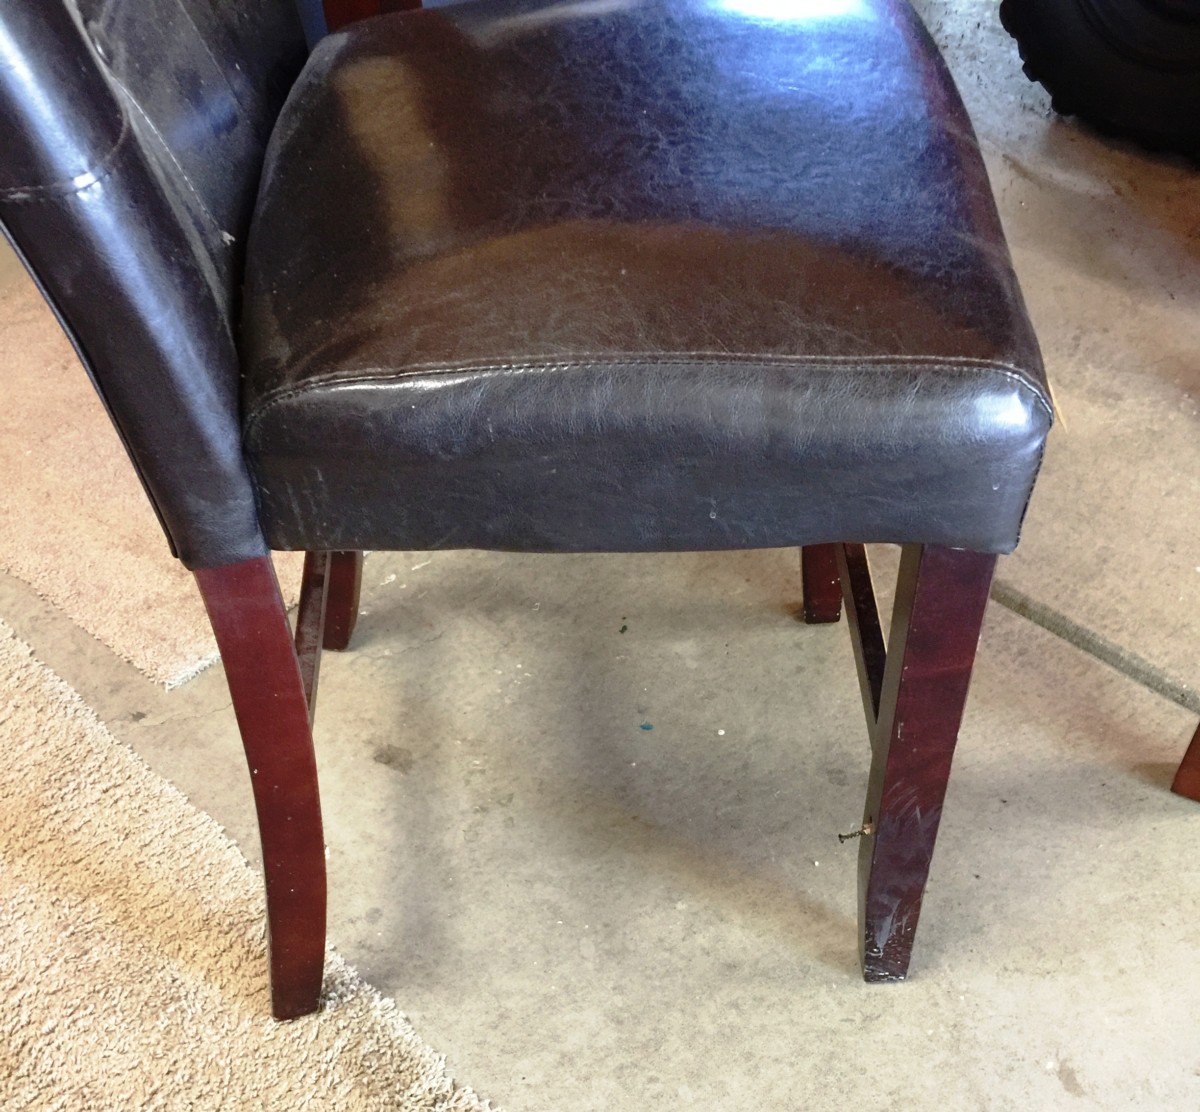
Broken back 
Broken support
Free chairs – After

I was surprised that I was able to fix these chairs and then make them cute, but I did!
Now that I had two tall chairs, I needed to find a tall table. I started, as I usually do, online where they are referred to as ‘pub’ tables. There were several options that I liked: wood only, metal only, wood & metal. I settled on a wood/metal combo that was just around $100. Before buying it, though, I knew I’d be looking around for something less expensive. I headed to the Goodwill….

To my surprise and delight, I found exactly what I was searching for; and it was only $24.99 before the 20% discount!
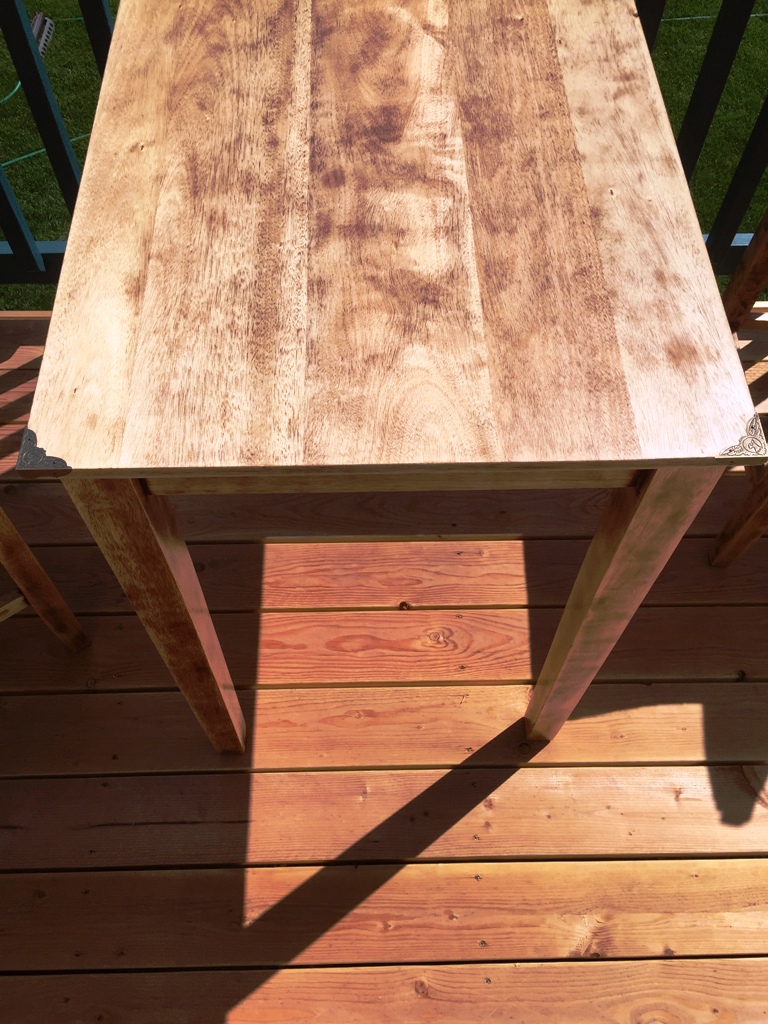
Refinishing the table
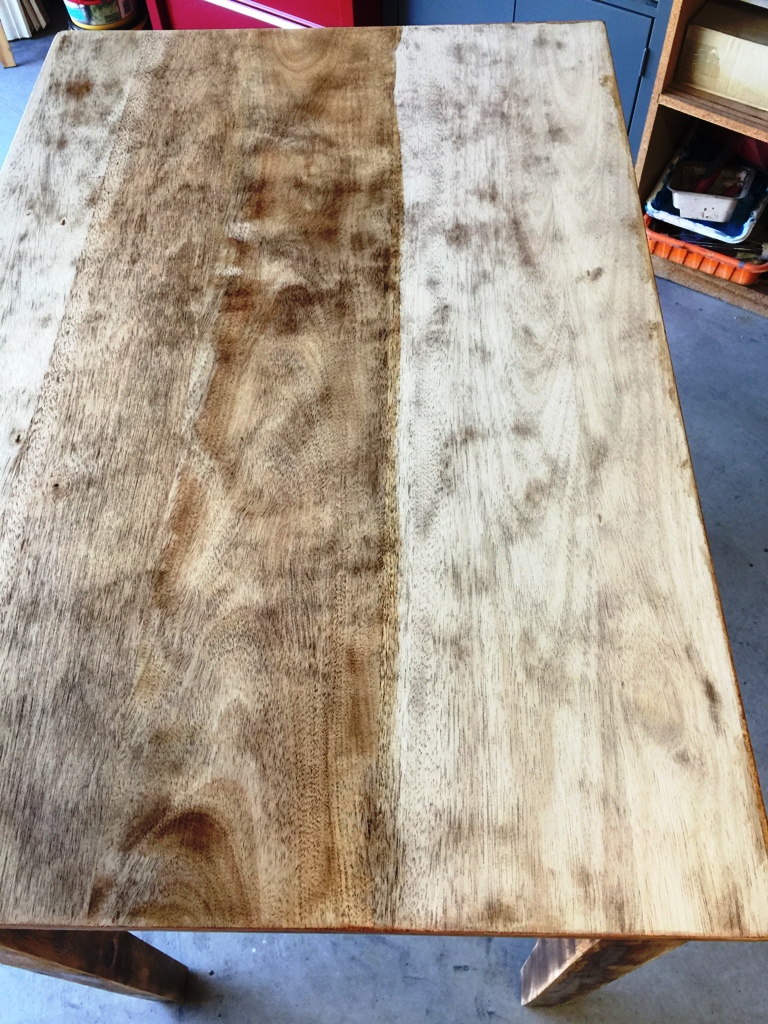
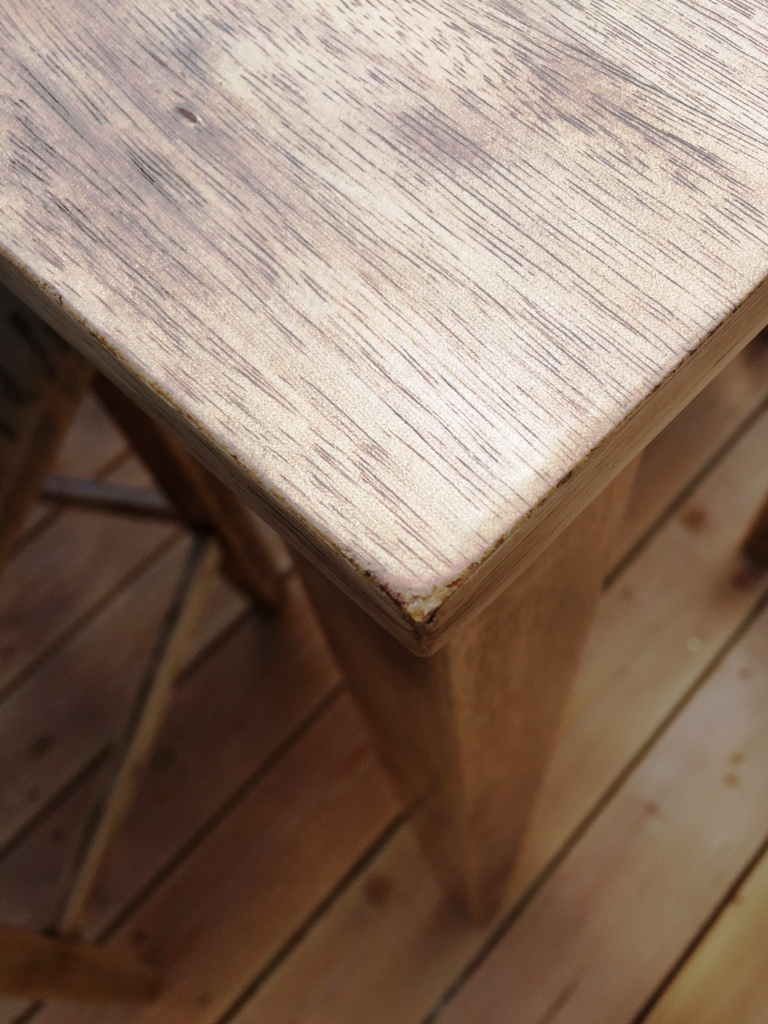
The table was stained with a dark finish, just like the chairs had been so I knew I could refinish it in the same way. As with the chairs, I didn’t think I would need to use a stripper. Besides, it’s messy! So, I decided to simply sand off the finish. For this process, I used my 5″ orbital sander & a 220 grit sandpaper to remove the finish, and just like when I sanded the chairs, it worked beautifully!
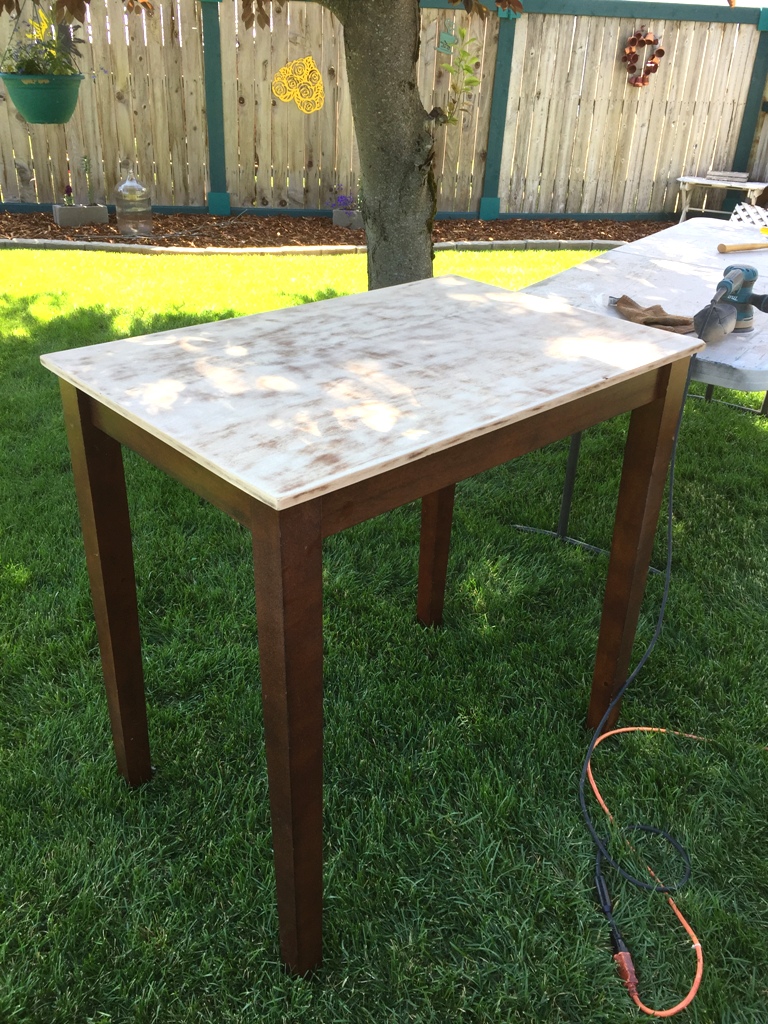

I was excited to see that the sanded wood looked just like the wood on the chairs – bonus!
Sealing the wood
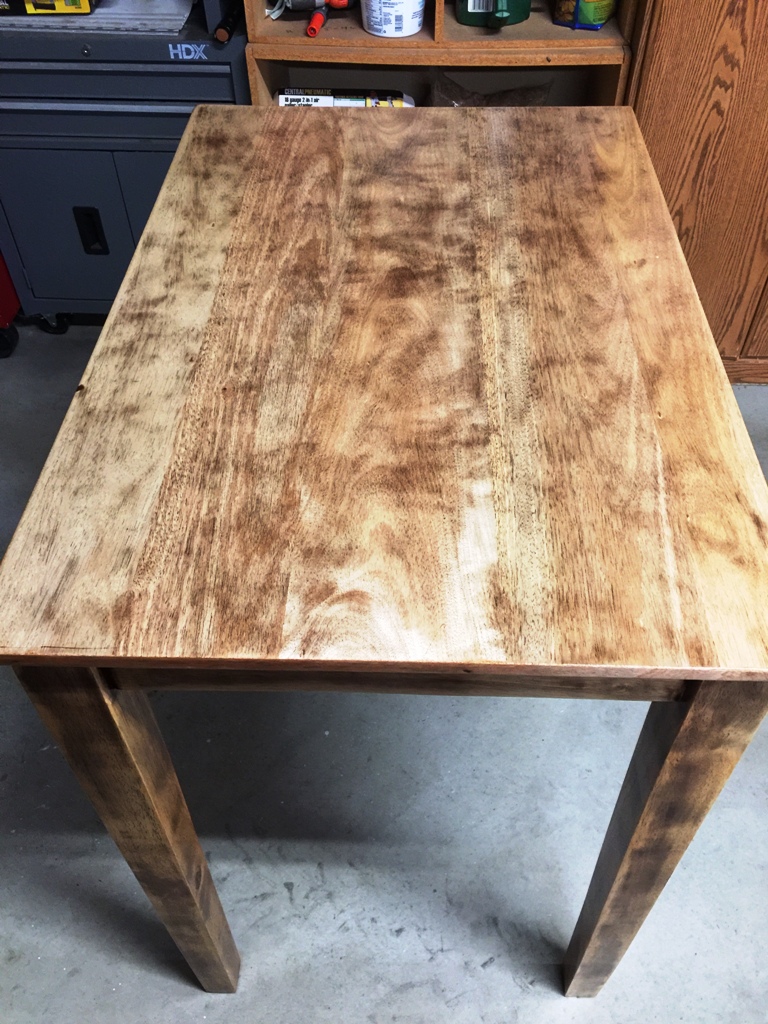
Once the table had been sanded, I wiped it down with a soft cloth and then followed up with a tack cloth. Now it was time to seal the table for outdoor use. I usually use water-based Polyurethane for all my wood furniture but since I planned to use the table on the deck, I wanted to protect the wood as best I could.

I did some research to find the best product to use and found Minwax Helmsman Spar Urethane. It is an oil-based finish created for outdoor use.
I didn’t need much so I planned to buy a quart. Home Depot didn’t carry the product and Lowes only had the Satin in a gallon size. Ah well, maybe I’d find other uses for it. I bought the gallon (*spoiler alert – I’ve already used it on two other projects this summer) and brought it home. Because it is oil-based, I also bought a couple of paintbrushes that I could toss if I wasn’t able to get them clean after use.
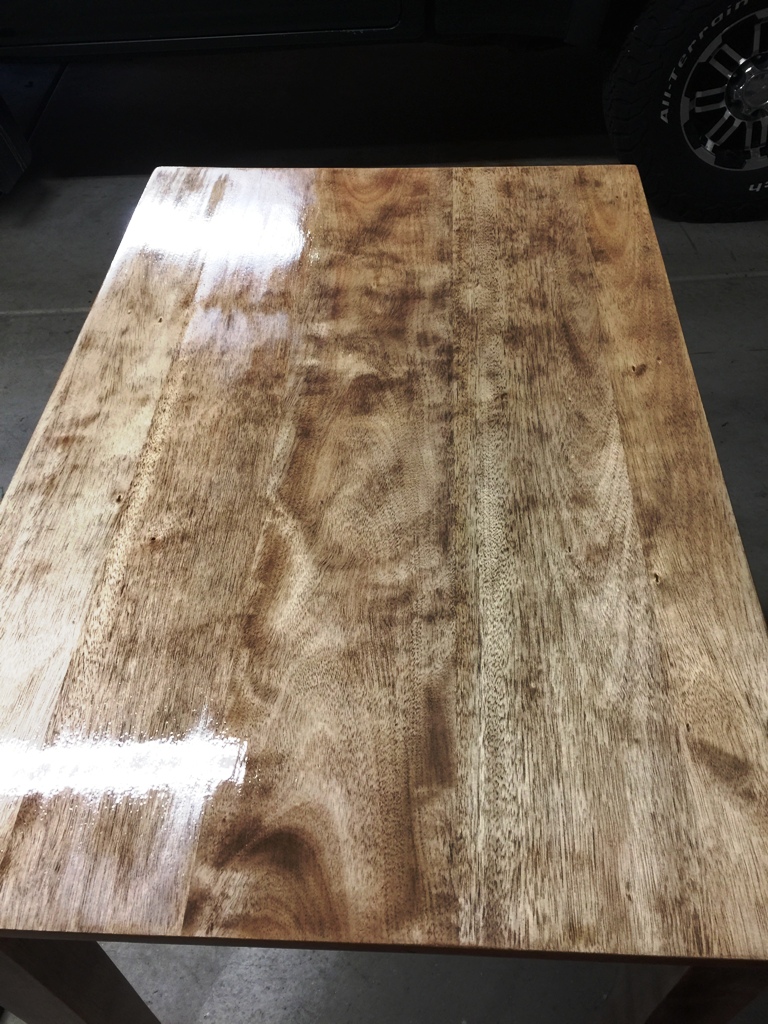
The instructions on the can are to apply 2-3 light coats, allowing at least 4 hours of dry time, then doing a light sanding before applying the next coat. I followed the directions exactly, applying 3 coats and the finish on the table came out great! Although this is Satin, it does have a bit of a sheen as opposed to being flat like the other brands of topcoat I have used. It also provides a warm, golden glow to the wood.
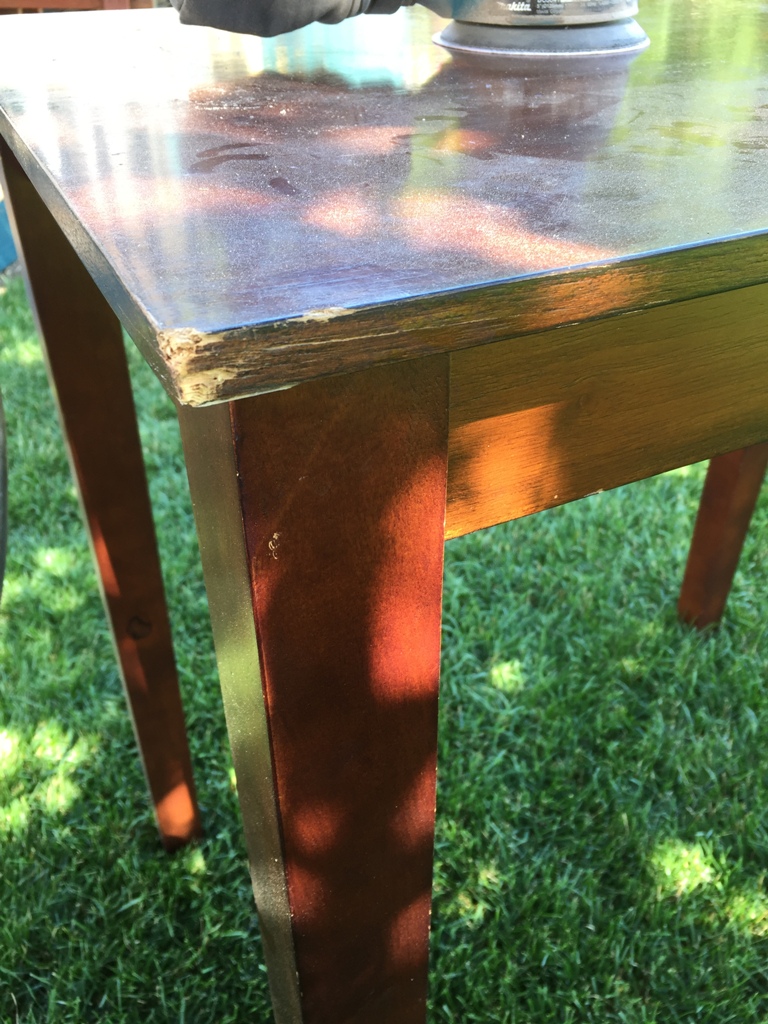
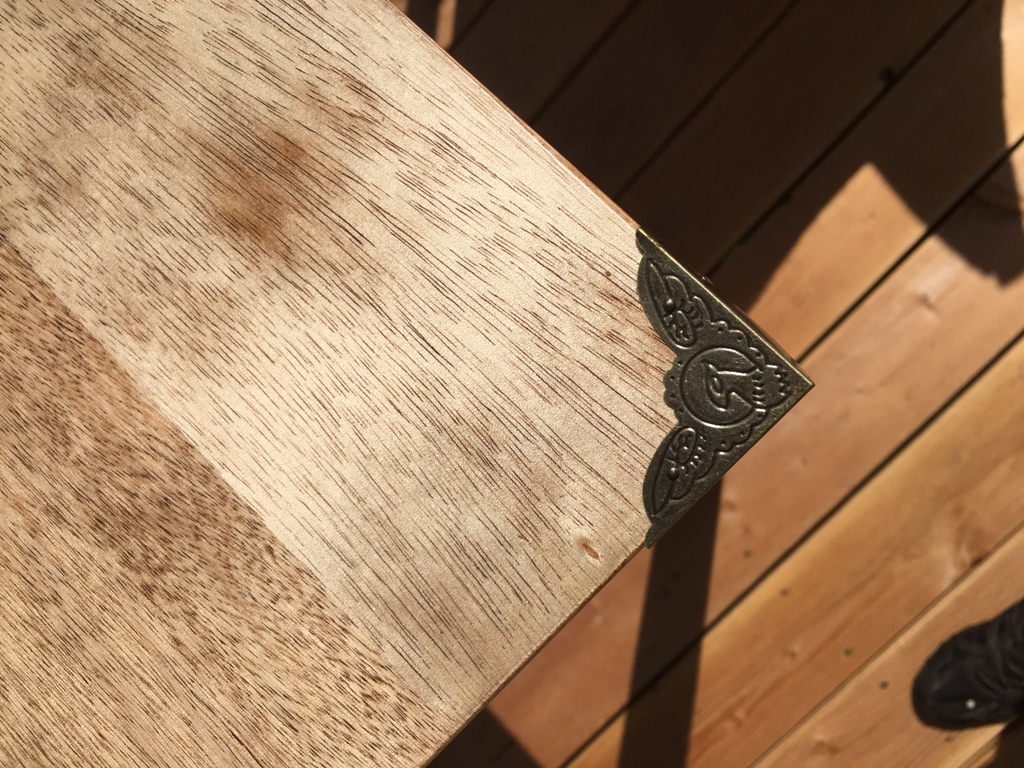
Protecting the corners
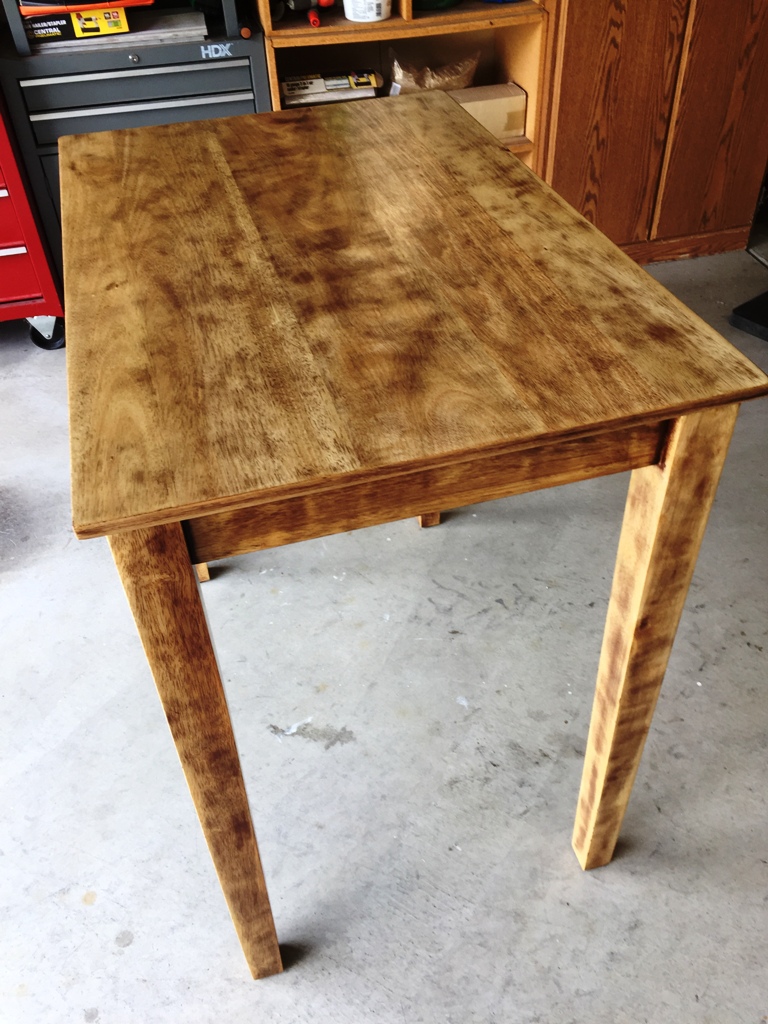
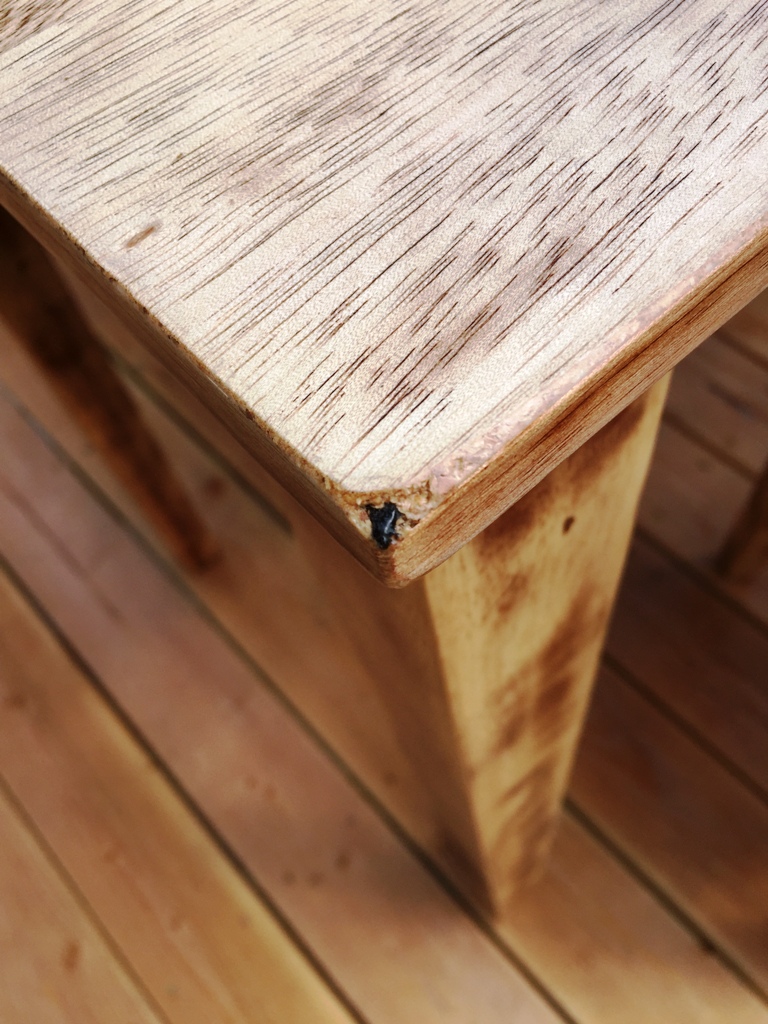
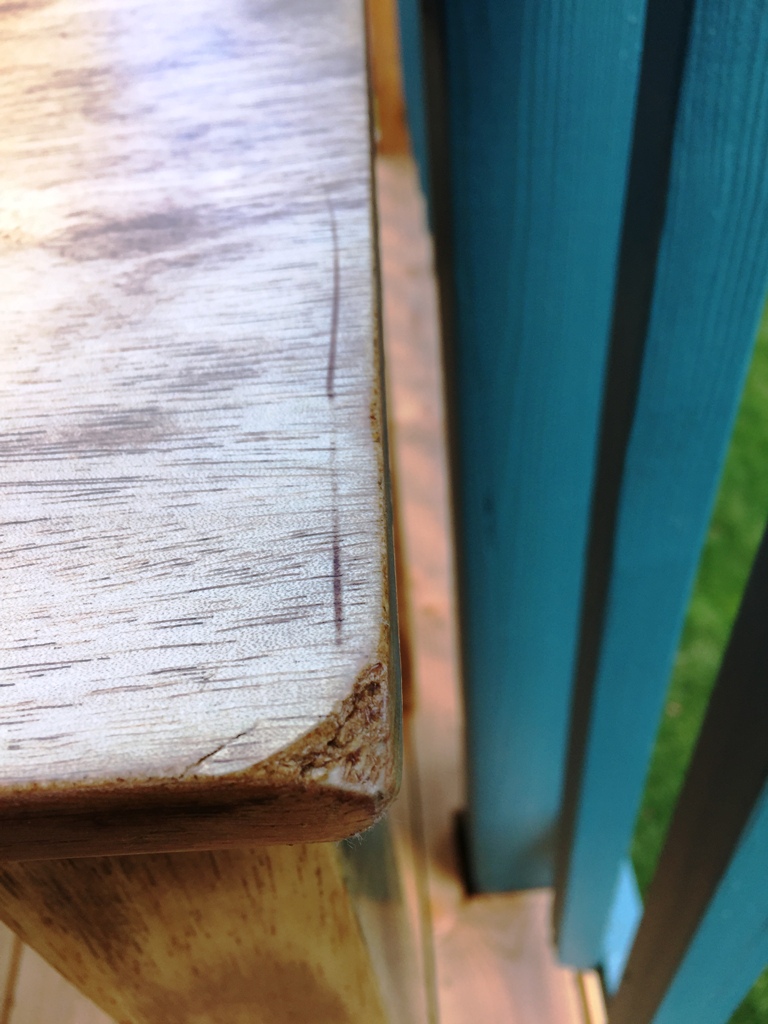
In the ‘before’ picture, you may have noticed a damaged corner of the table. After I started sanding off the finish, I noticed that the tabletop was not real wood but a veneer over particleboard. That wasn’t thrilling, but I figured since it was only $25 ish, I’d work with it. Once I finished sanding and sealing the table, I decided to protect the corners.
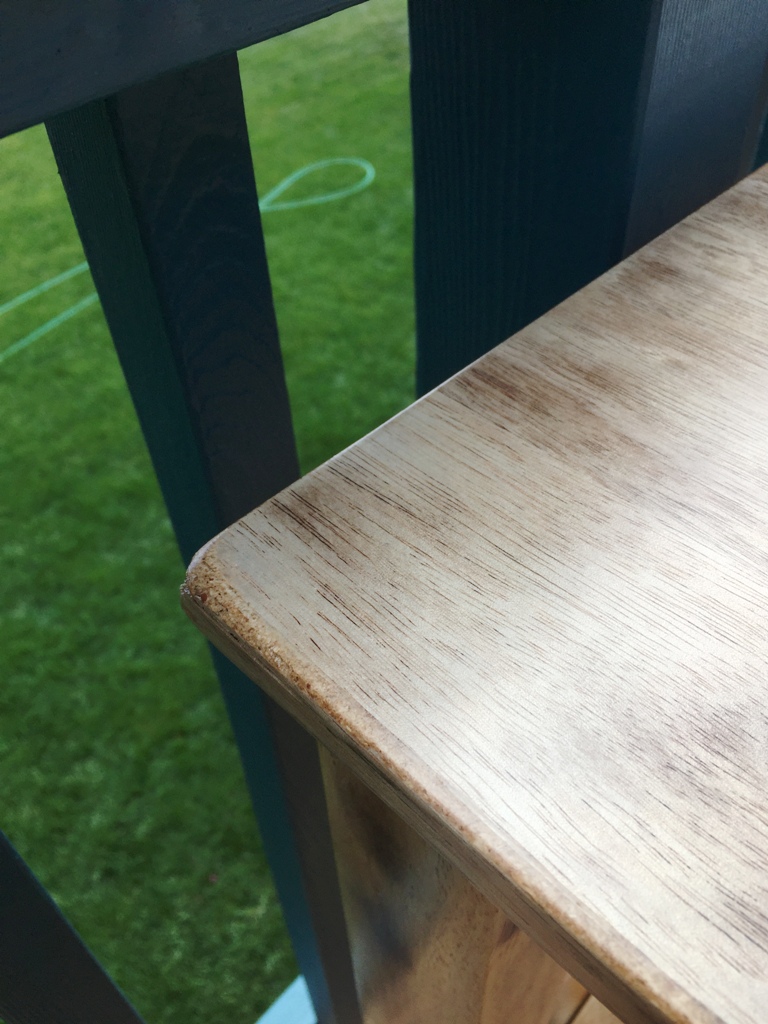
I found metal corner protectors on Amazon. I ordered 1.5″ x 1.5″ in a Bronze Tone, Pack of 24 for $7.99 What a deal!

To install the metal corners, I used a small hammer and a pair of needle-nosed pliers. I needed the pliers to hold the nails because they are so tiny!
To my delight, the corner pieces fit perfectly and did the job I was looking for, they hid the damage on the table.
I have used this little table and chairs several times since I finished refurbishing the set. I found a darling little footstool at a garage sale for $5 and it is the perfect height to use with the chairs.
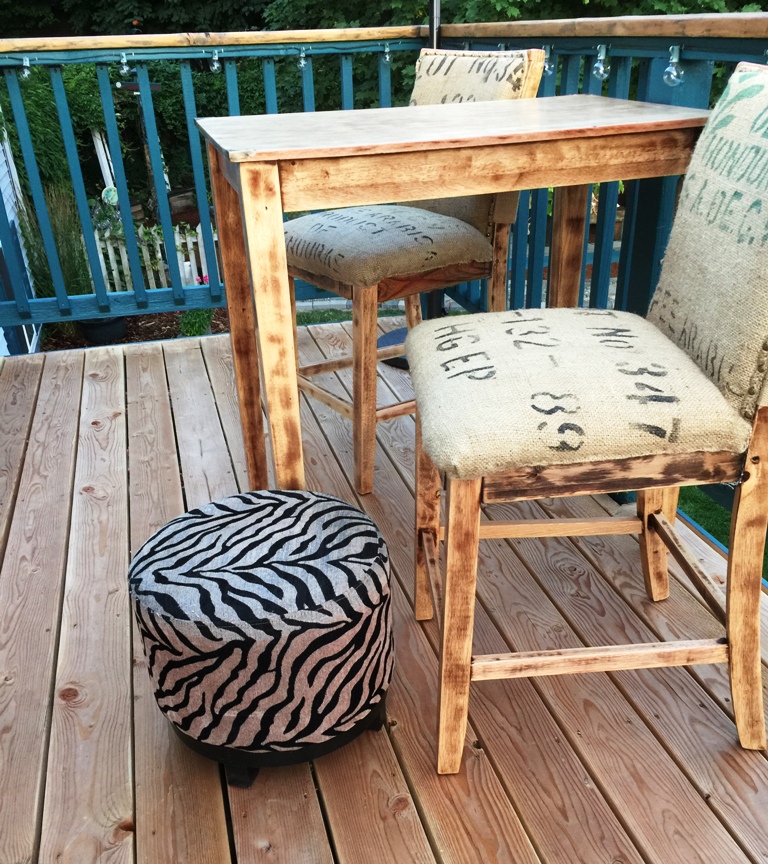
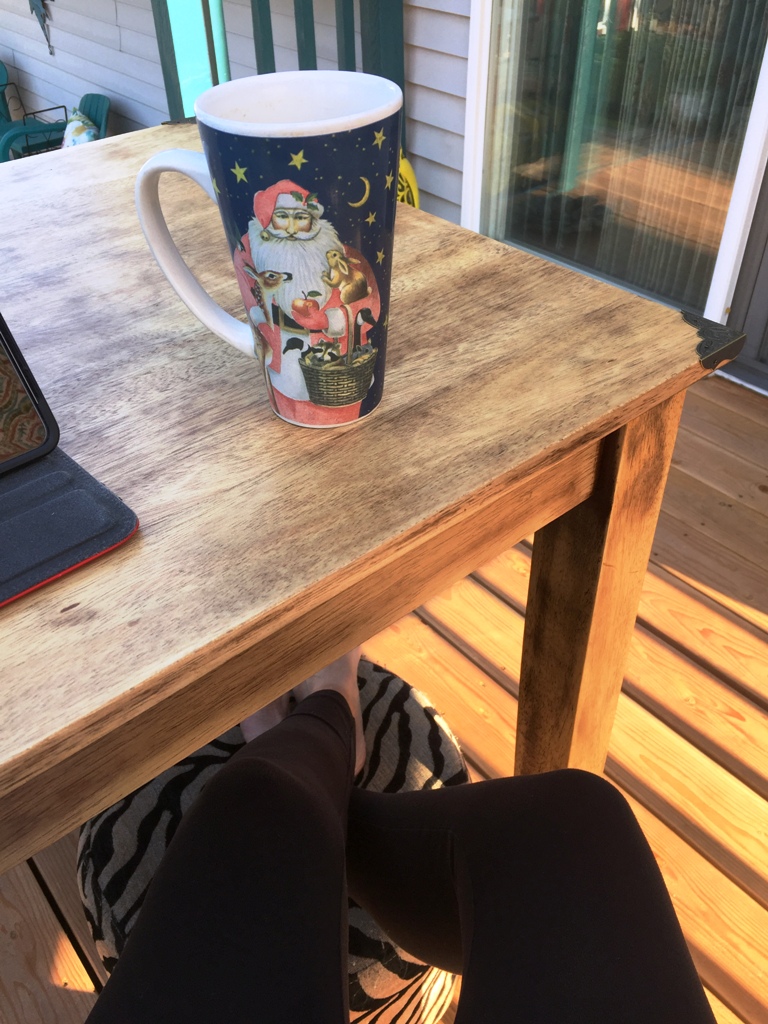
The project was much easier than I anticipated! Hubby and I are thrilled with how the table turned out!

Supply list
- 5″ orbital sander
- Sandpaper
- Minwax Helmsman Spar Urethane
- Paintbrush
- Paint thinner
- Metal corners
- Hammer
- Needle nosed pliers
For your convenience
This post contains Amazon affiliate links. If you choose to order through these links, it will be at no extra cost to you


You May Also Like

Let’s Create Some Privacy!

Let’s Create a Secret Garden! Part 4

