

Let’s Fix the Fence With Shiplap!
We have a nice-sized, fenced backyard. Our fencing is wood. Weathered wood. I love the look of our fence! Over the years, we have replaced many of the boards, and those we have not replaced, we have nailed and screwed back in several times. The posts are still nice and solid so when our neighbor to the East of us asked if we wanted that section of our fence removed and replaced with the vinyl one he was installing, we declined.
Fence history
If you’ve read my posts about the projects I have done with reclaimed wood, you know that a section of the West fence fell down during a wind storm and had to be replaced. Since the planks were pretty weathered, we bought new ones to be used in the replacement of that part of the fence. The new planks looked very out of place for a year or so but have greyed nicely, matching the old planks now. I used the old wood to create a tree bench and planter boxes, you can read about those projects by clicking on the names.

Reclaimed wood planter box 
Reclaimed wood tree bench 
New section of West fence

If you love the reclaimed wood tree bench, you can get the plans to build one of your own. They are located in my shop. Click on the photo to be taken there.
Vicious dog
Our neighbors to the South and West of us have large dogs, 3 to the South and 2 to the West. It’s common, in fact, it happens every single time, for the dogs to bark while I am working in the yard. The barking doesn’t bother me, I actually like that they are protective. Usually, they’ll calm down after a while and if they don’t and the neighbors are home, they’ll be told to stop barking. However, one day a couple of years ago, I was weeding along the South fence when one of the dogs must have gotten spooked and charged the fence. Since the fencing is older, the plank right by my face came loose and I was staring into very large teeth as the dog was trying to come all the way through the fence to get to me.
I quickly shoved the Home Depot bucket I was using for the weeds against the fence and stood up to lean my full body weight against the bucket and plank. Not to be deterred, the dog began charging the fence and I started yelling at him to stop since I could barely hold the plank in place. After what seemed an eternity, the owner came out of the house and also starting yelling at the dog to stop as he ran to grab him by the collar. It took quite an effort for him to get the dog away from the fence. Both the owner and I were pretty shook up. After the dog and owner were in their house, I added more screws to that plank and then leaned a large log against it to help prevent that from ever happening again.
How to fix the fence?
When it was time to weed along the fence line again, I started thinking about how I would reinforce the planks without having to replace them with new ones. I thought that if I bought some boards and screwed them along the bottom of the fence, it would prevent the boards from falling down and also keep the dogs from being able to push them from the other side. I went to Home Depot to see what my options were. The fence posts are 8′ apart so I was looking for 8′ boards. When I saw shiplap, I decided to use it instead of plain boards. I bought 14 of them and brought them home.
Installing a bottom rail
After installing all the boards to the South fence line, I stood back to see how it was going to look. The wood that is used to make the shiplap is light and I wasn’t certain it would weather to match the fence. Since it needed something to protect it from weathering too quickly – stain, waterproofing, etc, I decided to paint the wood with one of the colors I had used on the deck and deck chairs.

I painted a small section of a spare shiplap board with the darkest of the two colors and set it next to the fence to see if hubby and I liked the look. You can see how weathered the fence is in the picture.
We liked the color so I decided I would paint the wood I had installed to the bottom of the fence and then be done with this project….until my son stopped by for a visit that is. He asked what I was doing and I told him I was shoring up the fence to keep the boards in place and prevent the neighbor dogs from breaking through. He said ‘What about the dogs on the other side?’ Hmmmm, well, now I thought it would be wise to add support to the West fence line too….AND, if I was going to do THAT, I might as well do the rest of the fencing. Then he said ‘You’re going to add those boards along the top of the fence, too, aren’t you?’ I said ‘No. Why would I do that?’ ‘Because it would look better’ he replied. Oh, man, he was right. So, like many, ok, ALL of my projects, this quick fix was evolving into a much bigger, longer project.

South fence 
South fence 
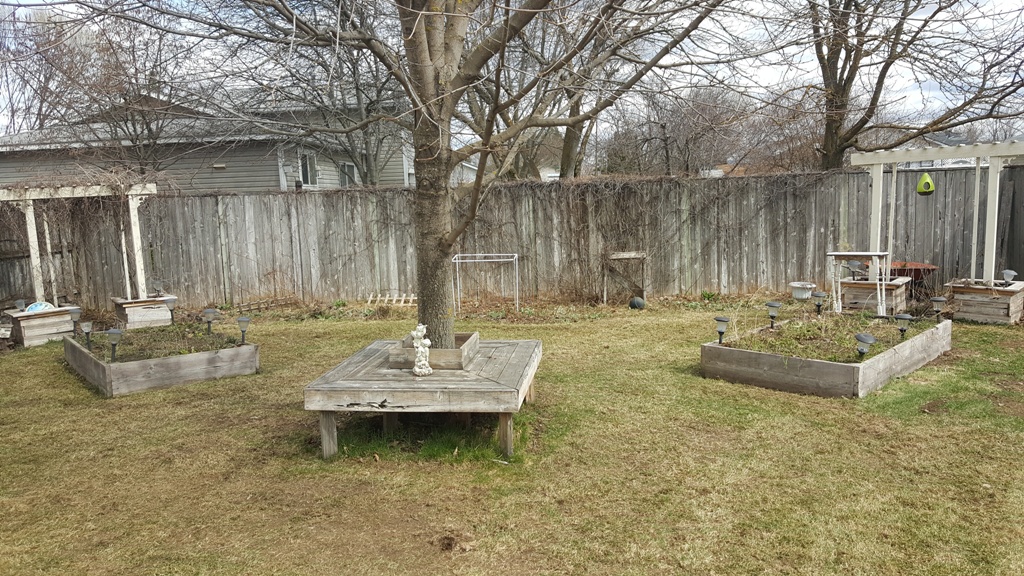
Garden area 
East fence 
East fence
Getting more shiplap

So, back to Home Depot, I drove to buy the supplies for the top section. Since I knew I would have to paint the installed boards, I figured it would be easier to paint the new boards that would be the top rail before installing them. The weather was rainy, so this was a good use of my time. Using a paintbrush, I applied two coats of exterior paint to both sides of the wood.
Installing a top rail

For the most part, I was working on this project by myself so to install the top rail, I screwed on a piece of 1″ x 1″ board to use as a guide and also to sit the 8″ shiplap on while I secured one end to the post. I used a level to make sure the guide board was level, marked the fence where the guide would need to go, and then screwed it to the fence before balancing the new board on it. For the sections where the fence was really warped, I waited until my son could come over so he could hold one end of the board in place while I screwed it into the post at the other end.
Connecting top and bottom rails

After installing all the top rails, I thought it looked disjointed between the top and bottom rails so I bought cedar fence planks to attach to and cover each fence post. I applied two coats of paint on each side of the planks.
Covering the gap
While installing the shiplap to the fence posts, I discovered that the posts were not spaced exactly at 8′. That meant that there were gaps between the pieces of shiplap where they were attached to the posts. Although the fence is old and weathered, I couldn’t leave it looking tacky with those gaps. I decided to cover them with pieces of wood. The board I used to cover the gaps between the shiplap was 1″ x 6″. I cut them with a skill saw**, gave them a light sanding and two coats of the coordinating paint that I had used on flower pots and deck furniture. It was easy to install them with a couple of screws. To add interest to the fence, I installed solar lights on the 1″ x 6″ pieces of board on every other post and then added some fence art. **You can also use a miter saw**

1″ x 6″ decorative board 
Solar light
Finished project
I just love the look of the fence now and the neighbors have commented on how nice it looks too! The added strength this project gave to the planks gives me peace of mind in regard to the dogs next door. They still bark at me when I’m in the backyard and come right up to the fence to do so but it’s comforting to know they will be staying on their own side of the fence while they check out what I’m doing.


Update
It’s been 3 summers since I installed the shiplap onto the fence. We live where there are all 4 seasons and I am so pleased that I have not needed to do any paint touchups!

Supplies Used
- 8′ shiplap boards – 2 per section of fence
- 6′ cedar fence boards – 1 for each post
- 1″ x 6″ board for decorative plaques
- Drill
- Screws
- Paint
- Paintbrush
- Skill saw or miter saw
- Sanding blocks
- Solar lights
- U shaped holder – 2 per solar light
Instructions
- Apply two coats of paint on all boards
- Cut decorative plaques from the 1″ x 6″ board to the size that works for your fence. Mine are 6″ x 6″ and 6″ x 9″
- Install shiplap with screws along the top and bottom of the fence
- Install fence boards to each post using screws
- Attach the U holders to the small decorative plaques
- Center the holders on the plaque
- Place the holders 1″ from the top and 1″ from the bottom
- Attach with small screws
- Install decorative plaques on the posts where the shiplap boards meet
- Place solar lights into the U holders on the plaques
If you need supplies
This post contains Amazon affiliate links. If you choose to order through these links, it will be at no extra cost to you


Sign up for more project ideas

Let’s Stay in Touch!
I’m excited to share more projects with you as well as tips/tricks/freebies! Just enter your email below to be one of my Blog Peeps!
If you love this project, please share with your family and friends!


One Comment
Pingback: