

Let’s Enlarge the Bark Beds!
If you’ve been one of my Blog Peeps for a while, you may have seen my post about ripping up sod two years ago to add a buffer between the fence & house and lawn. In that post, (the project details can be accessed by clicking on ‘post’) I laid out the reasons I thought this was a good idea:
Reasons to add bark beds

- The space between the fence and the shed never gets watered so the grass is sparse and mowing it just kicks up dust
- It would keep me from being nose to nose with the fence. Even though I was confident that the work I did to shore up the fence would keep the neighbor dogs from breaking through it, it’s still a bit disconcerting when I am weeding along the fence on hands and knees and one of them runs up to it to bark at me
- To make it easier to mow. Since it isn’t possible (or at least not for me) to mow right next to the fence and I forbid hubby from using the weed whacker on my newly installed, painted shiplap, I put myself in the position of reason #1, weeding along the fence line on hands and knees
- Reasons to add bark beds
- Hidden benefit of manual sod removal
- Sod removal process
- Bark beds complete
- Problem section
- Summer 2020 landscaping plan
- Starting the enlargement
- Adding the bark
- Enlarging the other bark beds
- Sod relocation
- Finished project
- Supplies Used
- Instructions
- Where to buy supplies
- Other landscape projects
Hidden benefit of manual sod removal
Years ago, when I removed sod to create the flower beds on the East end of the lawn in both the front and back yards, I did so by hand. If you’ve done this, you know it’s not an easy task. Knowing this, I considered renting a sod cutter but then thought ‘What the heck, I’ve done this before, it wasn’t that bad’ (you know, the same lie we tell ourselves about how bad labor wasn’t when considering having a second child 🙂 ) so I chose to manually remove the sod. Of course, it was THAT bad, a fact I realized immediately, but I’m fairly stubborn and pretty frugal so I just kept at it. Like with many of my projects, I choose to view the manual labor part as being good for me physically. Nothing like ripping up sod to add muscle:
- To the biceps and upper back
- Pulling up the sod
- To the legs and arms
- Loading sod into the wagon to take it to a spot under the deck
- Unloading wagon for several more trips
- Reloading sod into the wagon from the spot under the deck
- Hauling it one load at a time into the garage to load into the truck
- Taking it to a friends property to unload it once again
- I was so glad she could use it – she said it wintered well and it’s growing!
- Sound fun? 🙂
Sod removal process
My go-to tools for sod rippage is a shovel and small garden claw. I use the shovel to cut through the sod along the desired length and width of the area then grab my garden kneeling pad, get down on hands and knees then use the garden claw to pull the sod toward me bit by bit, inch by inch. When I’ve pulled up a section that is approximately a foot by a foot, I rip it away from the grass and place it in the wagon. Sometimes it comes loose before I have a section that big but it’s usually firm enough to hold together. My plan when I started the project, was to make the bark beds 3 ft wide but that was before I decided to use the cement paver edging, which then made the bed too narrow. So, after finishing the ‘longest length’ section, I went back over it to pull out an additional 8″ from that entire length! Although it was more work, it was a good decision because it looks much better with the wider bed.

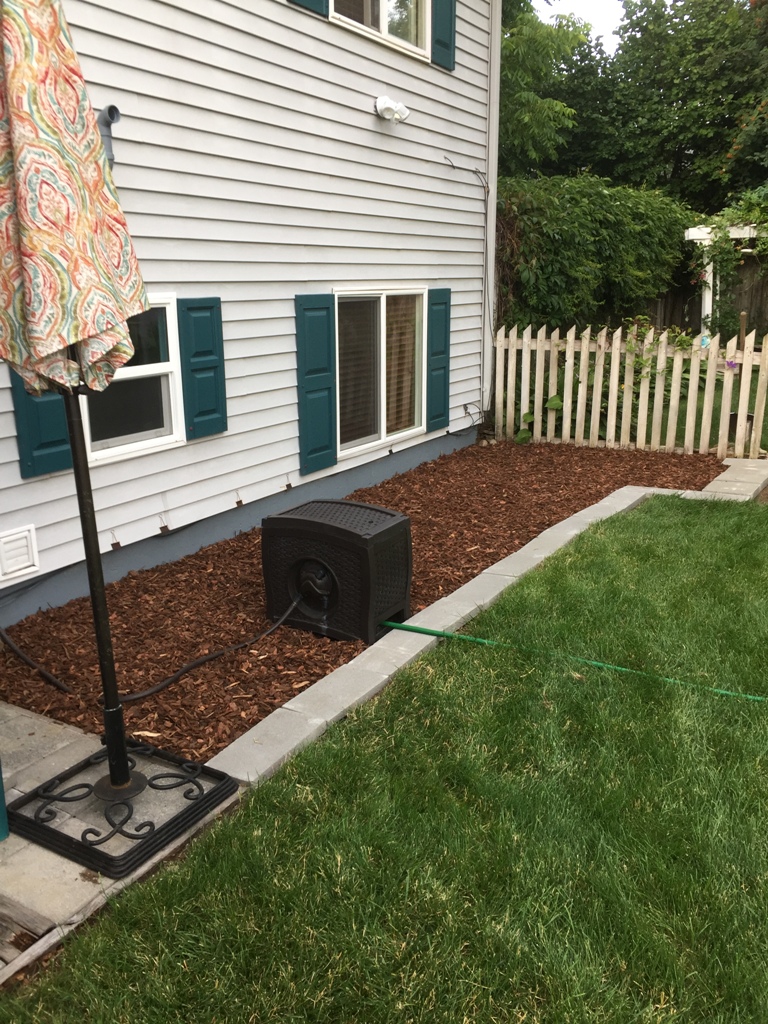
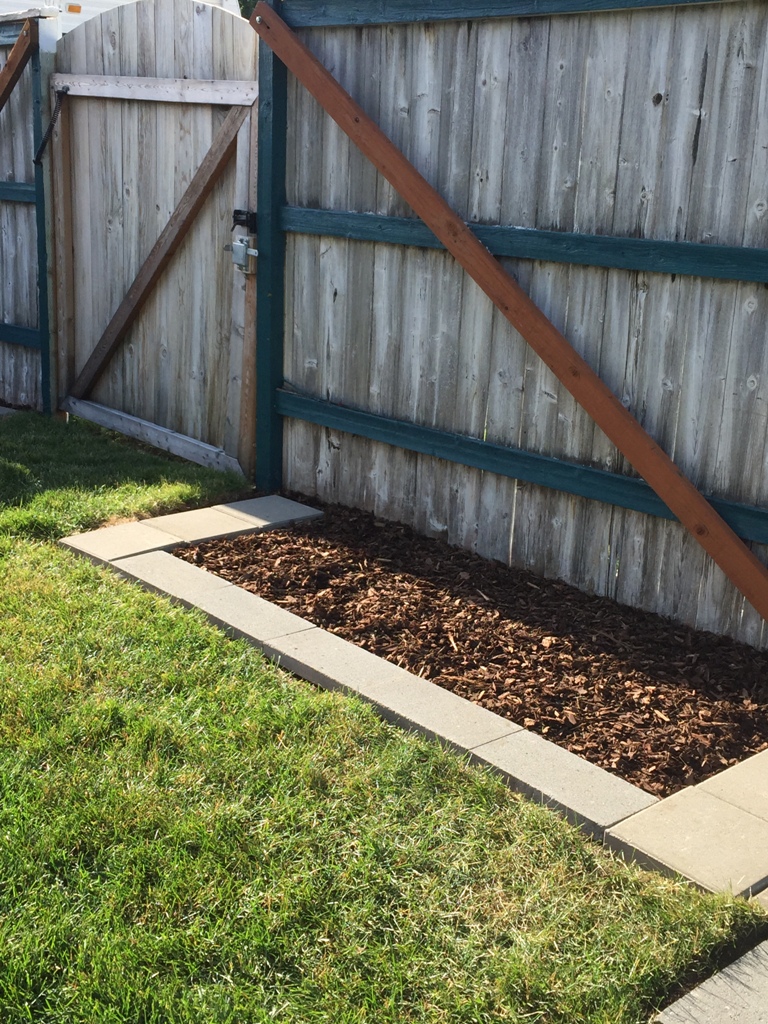
Once I had the sod removed from an area, I laid down landscape cloth and edged the space with cement stepping stones & pavers. I decided to use a combination of 12″ x 12″ and 8″ x 16″. The square stepping stones were used at the end of each section and the rectangular pavers were used for edging between the bark and the grass. The first section to be completed was around the shed.
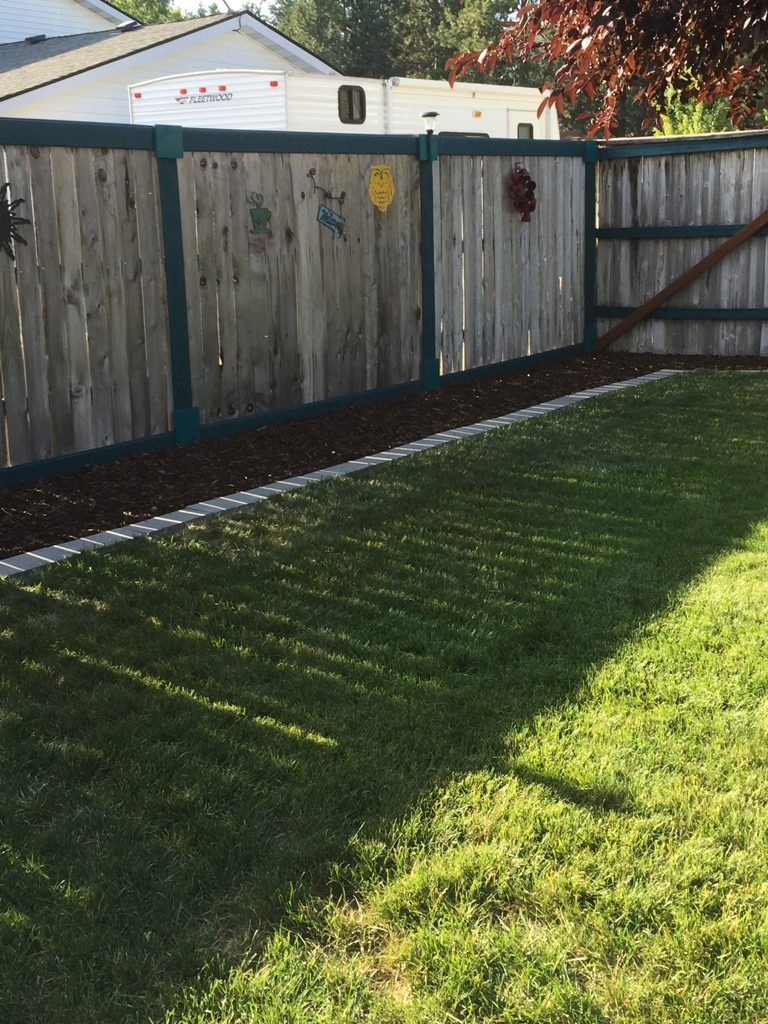
Bark beds complete
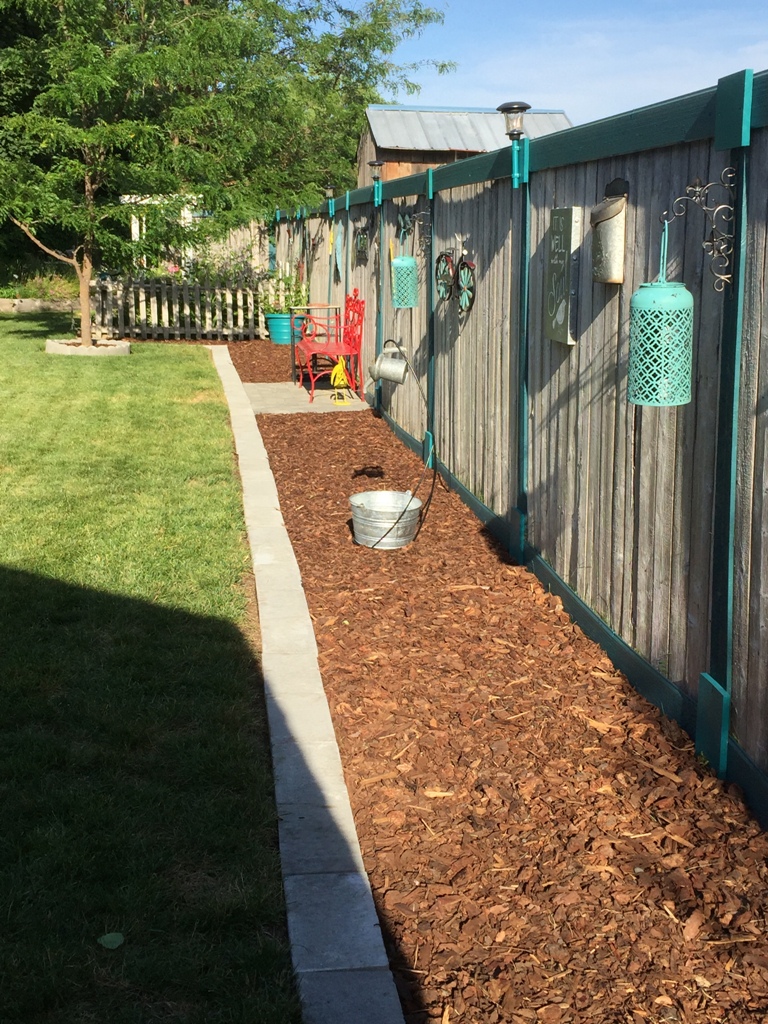
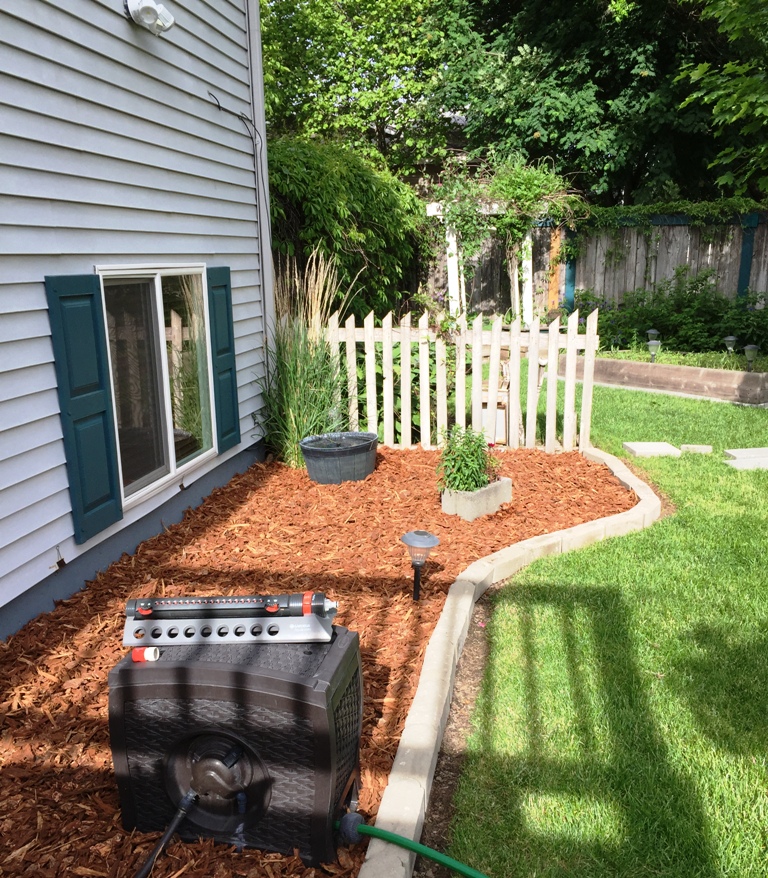
I continued this process all along three fencelines and a section of the house. It was great to have the space between the fence & house when mowing and the bark beds made a nice addition to the landscape in the backyard. However, there are large roots running through the yard that I just couldn’t remove so some of the pavers are not nice and level; and to be honest, I never really loved the look of the cement blocks. They were fine, but a bit linear. Normally, I’m drawn to linear things but I’ve been trying to venture out with a more relaxed, fluid style; yes, that has been a struggle, but I AM trying!

Bark bed by house 
North fence bark bed 
West fence bark bed 
South fence bark bed

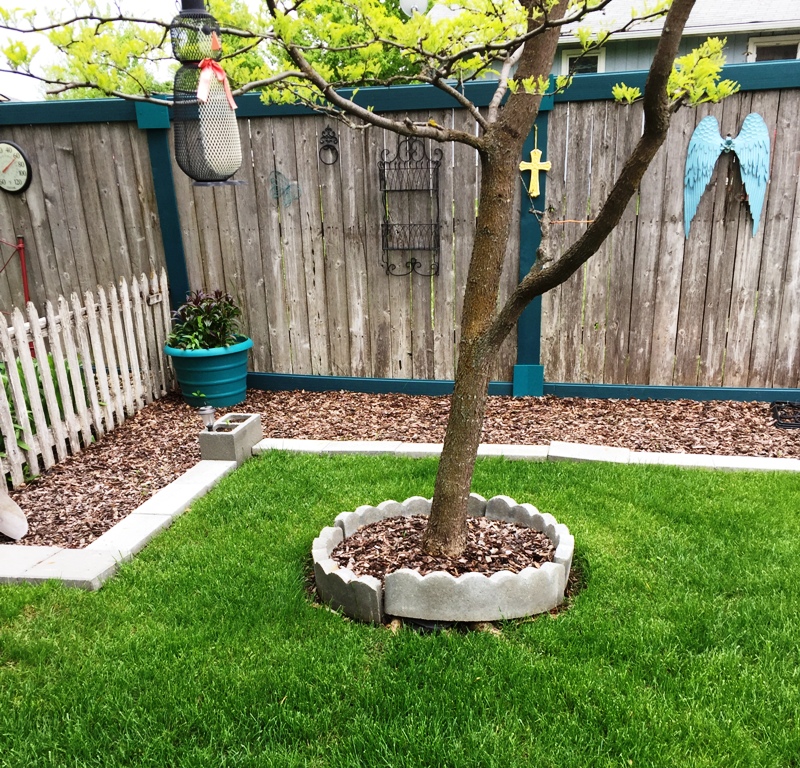
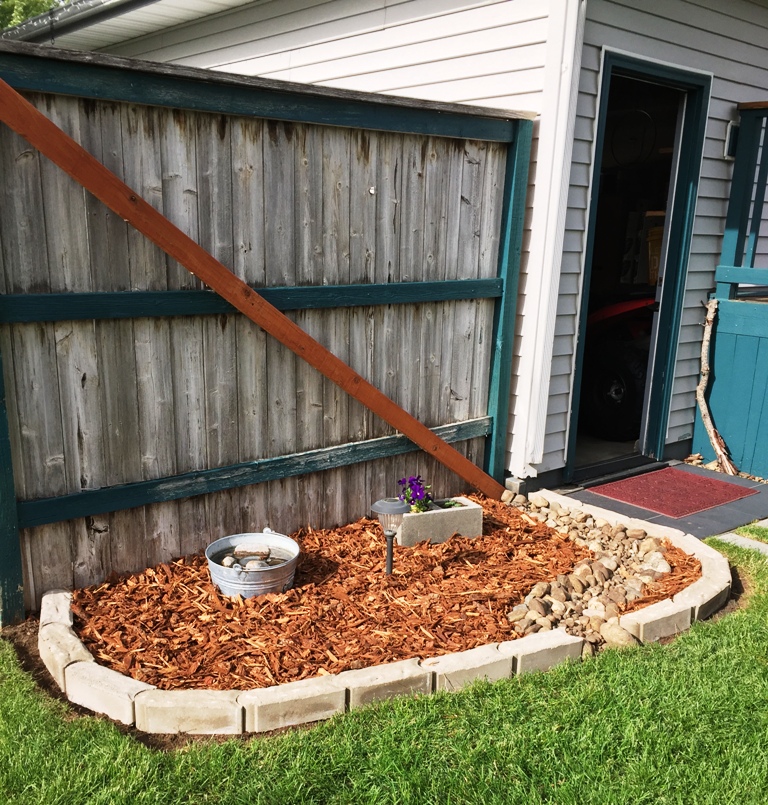
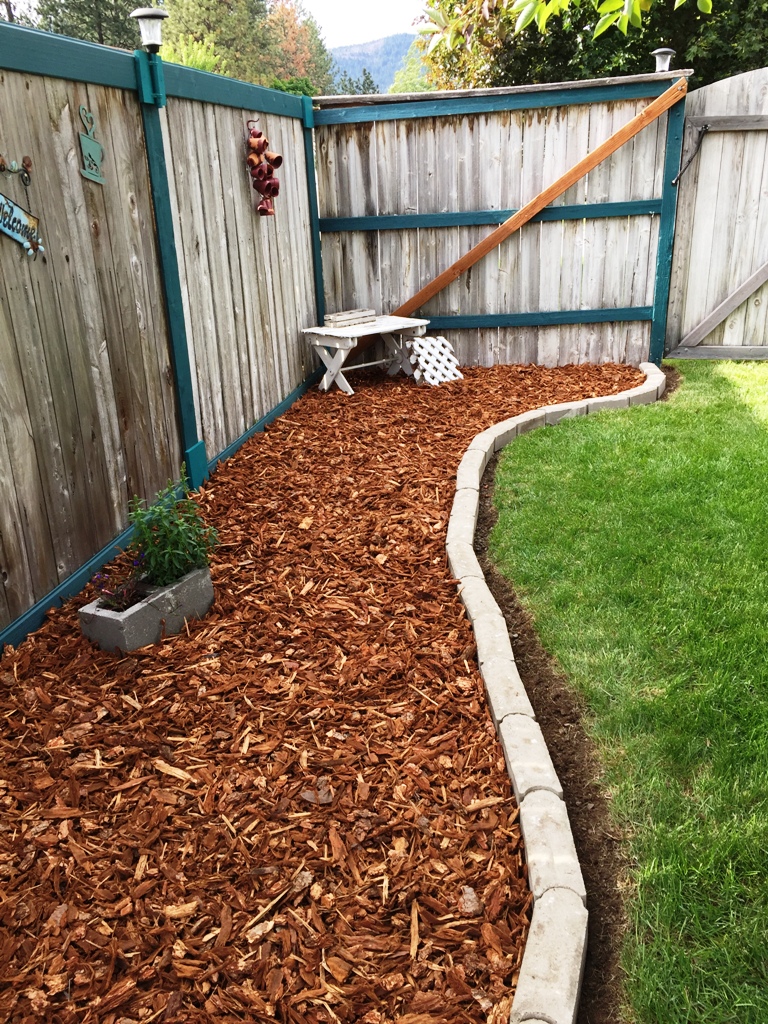
Problem section
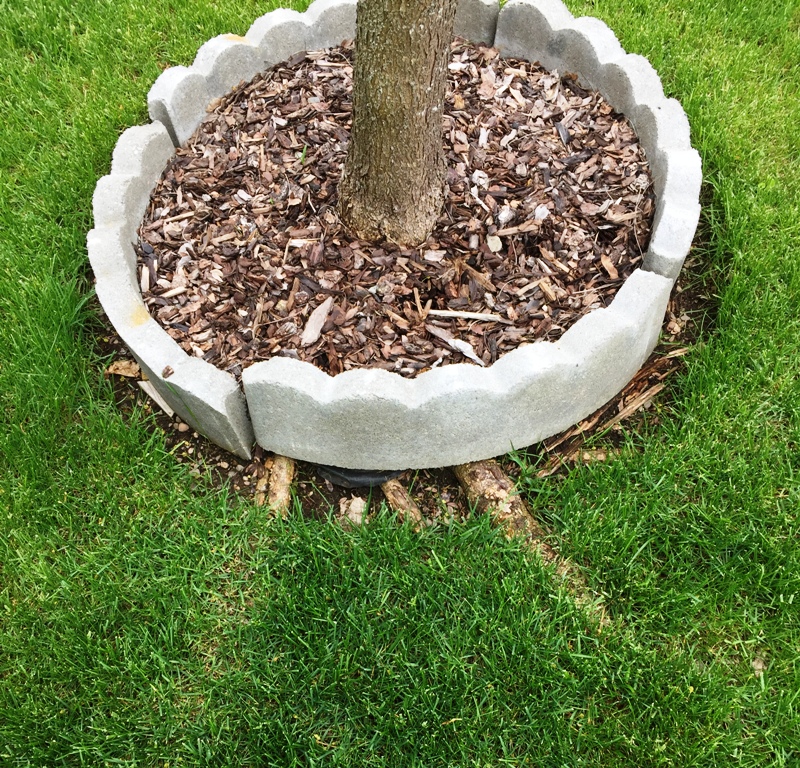
The section that really bugged me was the one along the South fence. It is the section I see from the window above the kitchen sink. The roots from this tree make it impossible to level the bricks, I’ve tried several times. In addition, mowing between the tree and the bark bed was tricky. The more I looked at it, the more it bugged me. I wondered what to do to help it look better. Then I remembered the bullet bricks I used last year in the front yard landscaping projects (see links at the bottom of this post). They are smaller which meant the span over the roots would be smaller and leveling would be a bit easier and they allow for creating curved beds.

Summer 2020 landscaping plan
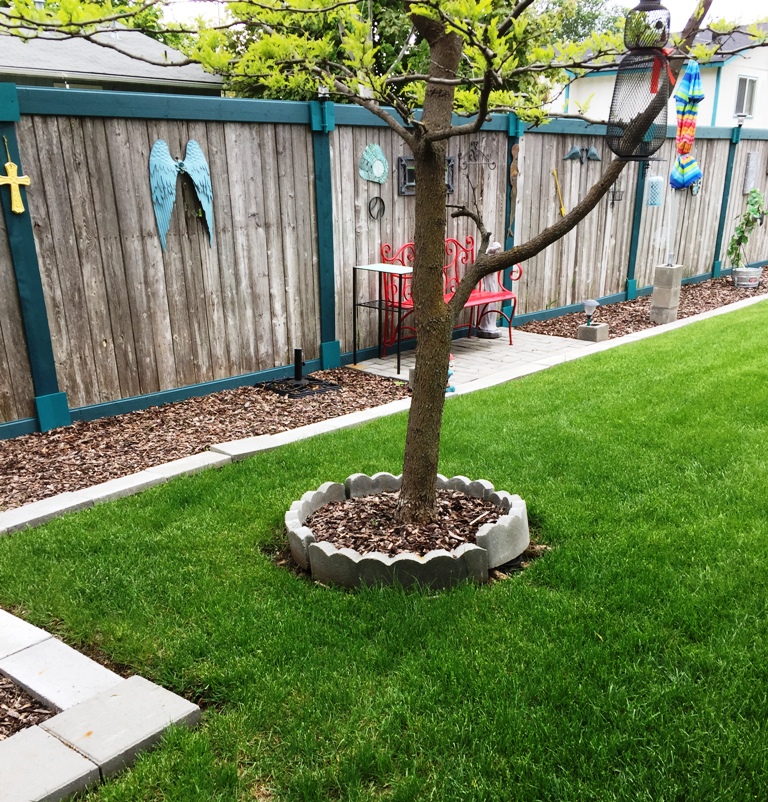
For this year, I had planned to revamp the garden area on the East side of the back yard. So, when I thought about removing all those cement blocks, I figured I could use them in that project. I felt better about enlarging the bark beds knowing that I would be utilizing the bricks elsewhere. As I removed the bricks, I set them around the area that I would eventually be working on. I moved the tree ring to the front flower beds around a new azalea plant my oldest son gave me as a Mother’s day gift.


Starting the enlargement
Just like when I first created the bark beds, the first step after moving the bricks out of the way….ok, the second step, was to remove the sod. As you read above, this is extra time-consuming and difficult around tree roots. Unlike the first time, this time I did the sod removal a bit at a time as opposed to all at once. I keep my deck umbrella close by so when the sun is intense, I use it as a mobile shade.


As I was enlarging the area by the tree, I set the bullet bricks along the new line of the grass to see if I needed to enlarge the other section of this bark bed so the bricks would flow nicely. I saw that I needed to increase the area by the patio by about a foot as well as a few inches along the rest of the fence line. I added another section of bricks to the patio to fill in the new space. I could have used bark there but the extra patio space is nice. Is it level? No. But, I think that adds to the charm; unlike the uneven bricks by the tree 🙂


Adding the bark
With the sod removed, I added some topsoil to cover the bare roots of the tree. In my landscaping projects last year, I started using newspapers to help with weed control. I also used paper sacks last year, along with landscape cloth. I have found that all three underlayments work equally well. The bonus to using newspaper or paper sacks is that they are free! I laid down sections of the newspaper in all the new areas, 6 layers thick, wet it down well and then laid bark on top of it.


Enlarging the other bark beds
As is typical, this one project became larger in scope. Since I was changing the feel of the bark beds, that meant the other 3 needed updating too.

Sod relocation
In case you’re wondering what I did with all the sod I removed…..it went to a friend who has property. This is the 4th truckload of sod I have taken to her house and the previous sod has done very well!

Removed sod 
New sod home 
Section of last years sod
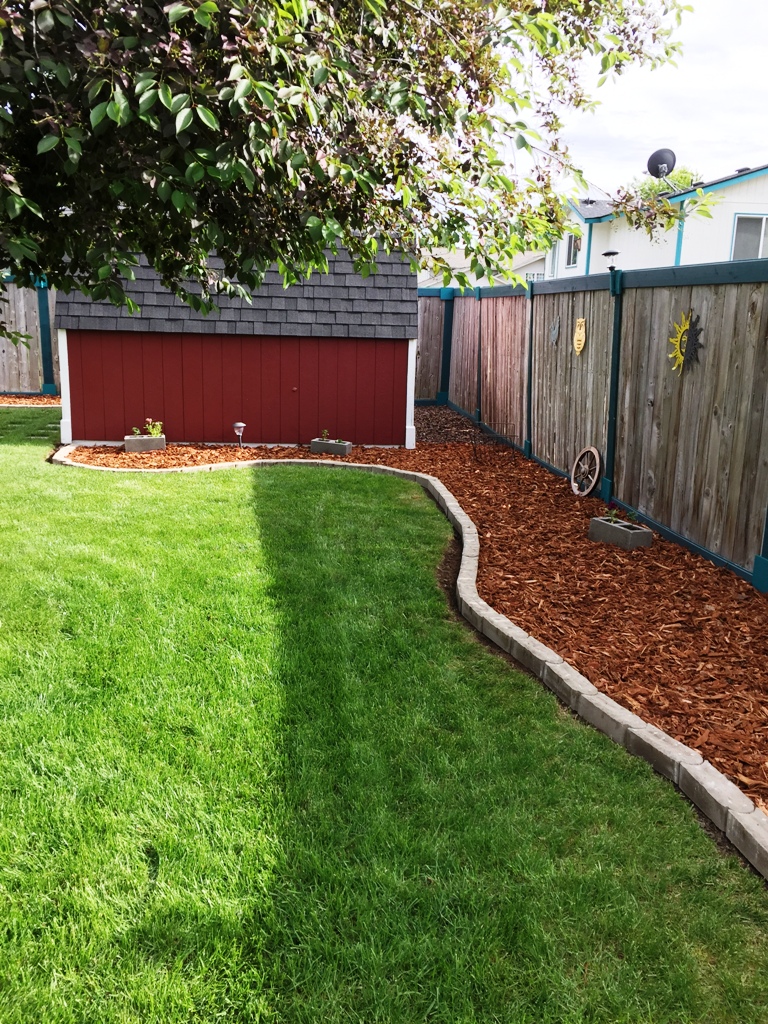
Finished project
Since I was going to freshen up the bark this year anyway and was going to be buying supplies anyway for the planned landscape project, the cost of this update was the new patio bricks and time & sweat!

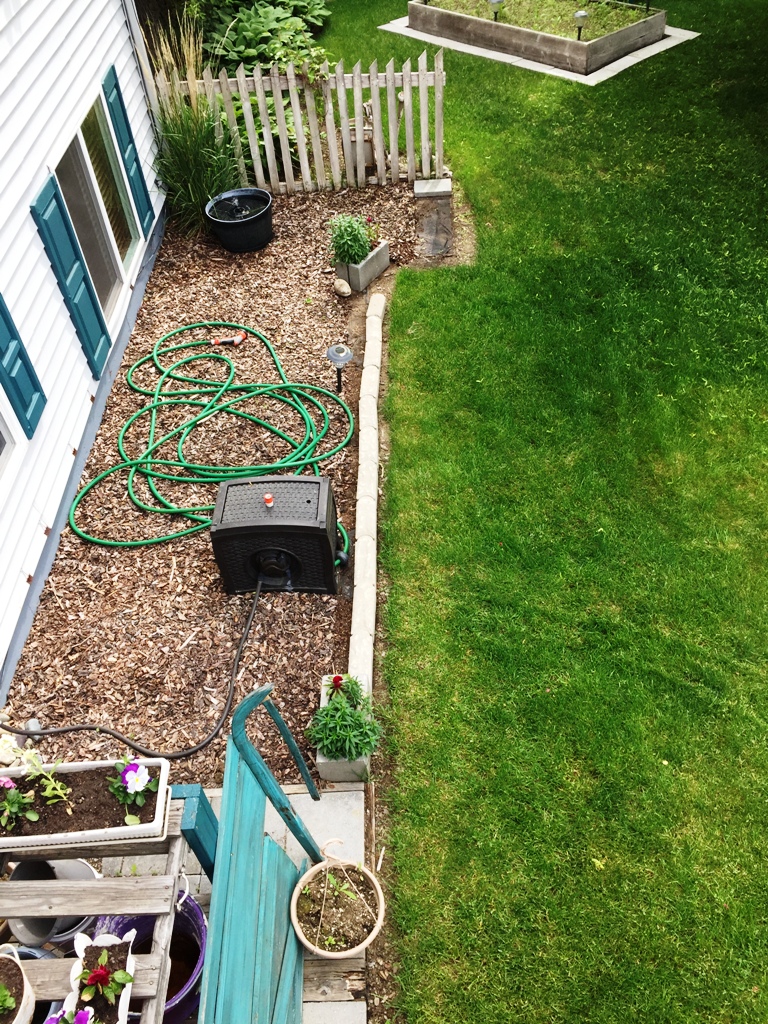
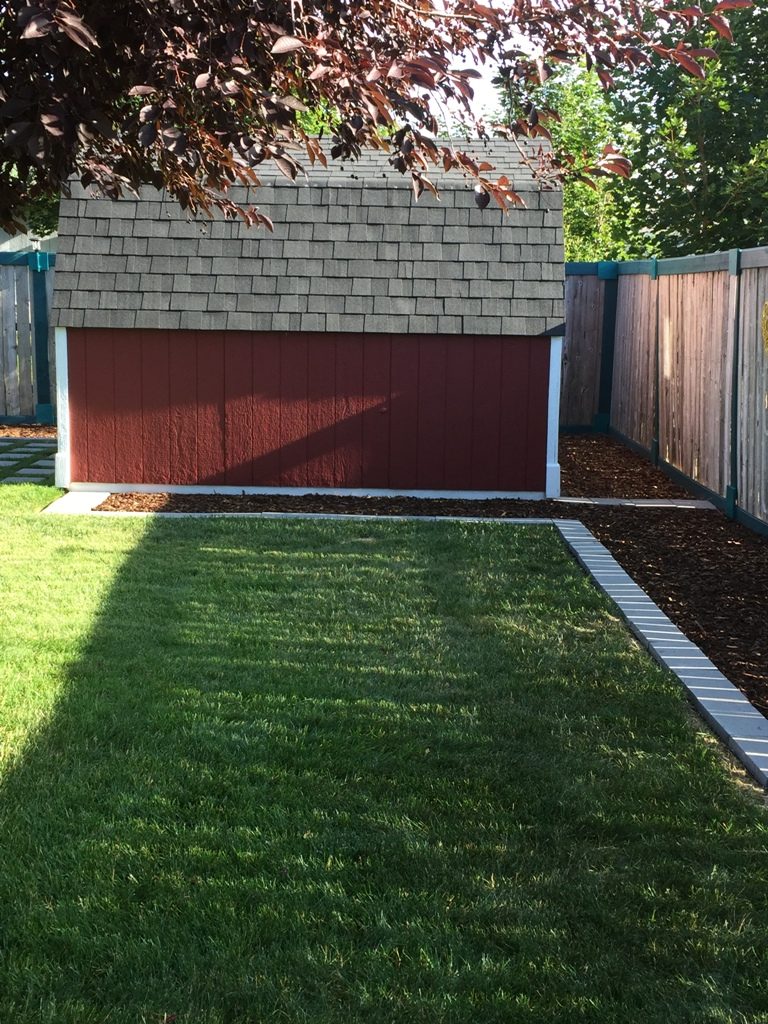
Old view 
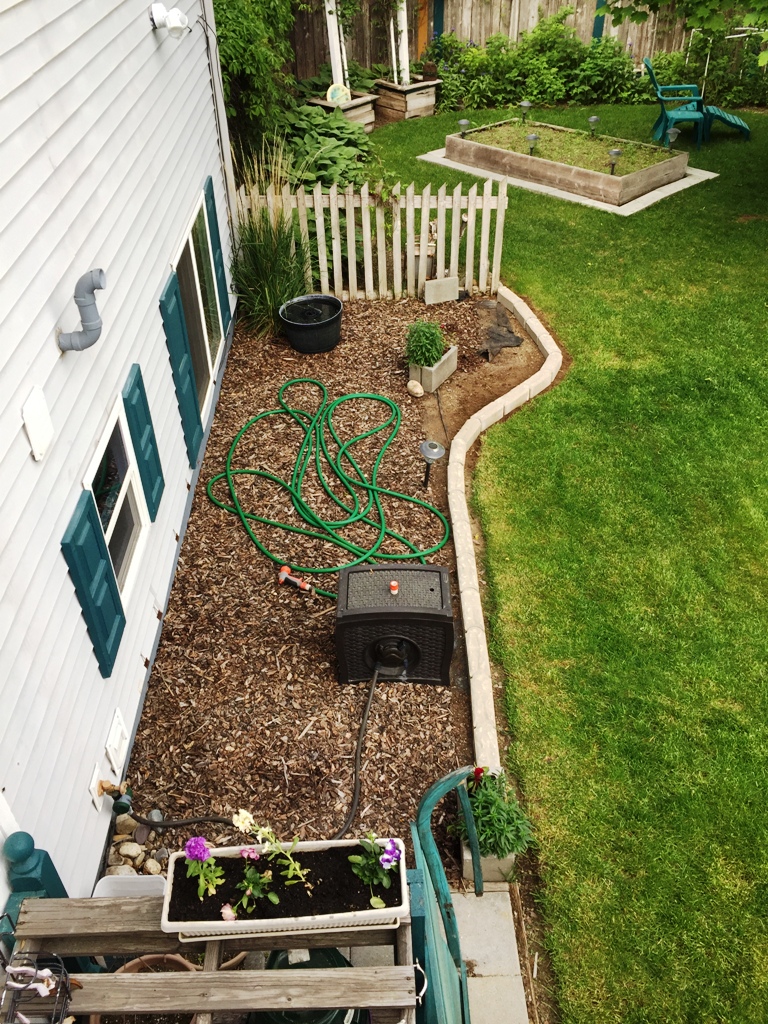
New view
Supplies Used
- Bullet edger brick
- Topsoil
- Newspaper
- Bark
- Shovel
- Wagon
- Garden claw
- Kneeling pad
- Gloves
- Umbrella to provide shade
Instructions
- Remove sod – you may want to rent a machine if your area is large
- Level ground as best you can
- Lay down newspaper/brown sacks or landscape cloth
- Line area with cement pavers/stepping stones
- Cover landscape cloth with topsoil if needed then bark
Where to buy supplies
This post contains Amazon affiliate links. If you choose to order through these links, it will be at no extra cost to you


Other landscape projects
- Let’s Landscape the Front Yard – Zone 1
- Let’s Landscape the Front Yard – Zone 2
- Let’s Landscape the Front Yard – Zone 3
- Let’s Landscape the Front Yard – Zone 4
- Let’s Build a Little Patio!
- Let’s Create a Rock Garden!
I’m excited to share more projects with you as well as tips/tricks/freebies! Just enter your email below to become one of my Blog Peeps!


5 Comments
Pingback:
Pingback:
Pingback:
Pingback:
Pingback: