

Let’s Change the Appliances from Glossy to Matte!
How do you feel about glossy black appliances? If your kitchen gets very little sunlight, you may just love them! However, if your kitchen gets sunlight shining on those glossy black appliances, like we do, you may not love them. I’m not sure why I chose glossy black when replacing my old appliances. Maybe because they had been white, and I was ready for a dramatic change? At the time we were appliance shopping, there weren’t a lot of options beyond white, glossy black, and stainless steel. Since I’d had white and stainless cost a lot more than I wanted to spend, I chose glossy black. Looky there, I answered my own question! I have two pet peeves with the glossy black: 1) Fingerprints show all the time and 2) Dust shows all the time! Like so many things that bug me, I’ve just lived with the fingerprints and dust, removing them on sunny days. But lately, I’ve been on an ‘I’m SO tired of this, it’s time to fix it’ trend. So, I fixed it!
- What to do about the gloss?
- Paint them?
- Supply List
- Paint color
- Step 1: Prep – tape
- Step 2: Prep – Degloss/degrease
- Step 3 : 1st coat of paint
- Step 4: 2nd & 3rd coats of paint
- Step 5: Adding copper
- Step 6 – Seal the handles
- Fridge – Before, During, After
- Stove – Before, During, After
- Microwave: Before, During, After
- Vent hood: Before, During, After
- Dishwasher: Before, During, After
- More to come
- Instructions
- For your convenience
- Want more project ideas?
What to do about the gloss?
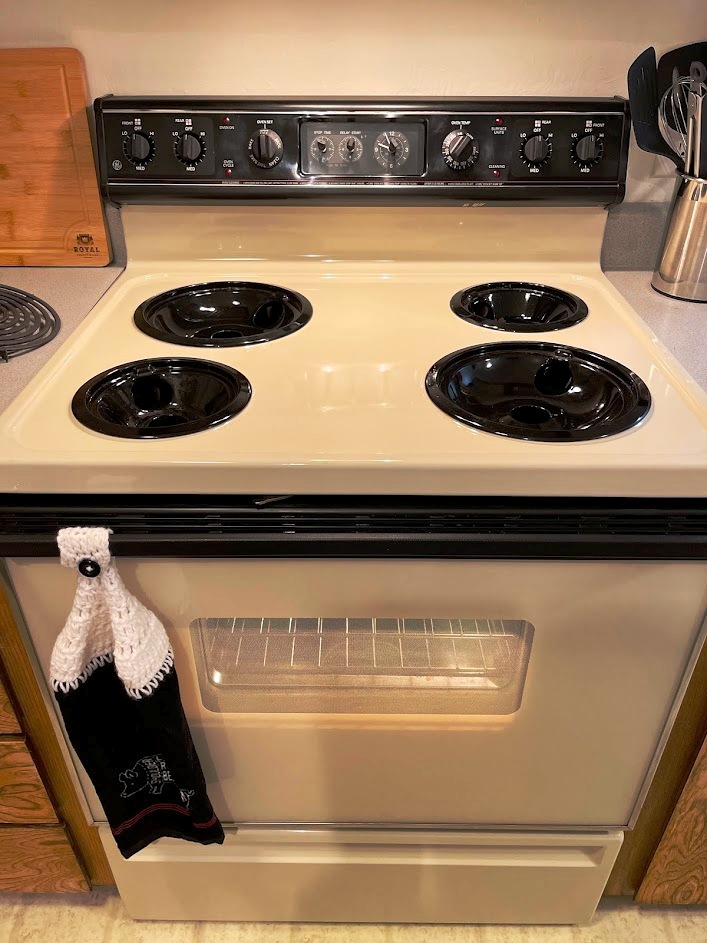
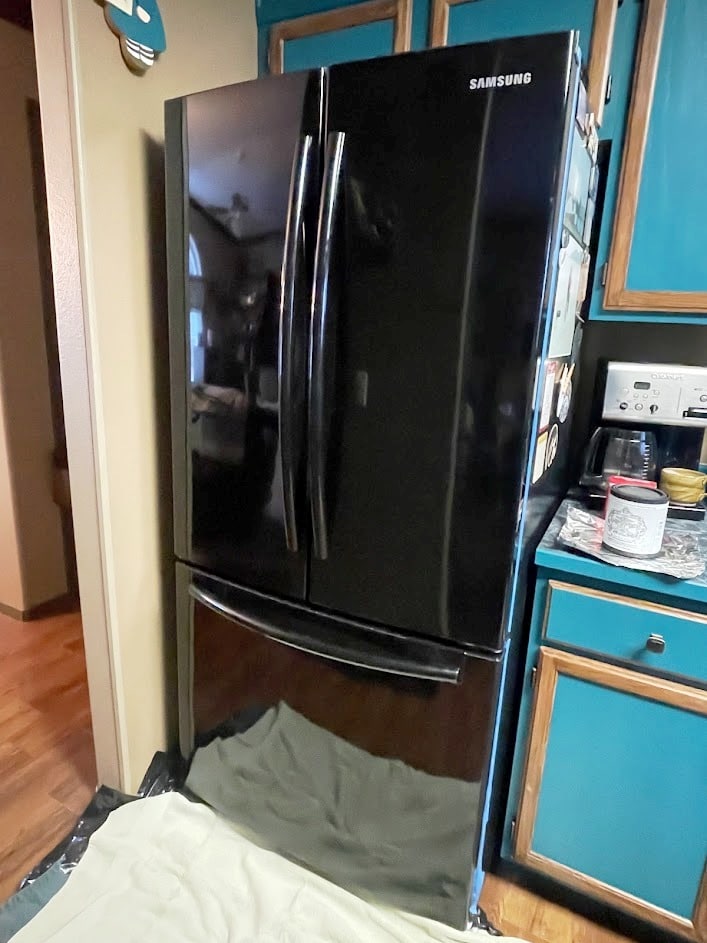
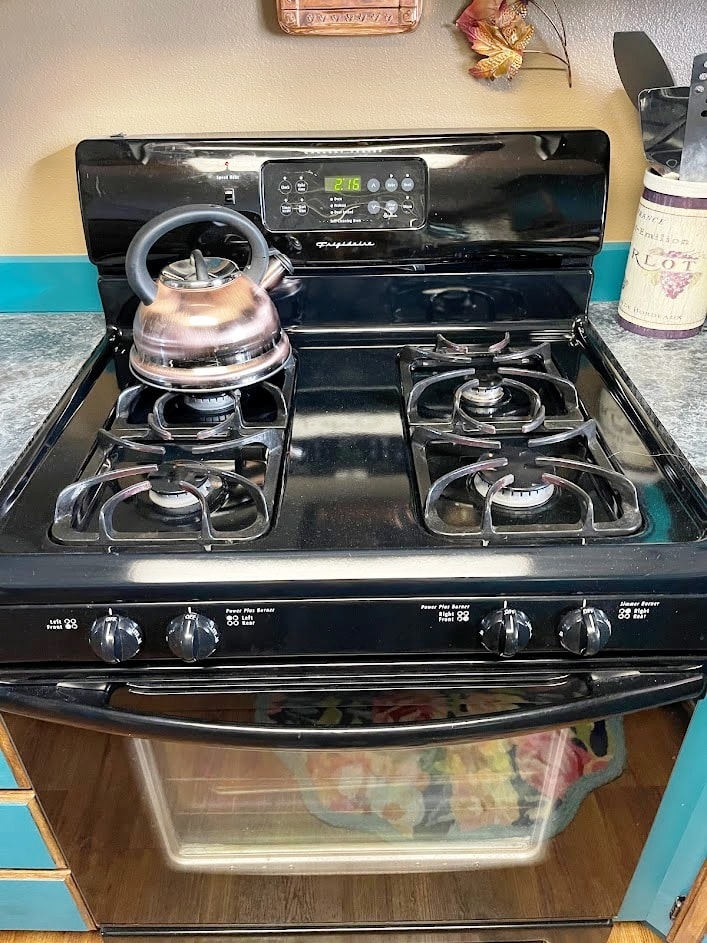
So now that I was at the end of my patience with the glossiness of our appliances, what do I do? The stove is over 15 years old; the fridge is over 12 years old. Hmmm…do we replace them? Well, to get the ones I’d like, that’s not going to be cheap. I could paint them like I did my son’s stove & dishwasher. Yes, I think I’ll do THAT! Below are pictures of the dust on a sunny day. Yes, I dust them, but the dust seems to come right back!


Paint them?
Did you know that you can paint your appliances? I had seen Pinterest Pins of painted appliances but hadn’t tried it until I was helping one of my sons refurbish his house. His appliances are all cream. The color scheme he chose for the house is cool, not warm, so the cream appliances clashed. Since he plans to replace the older stove, I decided to try to paint it white so it would look better in the meantime. I even painted the glass on the door! It came out really well! You can see all the pics here.
Supply List
- 1 quart Heirloom Traditions paint in Iron Gate
- Heirloom Traditions Deglosser/Degreaser
- Heirloom Traditions True Applicator Sponge
- Water based polyurethane
- 4″ foam roller
- Sponge
- Artist brush
- Paint tray
- Copper craft paint
- Small foam paintbrush
- Cloth for cleaning
- Painter’s Tape
- Clear tape/lables
- Newspapers
- Towels
Paint color
The first decision (after the decision to paint our appliances) was paint color. We have a lot of black accents in the kitchen, and I thought I’d only be painting the stove and fridge because the dishwasher is not glossy; it’s more of a semi-gloss. So, I chose black. I already knew that I would be using the same brand of paint that I did at the son’s house – Heirloom Traditions All-in-one-Paint. This paint is an all-in-one. It contains primer, paint, and sealer.

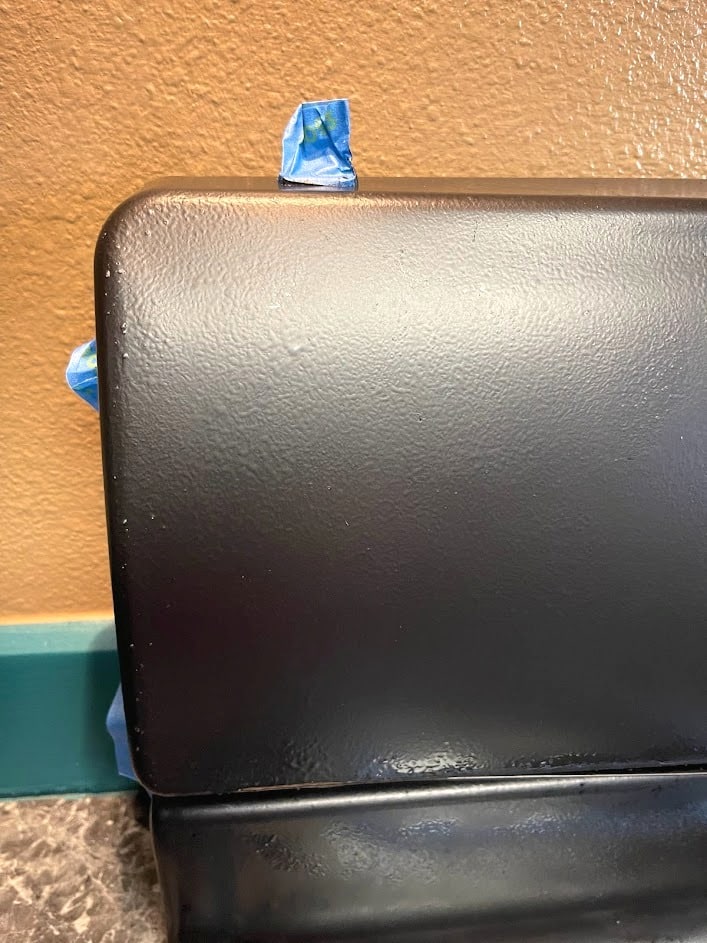
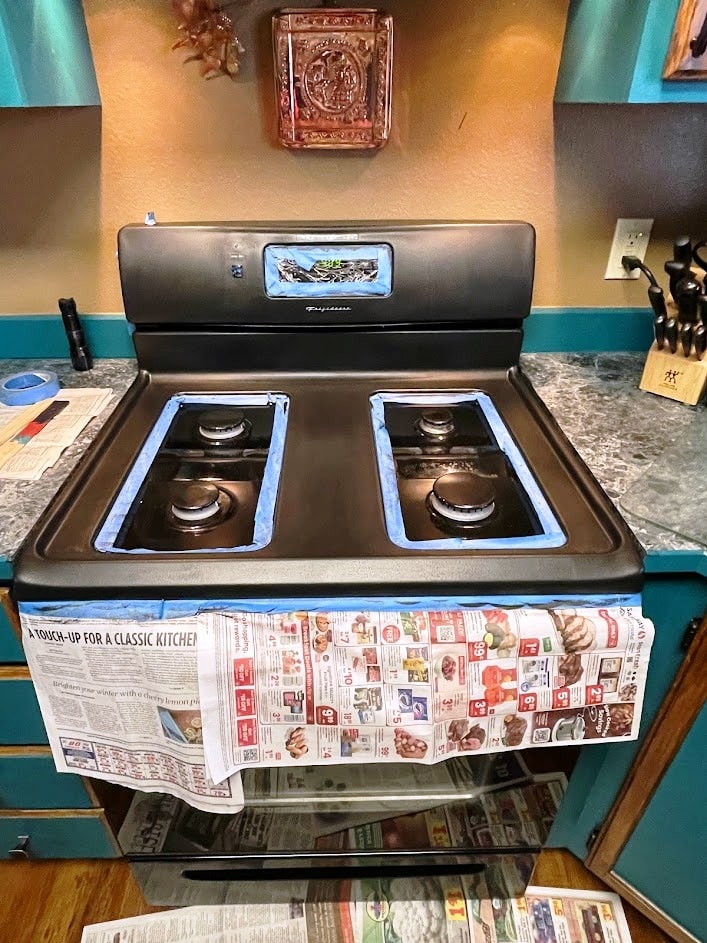
Step 1: Prep – tape
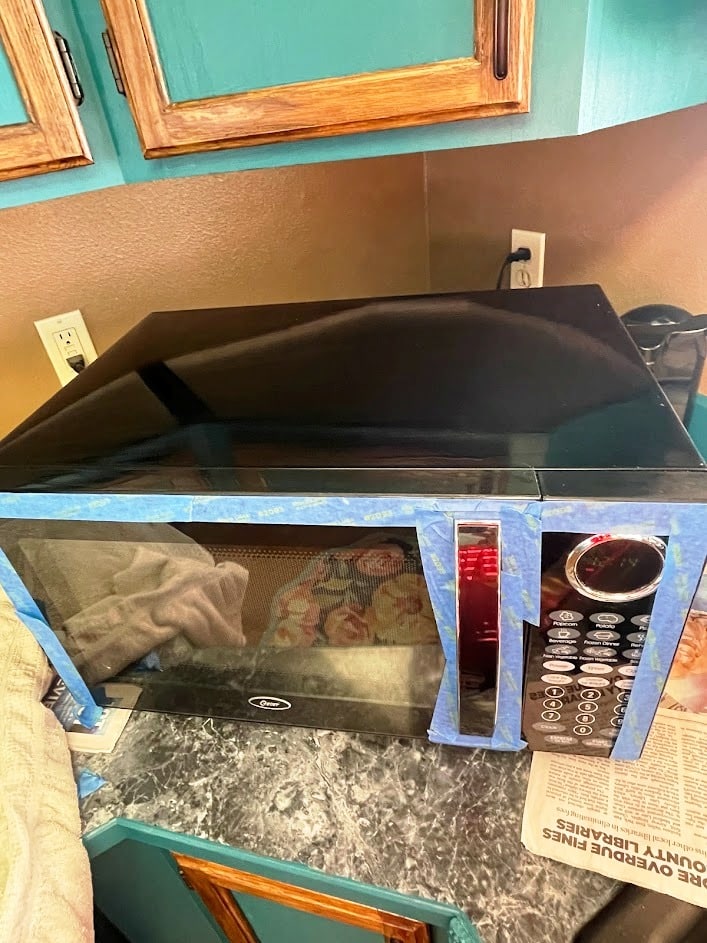
The first step in painting the appliances is to tape off all the areas you won’t be painting. I only planned on painting certain sections of the stove and fridge. For the stove: the stove top (excluding the burner area), the stove handle, and drawer. I didn’t see a need to paint the glass like I did for my son’s stove since it was already black. For the fridge: the doors & handles, not the top or sides. I also decided to paint the microwave and vent hood. All the areas not being painted were taped off to protect them from both the paint and the degreaser. I also used clear labels to tape off the words on the stove and hood that I wanted to protect and newspaper on the stove to protect the glass front.


Step 2: Prep – Degloss/degrease

The next step is to make sure they are grease & shine-free. Heirloom Traditions has a product they call Prep. It is a degreaser/deglosser product that is supposed to replace the need for sanding. It’s easy to use. With a sponge, I wiped it on all the surfaces that was going to be painted, let it sit for a little over a minute, then with the scrubby side of the sponge, scrubbed those surfaces. When the scrubbing was done, I wiped the surfaces with a soft cloth.
Step 3 : 1st coat of paint
Now that the prep work was done, it was time to start painting. I’ll be honest, just like when painting my son’s stove, I was a bit nervous! When I’m doing projects in my home, I am usually pretty fearless; but with appliances that we aren’t planning on replacing soon, I was nervous. Before painting, I laid a towel under the freezer door to protect that area from any paint spills and on the stove top when I painted the hood.
To apply the paint, I used Heirloom Traditions Tru Applicator sponge. The sponge is the same size as the opening of a quart of paint. You place the sponge over the opening of the can, tip the can (very carefully) to apply paint to the sponge; set the can upright, and remove the sponge. You’ll have just the right amount of paint on the sponge.
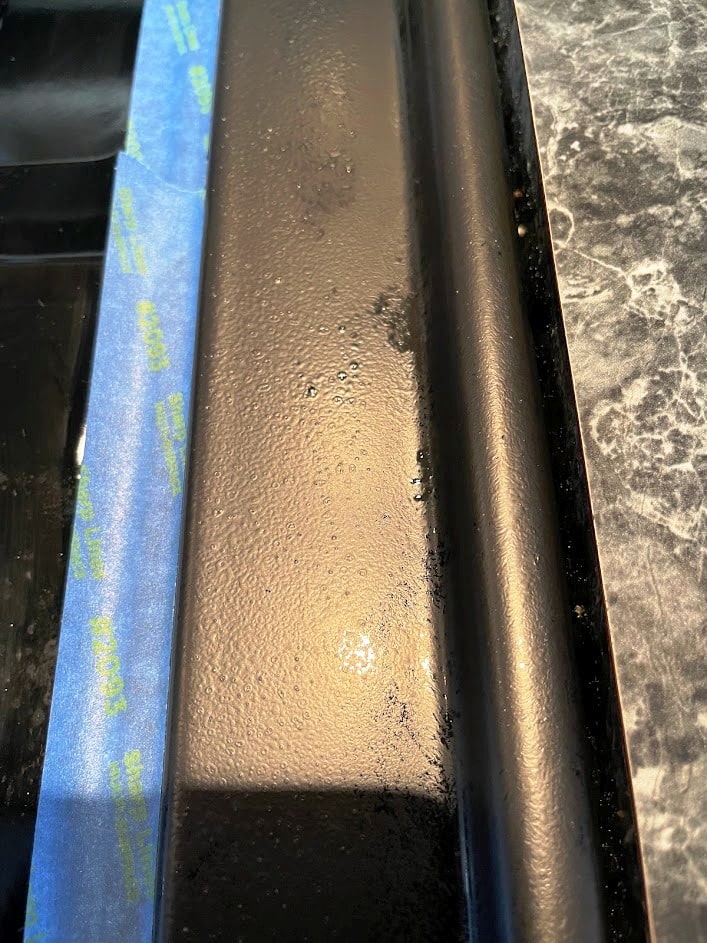
To apply the paint, you use a tapping motion with the sponge. The sponge leaves air bubbles and most of them pop on their own. When there were larger ones that didn’t pop right away, I gently tapped the area to help them pop. I love using the sponge to apply the paint, it leaves a nice textured look.

The stove was the first appliance I painted. After taking a few deep breaths, I started painting. Using the Heirloom Traditions sponge applicator, I started at the back of the stovetop. I then moved to the top and painted everything except around the burners. This paint is heat resistant. It can be used everywhere except where there is direct flame. Once the top of the stove had its first coat, using a small foam paintbrush, I painted the sides of the top and then applied paint to the drawer also using the sponge applicator. You can see where a few of the air bubbles didn’t pop. After the coat dried, I lightly sanded those areas with a sanding sponge.
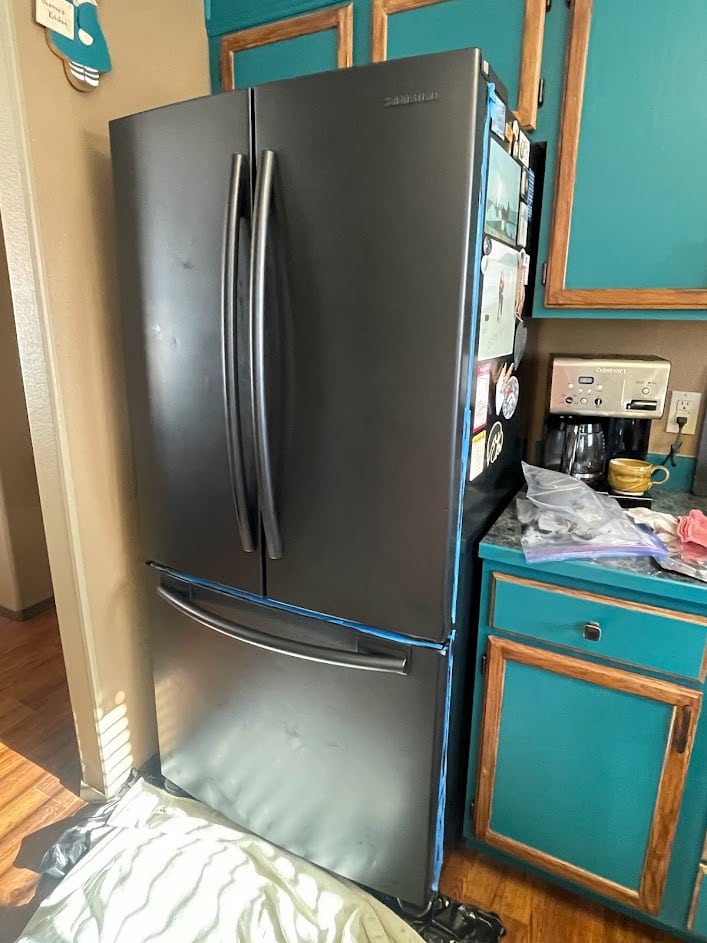
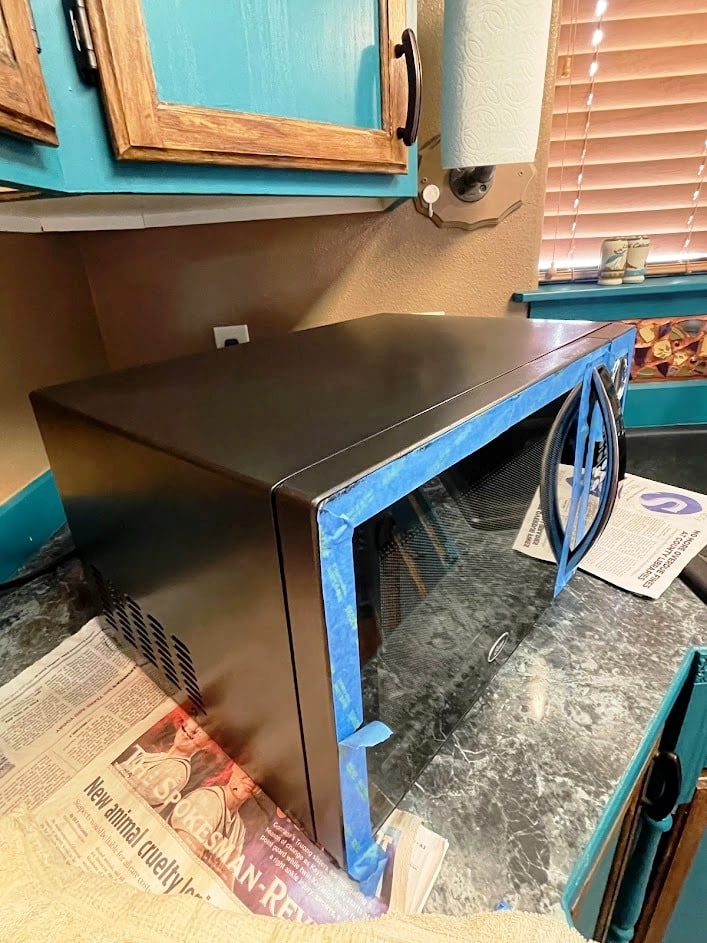
I removed the handle to the oven door, painted it & the drawer and then applied the first coat of paint to the fridge & freezer doors & handles. I had researched how to remove the handles and everything I read talked about them having set screws. The freezer handle has one, but the fridge ones do not. So, I decided just to paint them along with the doors. If your handles can be removed, the painting will go faster. I didn’t paint the sides of the fridge because they are textured and not very shiny. Next, I applied the 1st coat to the hood and the sides and top of the microwave & handle.


Step 4: 2nd & 3rd coats of paint
The first coat never looks great and the appliances were no exception. With Heirloom Traditions, 2 coats of paint is usually sufficient but I applied 3 coats on the stove and fridge. The hood and microwave only needed 2 coats. I did a light sanding with a sanding block between the coats of paint, wiping the areas with a slightly damp cloth before adding another coat of paint. For the 3rd coat of paint on the fridge, I used a 4″ foam roller.


Step 5: Adding copper
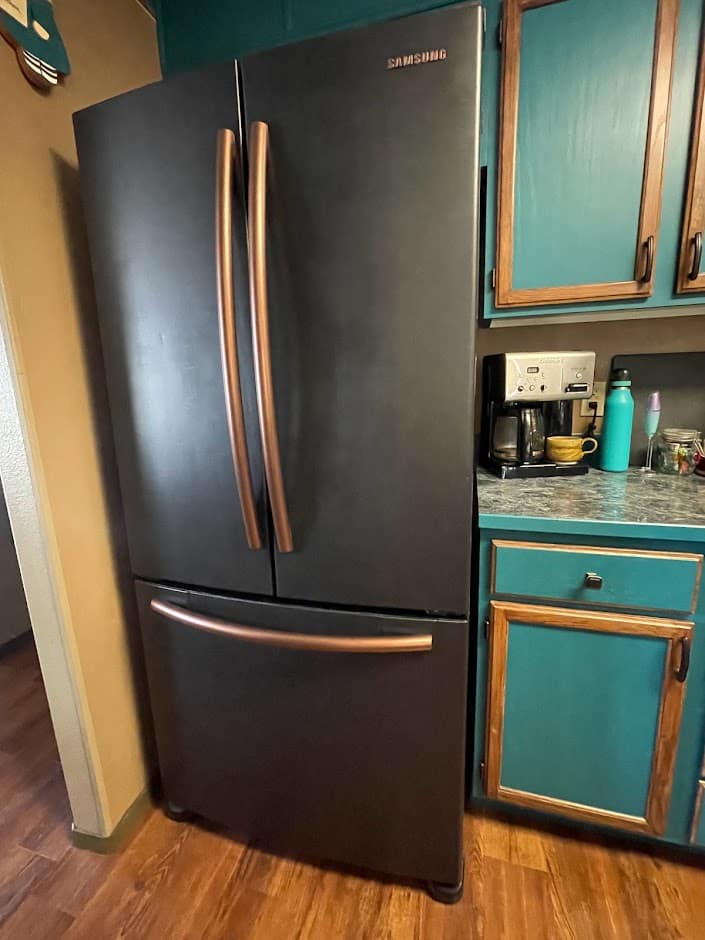
The appliances looked SO much nicer in matte black! Hubby and I just love the change! But I wasn’t done just yet. When researched painted appliances, I saw that a lot of people either painted their handles a different color or replaced them altogether. Since I couldn’t figure out how to remove the handles on the fridge, I decided to paint them. I have a few copper accents in the kitchen and thought that copper would look nice. Since spray paint was out of the question, I used craft paint. The copper paint I had was TOO shiny so I mixed in some metallic black and brown. Once I got the color right, I applied it using an artist brush. When hubby saw them, he also wanted me to paint the stove & microwave handles. While I was at it, I included the shiny silver trim around the clock on the microwave & the dishwasher. I had already painted the Samsung name on the fridge.


Step 6 – Seal the handles
Since I used regular craft paint on the handles, I decided to seal them for better durability. When I painted the handles on the fridge and microwave, I did not paint the underneath which is the area that gets touched the most. Because I was able to remove the handle on the stove, the entire handle has been painted so I wanted to make sure that was sealed. To seal the copper paint, I used Minwax water-based polyurethane. I applied one coat with an artist brush. Sealing the paint probably wasn’t necessary but I felt it wouldn’t hurt to do it.
Fridge – Before, During, After


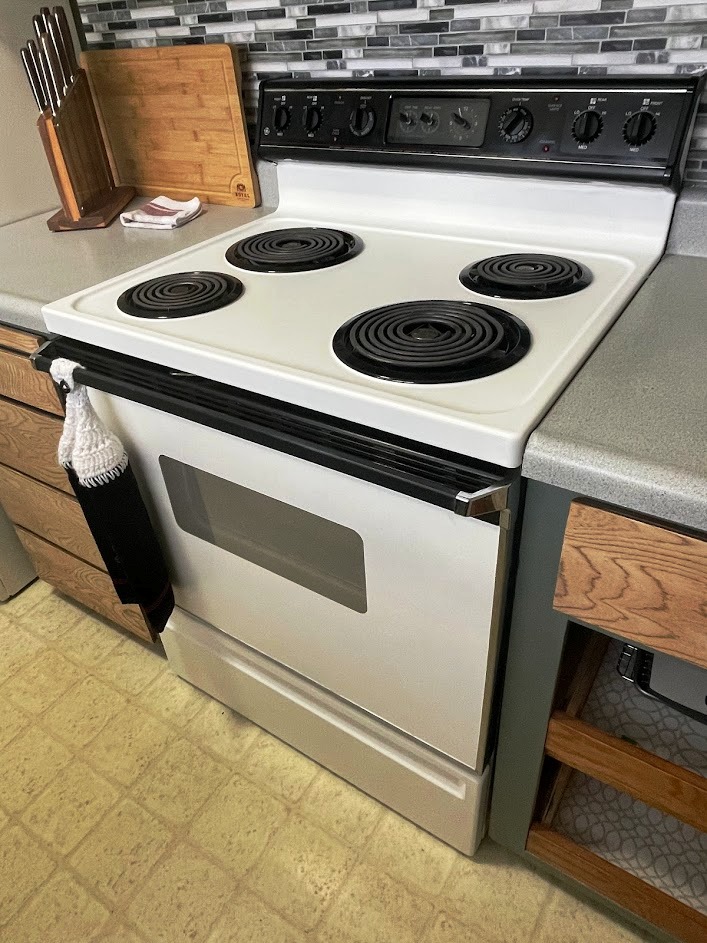
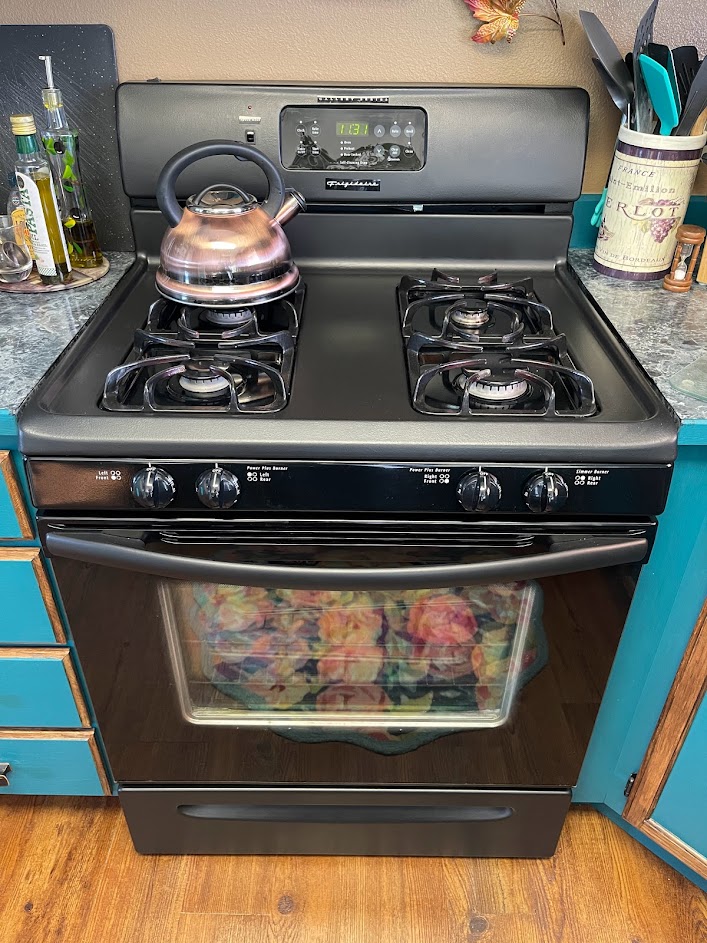
Stove – Before, During, After

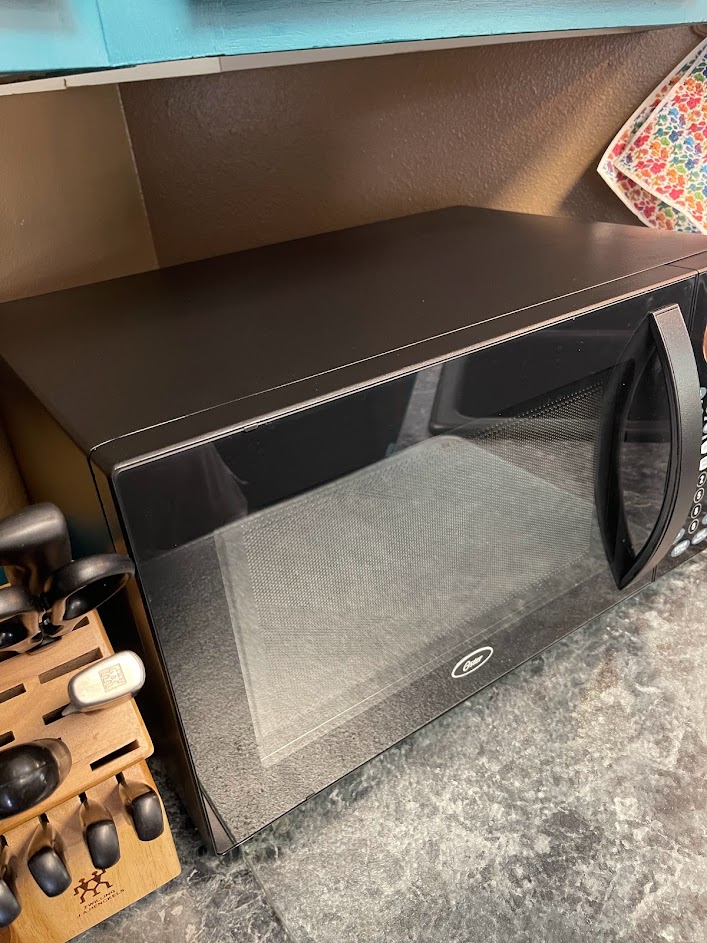
Microwave: Before, During, After

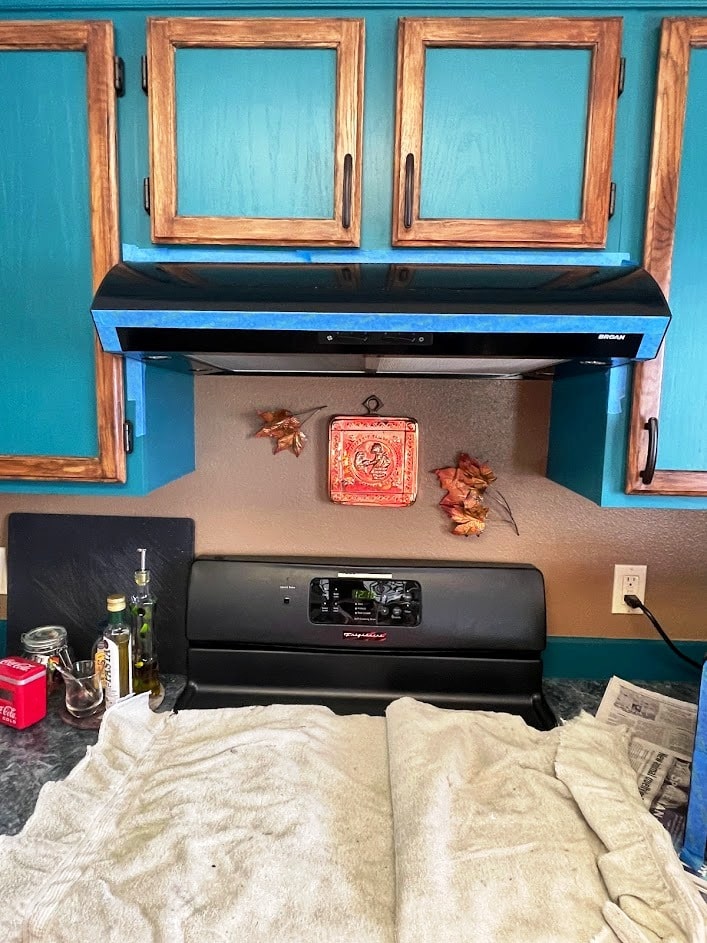
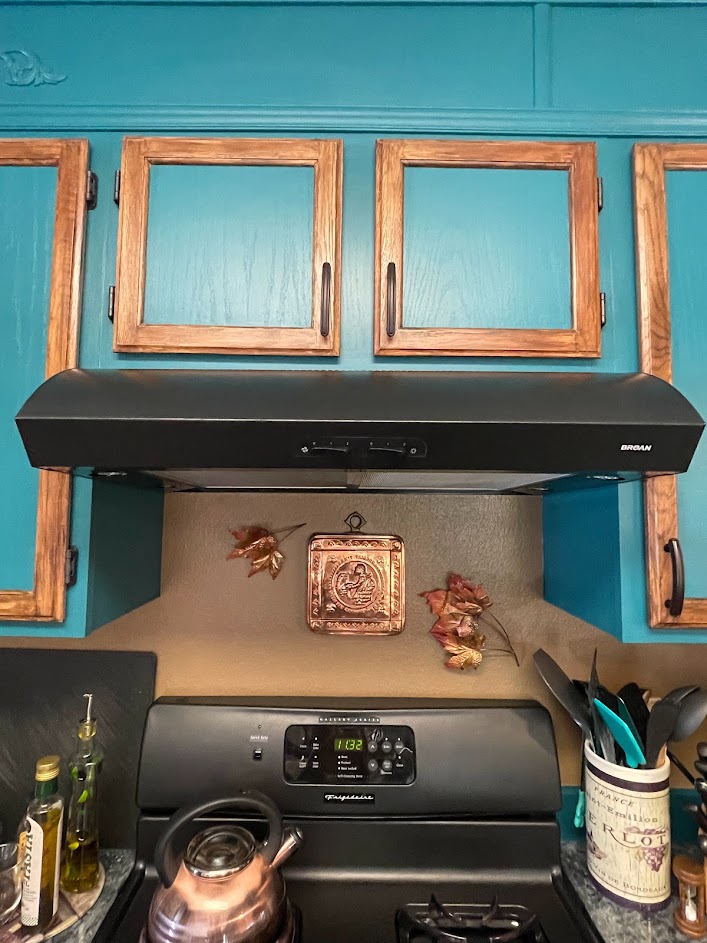
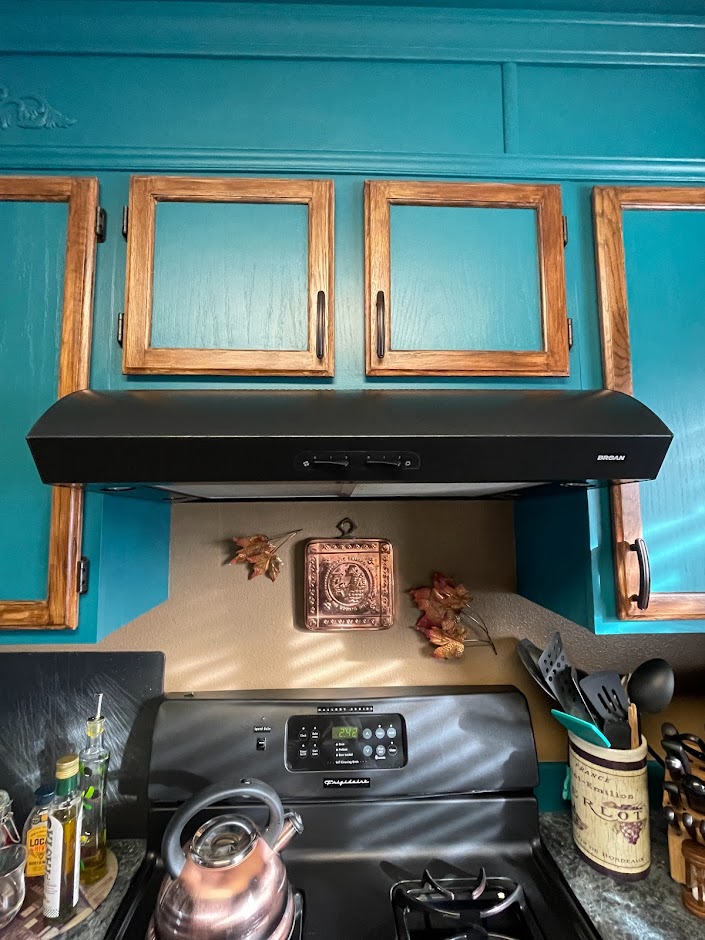
Vent hood: Before, During, After

Dishwasher: Before, During, After


In the beginning, I was nervous to start this project! Even though I had painted my son’s stove and it came out beautifully, I was more hesitant with my own appliances since we don’t have plans to replace them any time soon. Remember that the prep work is always SO important and one that you cannot skip with painting certain surfaces! Applying the paint was easy, especially using the True Applicator. Instead of a glossy finish, the appliances now have a nice textured look. Hubby & I are SO thrilled with the results! If you have appliances that don’t match your kitchen color scheme or type of finish you prefer – grab some Heirloom Traditions and paint away!!! (p.s. My son’s stove has been painted for almost a year and there are no scratches or chips in the paint!)
More to come
As I was typing this, I realized that it’s a lot of info all at once. I plan to break this down with a post per appliance so you can see more of the detail on each project.

Instructions
- Using painters tape, tape of areas not to be painted or deglossed
- Using clear tape, cover writing that you want to protect
- Apply degreaser/deglosser to all surfaces to be painted using a sponge
- Allow to work for 30 sec to a minute
- Scrub with scratchy side of the sponge
- Wipe dry with a soft cloth
- Apply 2 – 3 coats of Heirloom Traditions paint with their True Applicator & a small foam brush for small areas
- Allow each coat to dry according to directions on product
- Remove tape before the last coat dries fully
- Wait 48 hours before regular use
- Paint fully cures in 30 days
- Wait before doing any scrubbing
For your convenience
This post contains Amazon affiliate links. If you choose to order through these links, it will be at no extra cost to you


Want more project ideas?

Let’s Stay in Touch!
I’m excited to share more projects with you as well as tips/tricks/freebies! Just enter your email below to be one of my Blog Peeps!


You May Also Like

Let’s Paint the Kitchen Stove!

Let’s Paint the Kitchen Faucet Antique Copper!

